If you already have a 3D printed face&channel or backing&channel unibody channel letter part, you want to 3D print the rest of the letter. This is a guide for you.
Please note that this is not a ready-to-use built-in feature in FormLetter. You will need to switch between FormLetter and 3rd party design software to edit and export the vector file.
Export the DXF file, convert it to SVG file, then import it into FormLetter slicer, to generate a solid face, in this way, you can 3D print a unique face or backing.
¶ 1. 3D print the backing
In case you will 3D print the face&channel, you want to 3D print the backing too. Here is the guide:
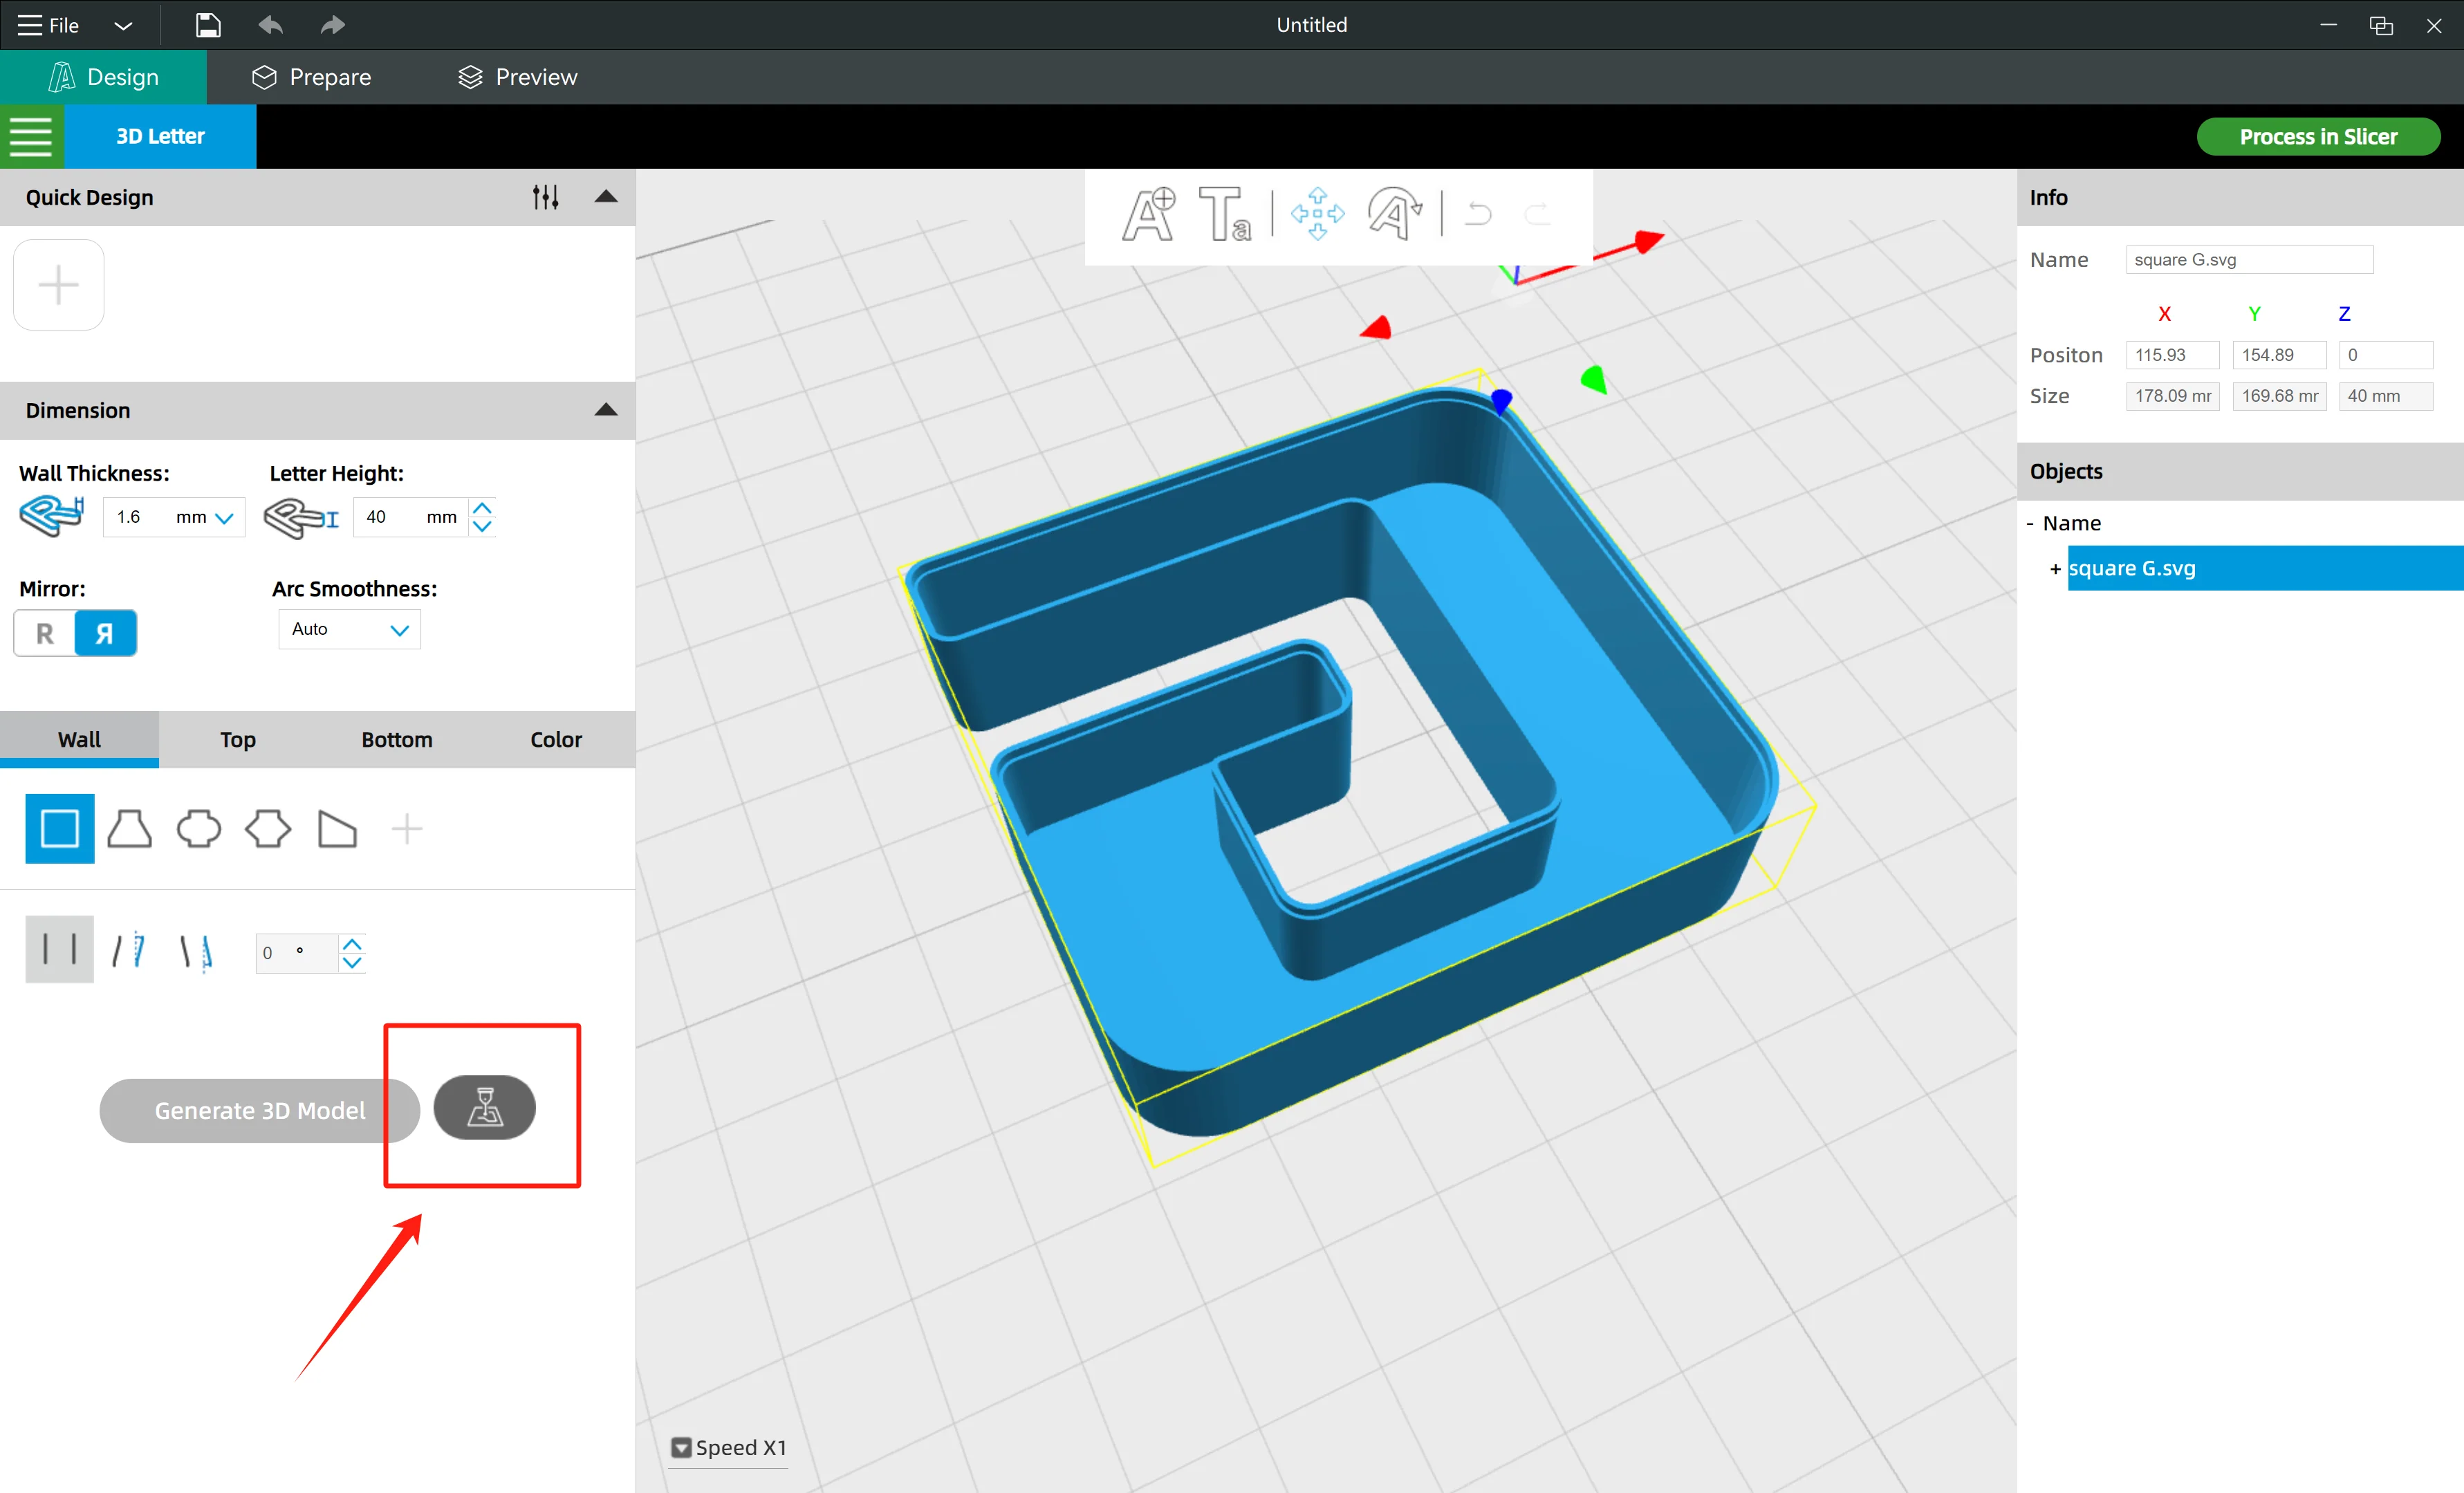
¶ 1.1 Export DXF cutting path
 |
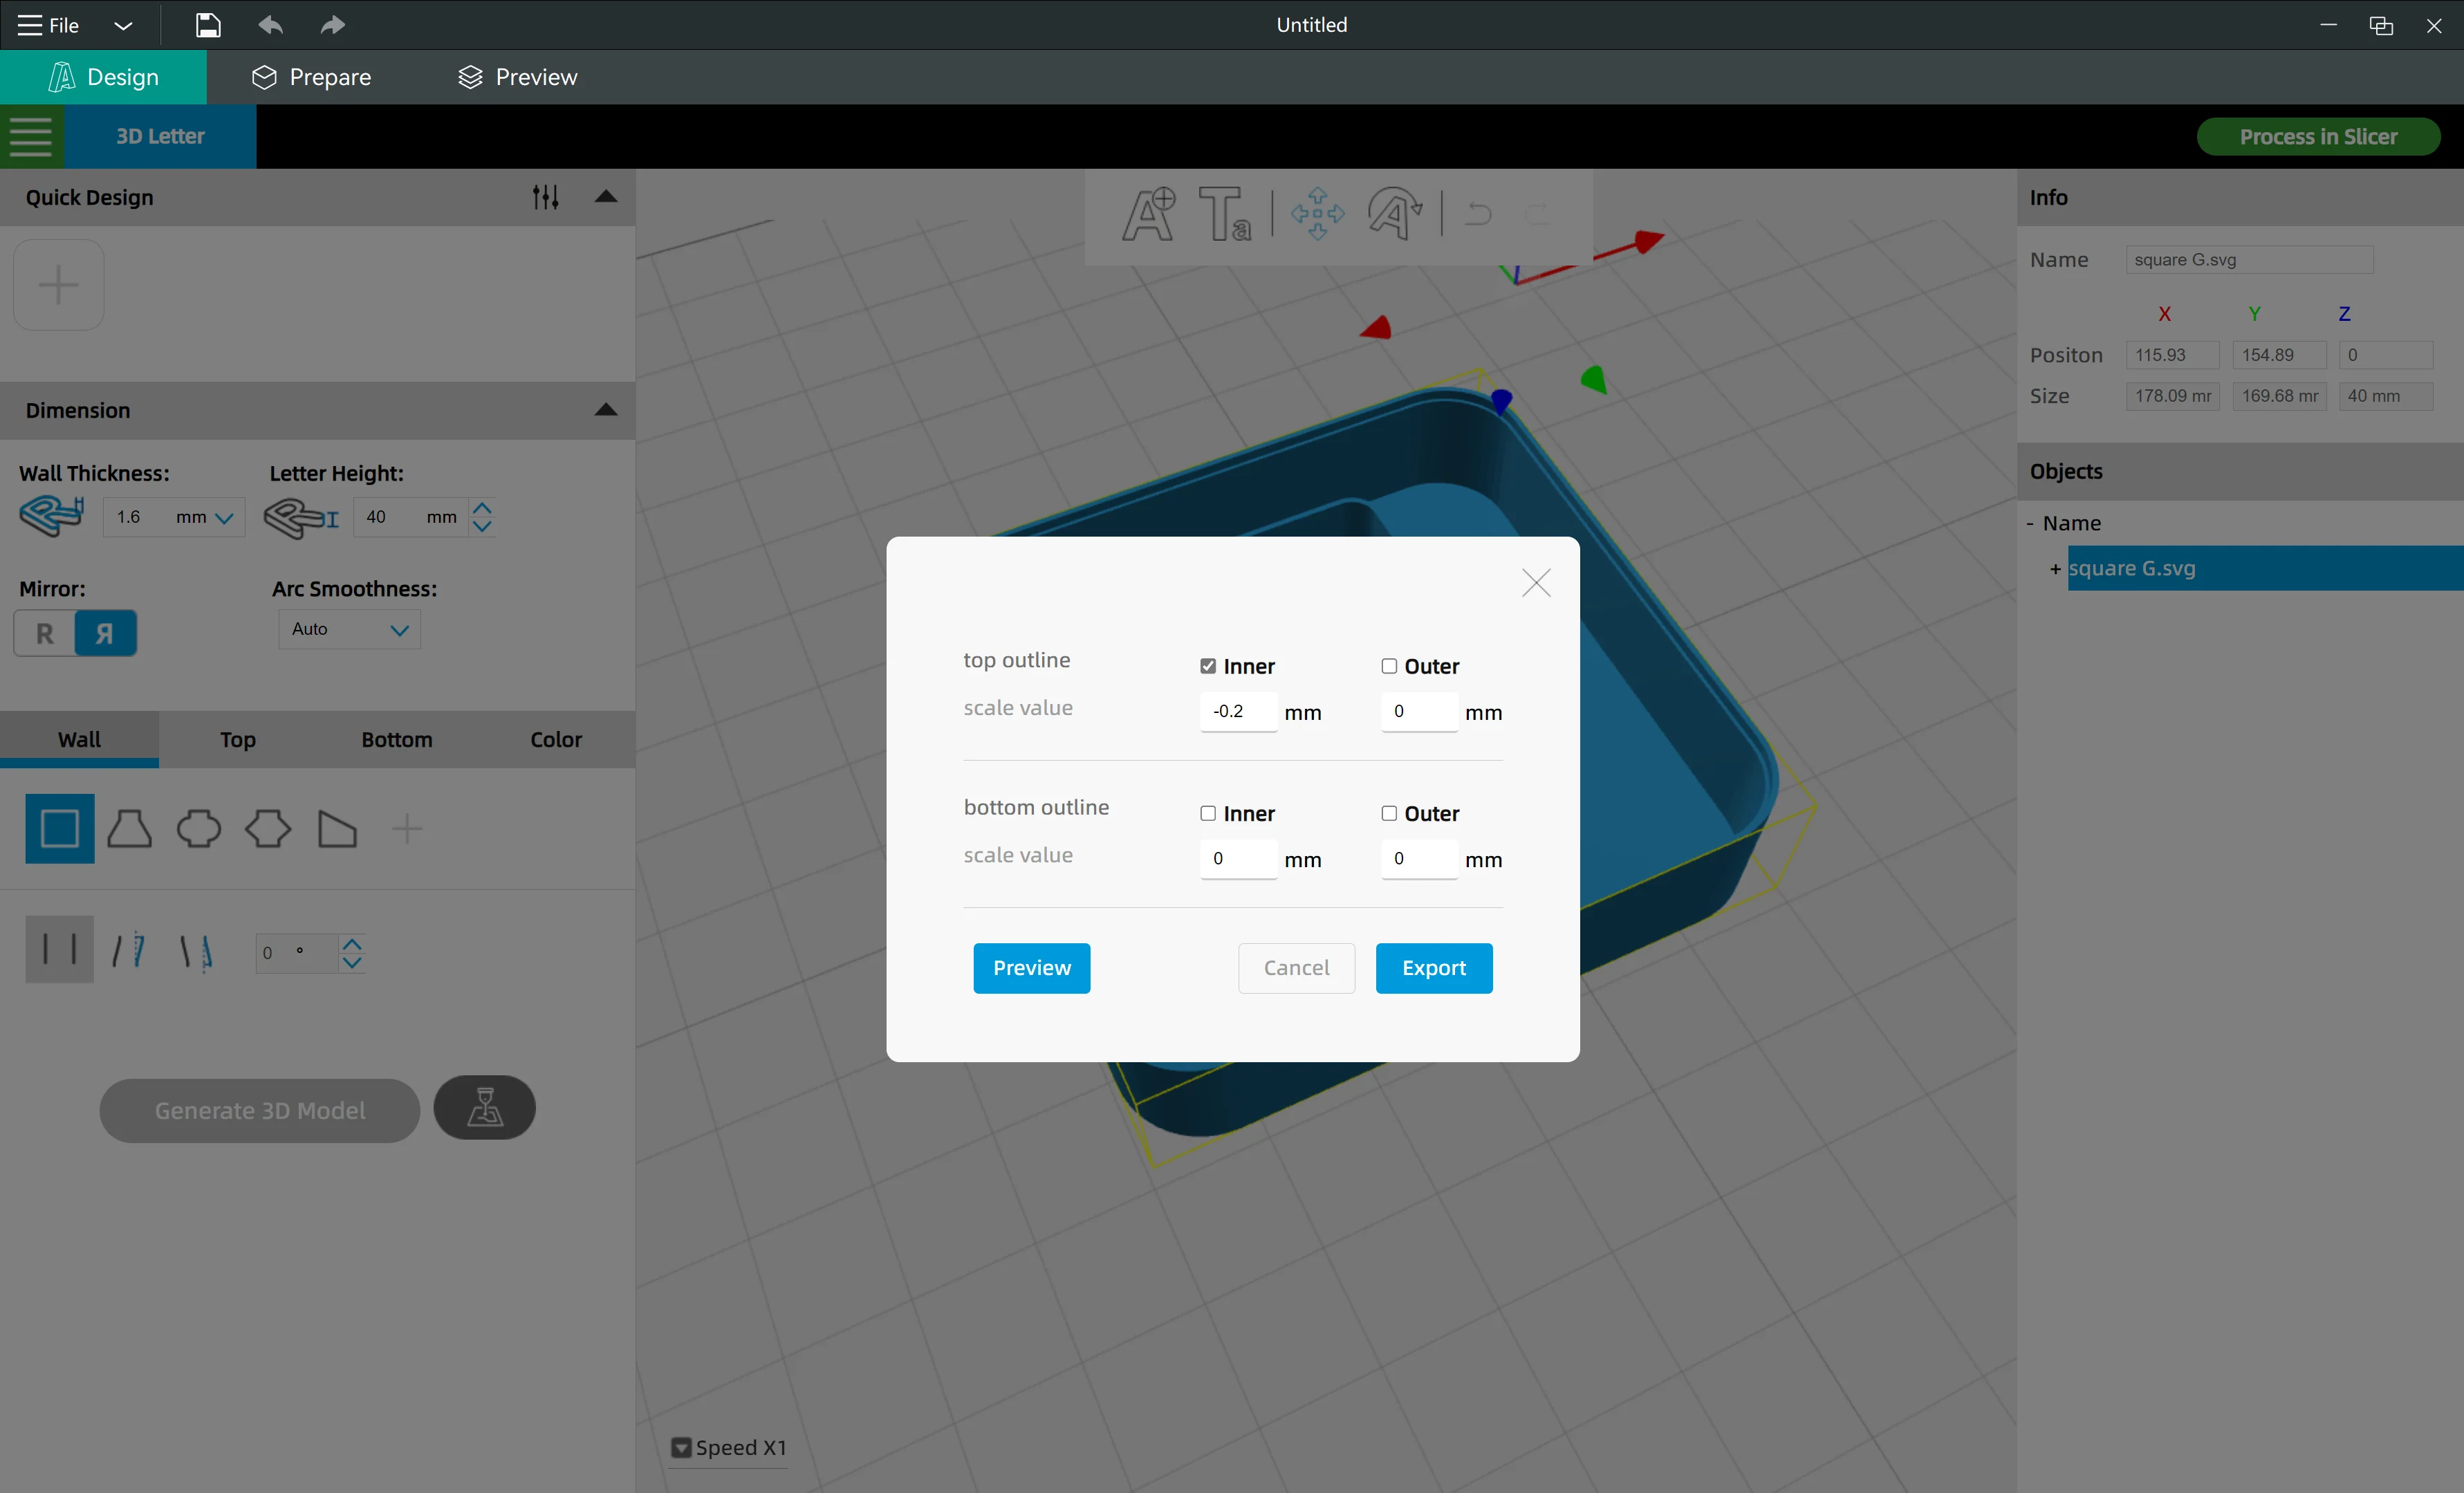 |
- Click the export icon, choose "top outline" and set "scale value" -0.2~-0.5mm, then click "export" button to save the DXF file
¶ 1.2 Convert DXF to SVG
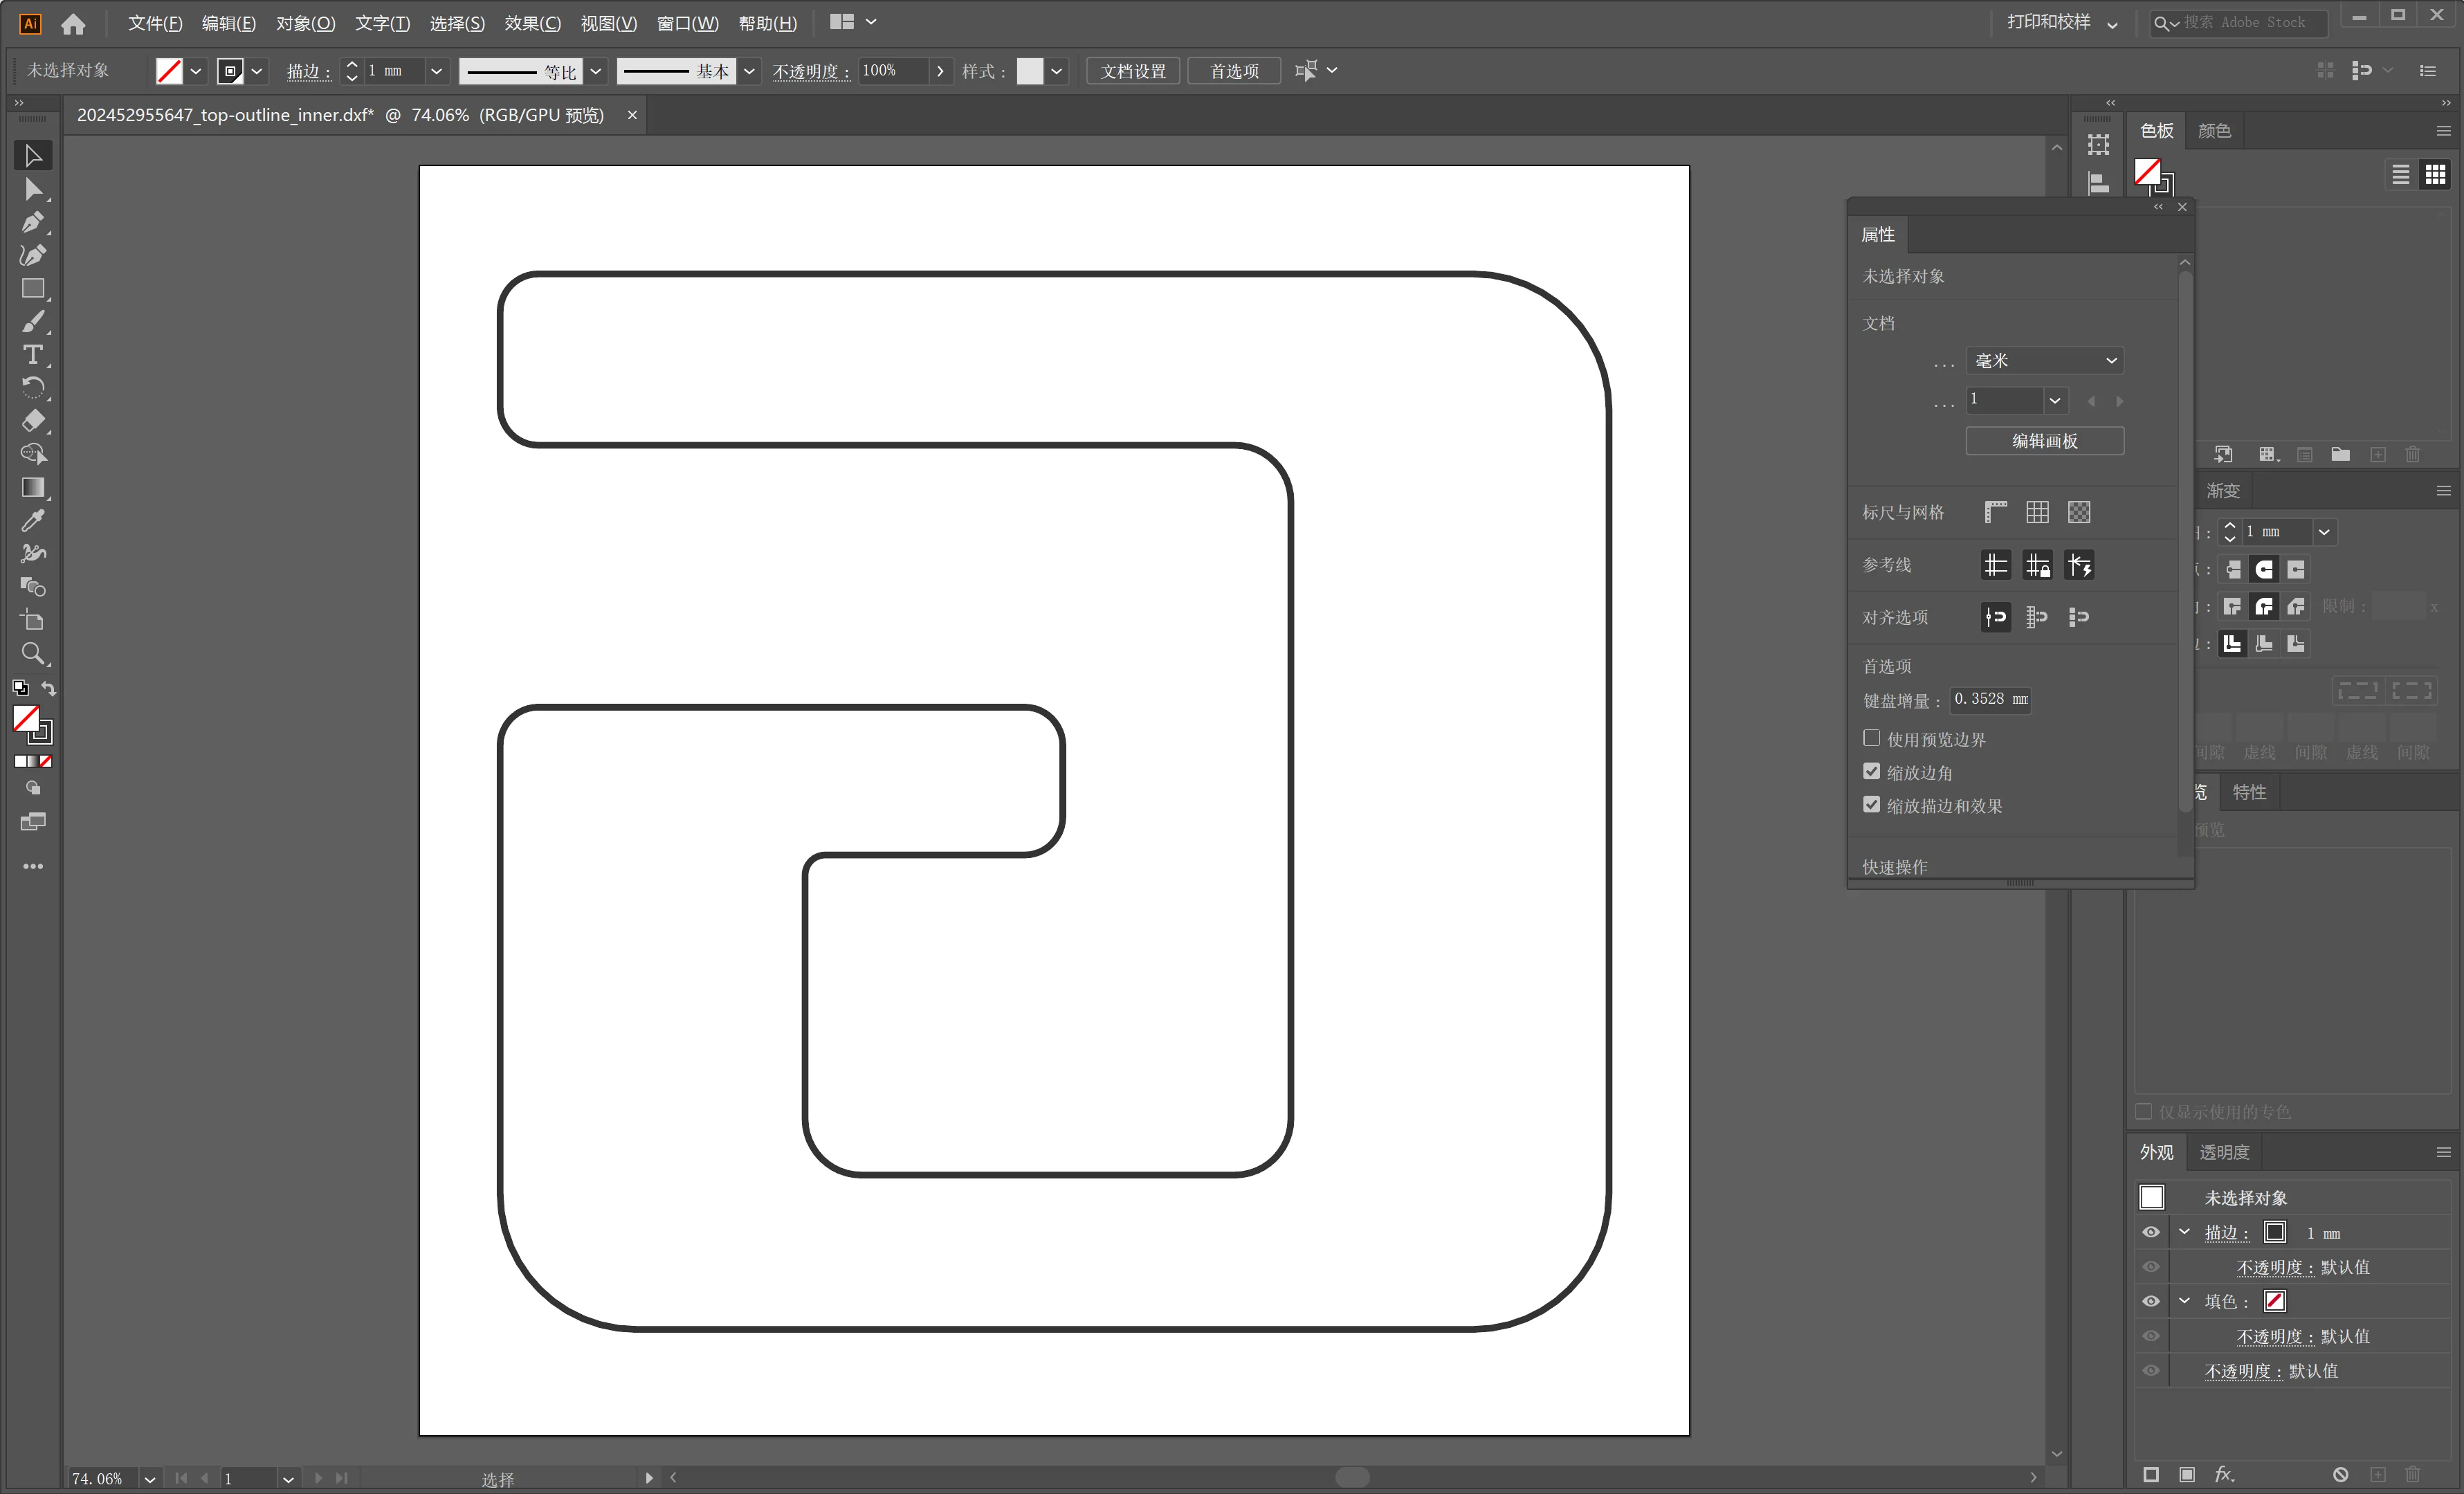
- Open the DXF file with Illustrator (Please note to open the file with the original size, don't scale it)
- Now the letter is combined with short paths, you need to connect all of them. Press Ctrl+A to select all the paths, then Ctrl+J (or go to menu "Object→Path→Join”) to join all the paths together
- Go to menu "Object→Path→Simplify” to reduce nodes on the path
- Press Shft+Ctrl+S to save the path with SVG format
¶ 1.3 Import SVG into slicer
 |
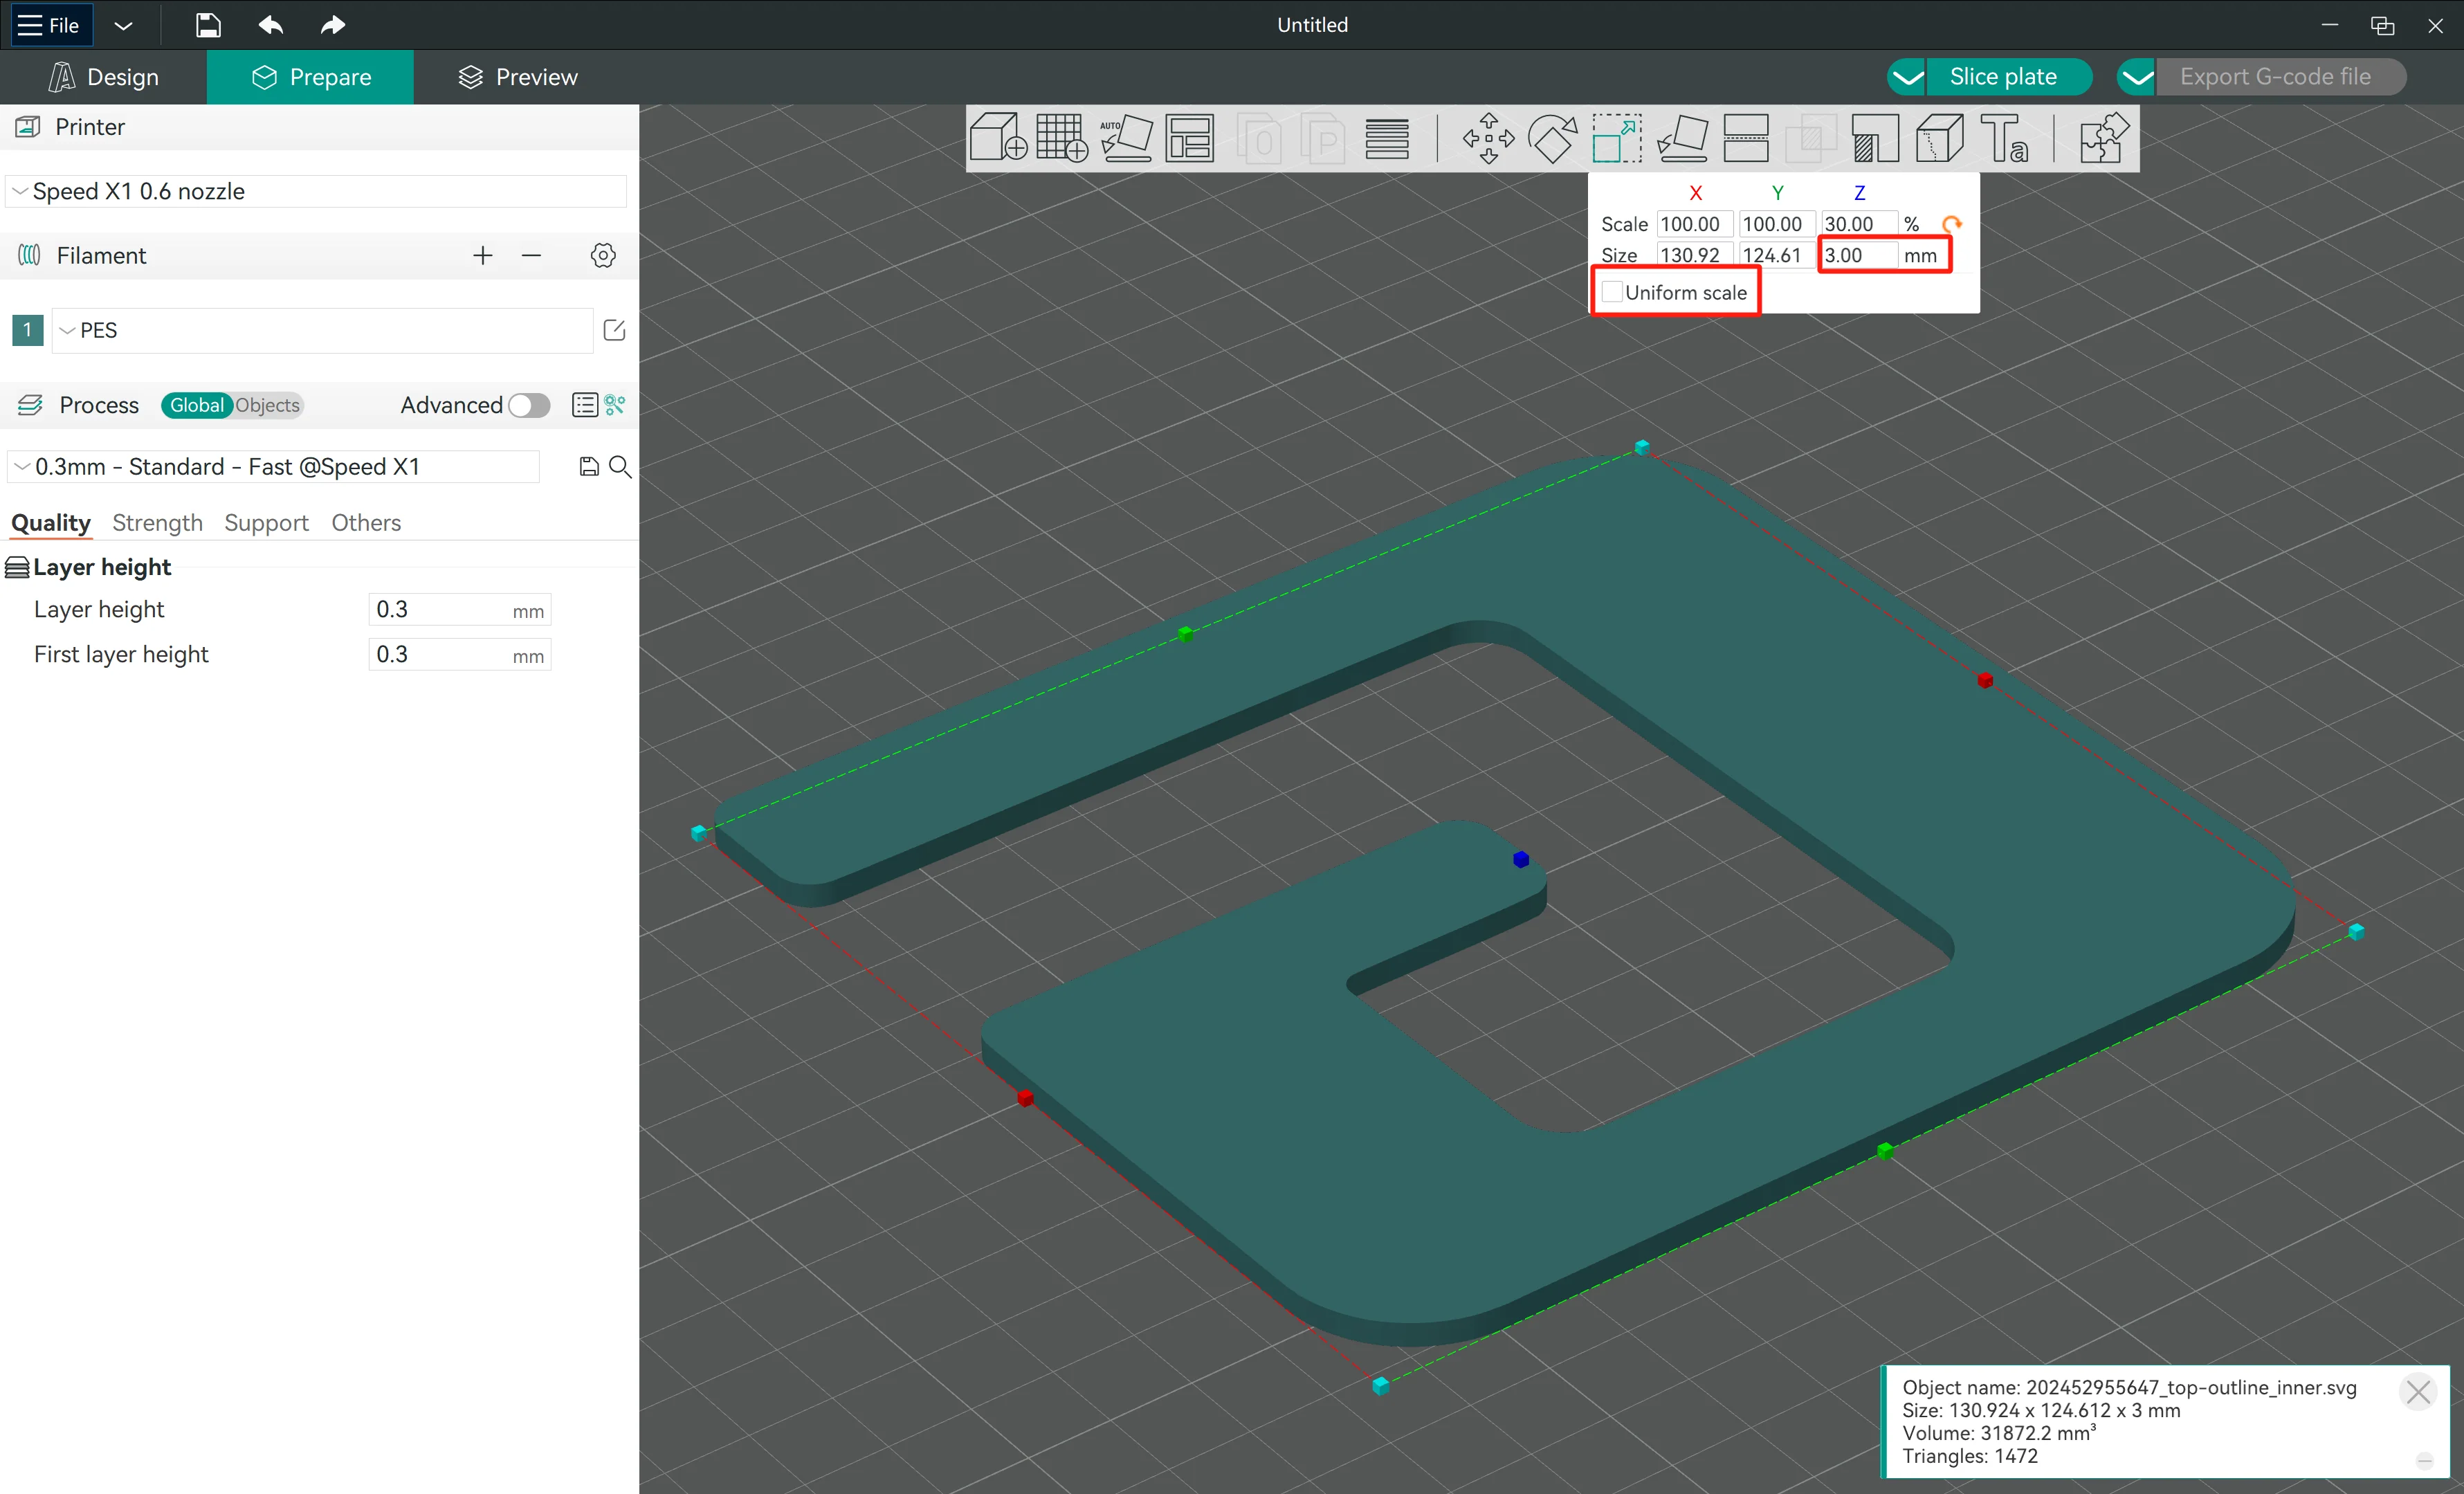 |
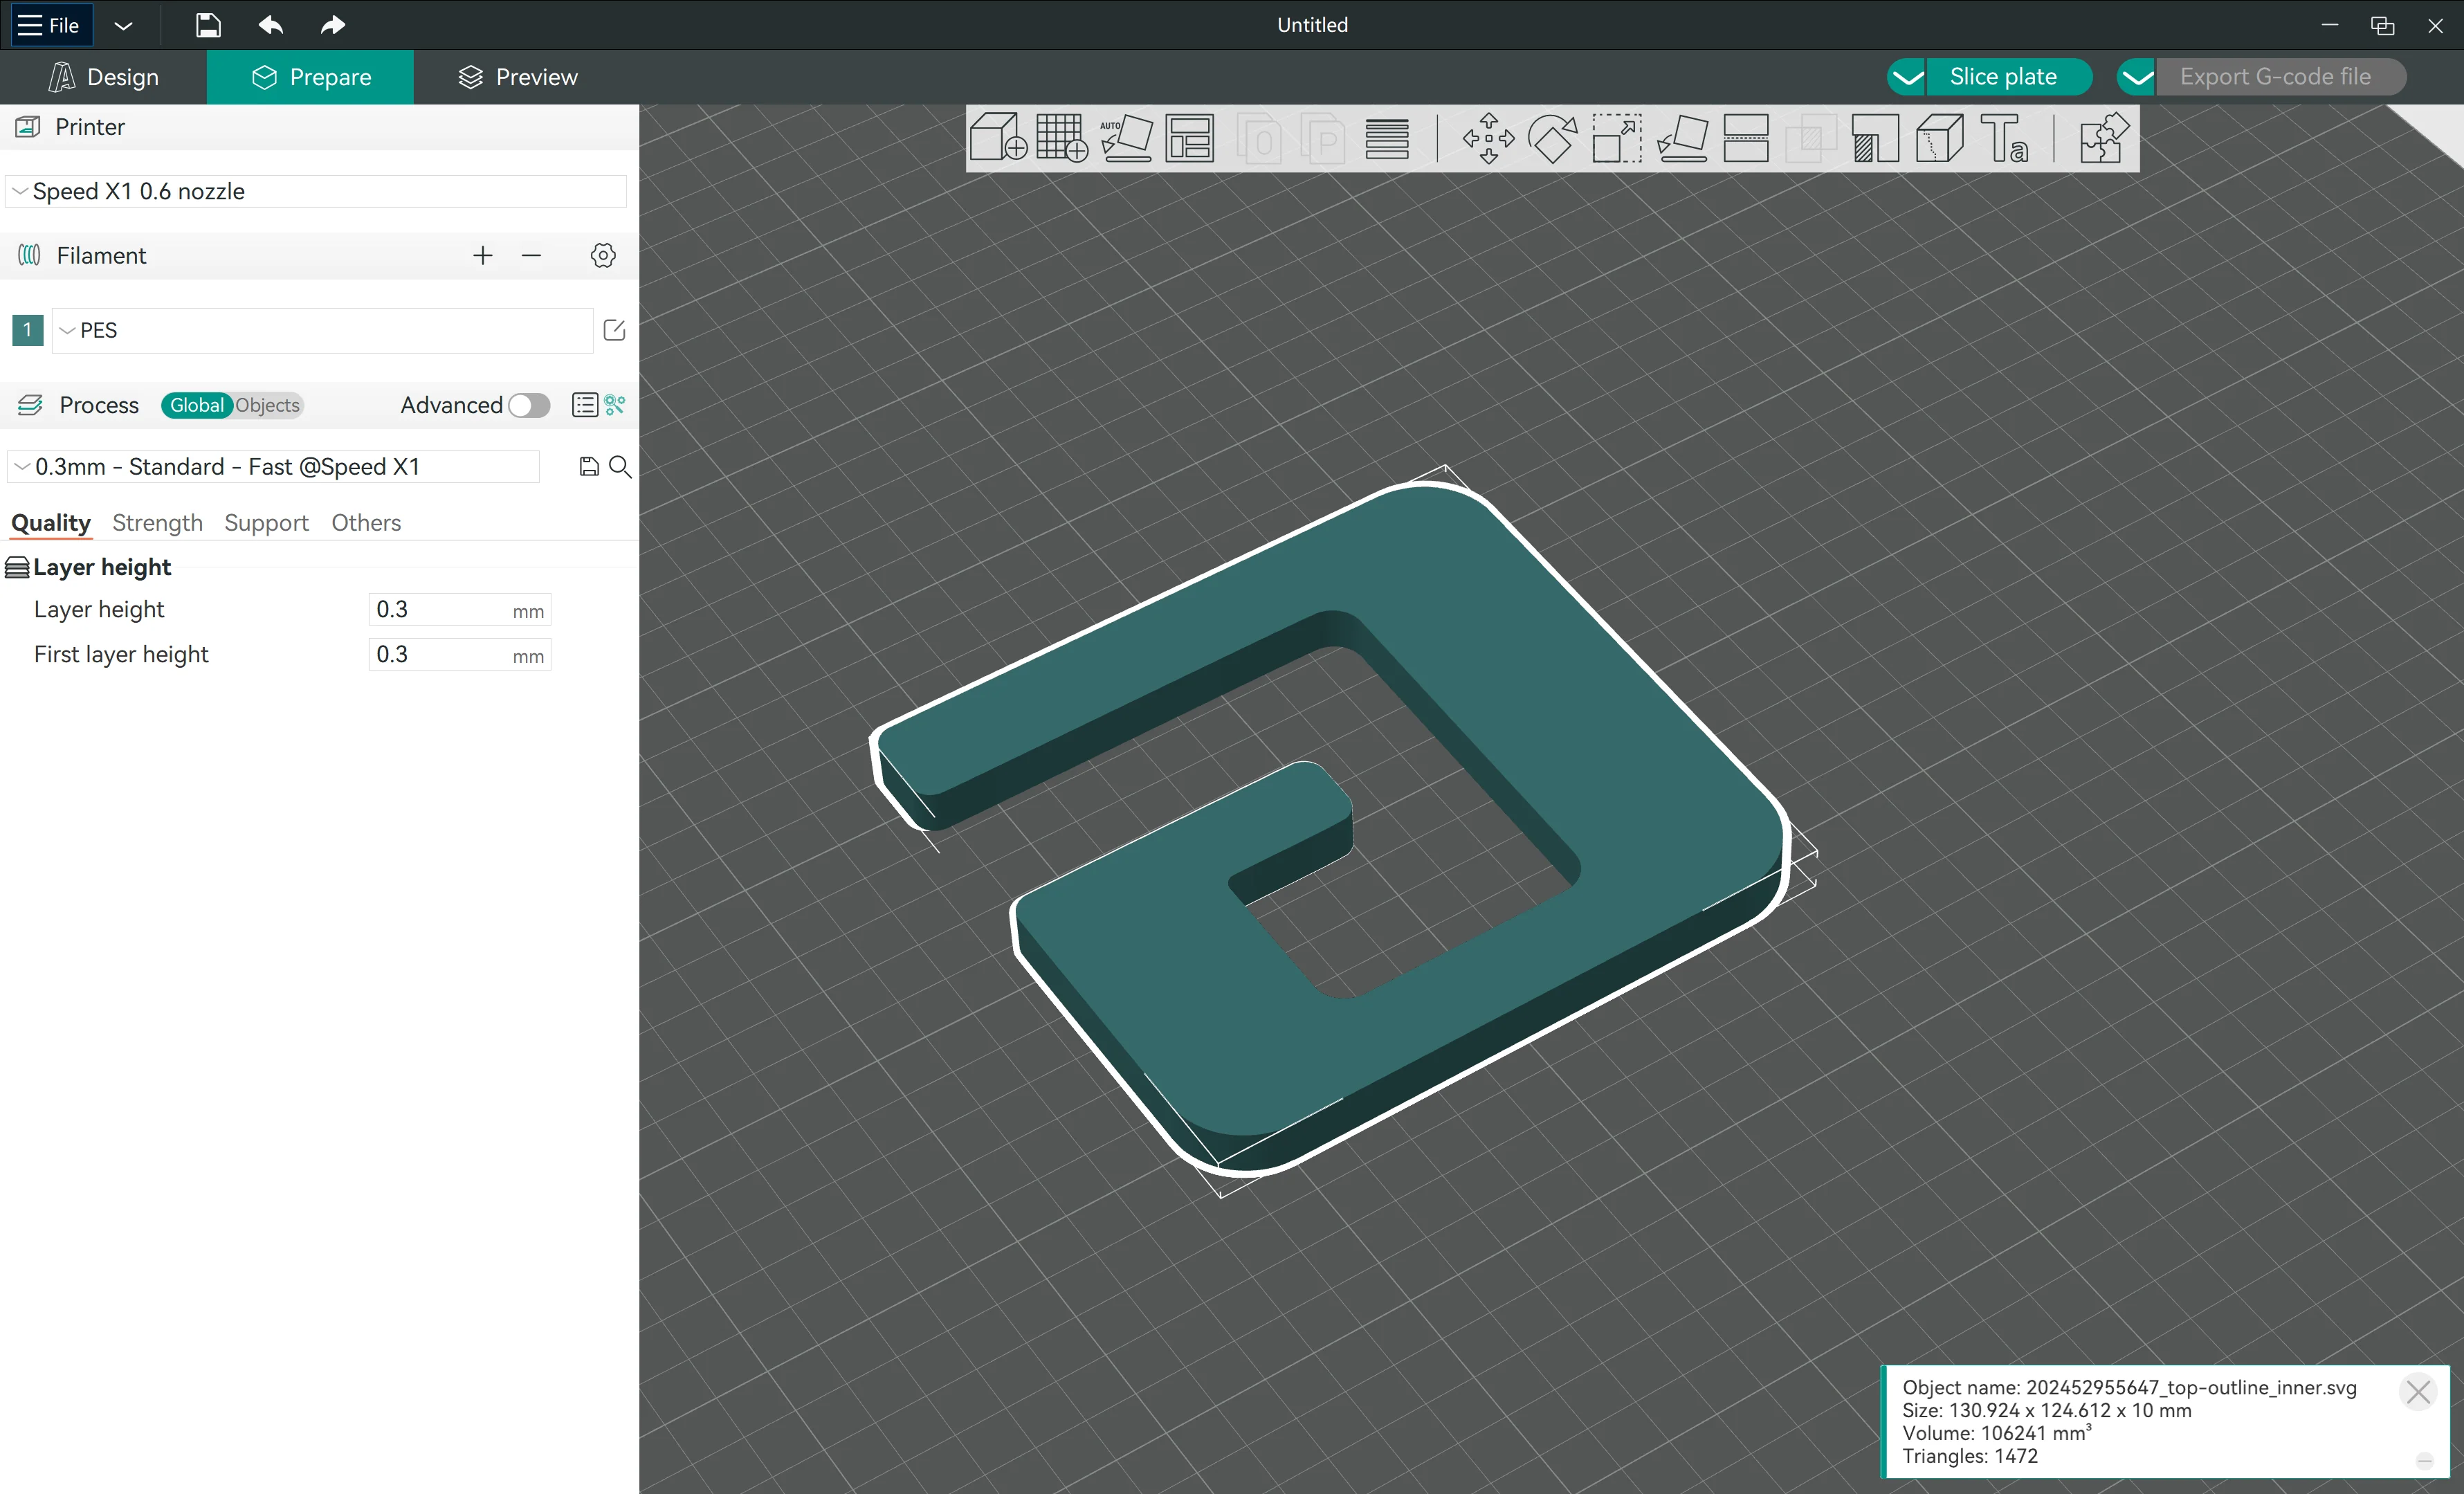
- Import the SVG into the slicer: "File → Import→Import STL/STEP/SVG/OBJ/AMF"
- Select the "Scale" tool on the tool bar
- Unselect "Uniform scale" first, then set the Z size to the proper thickness of the backing, let's say 3mm
|
|
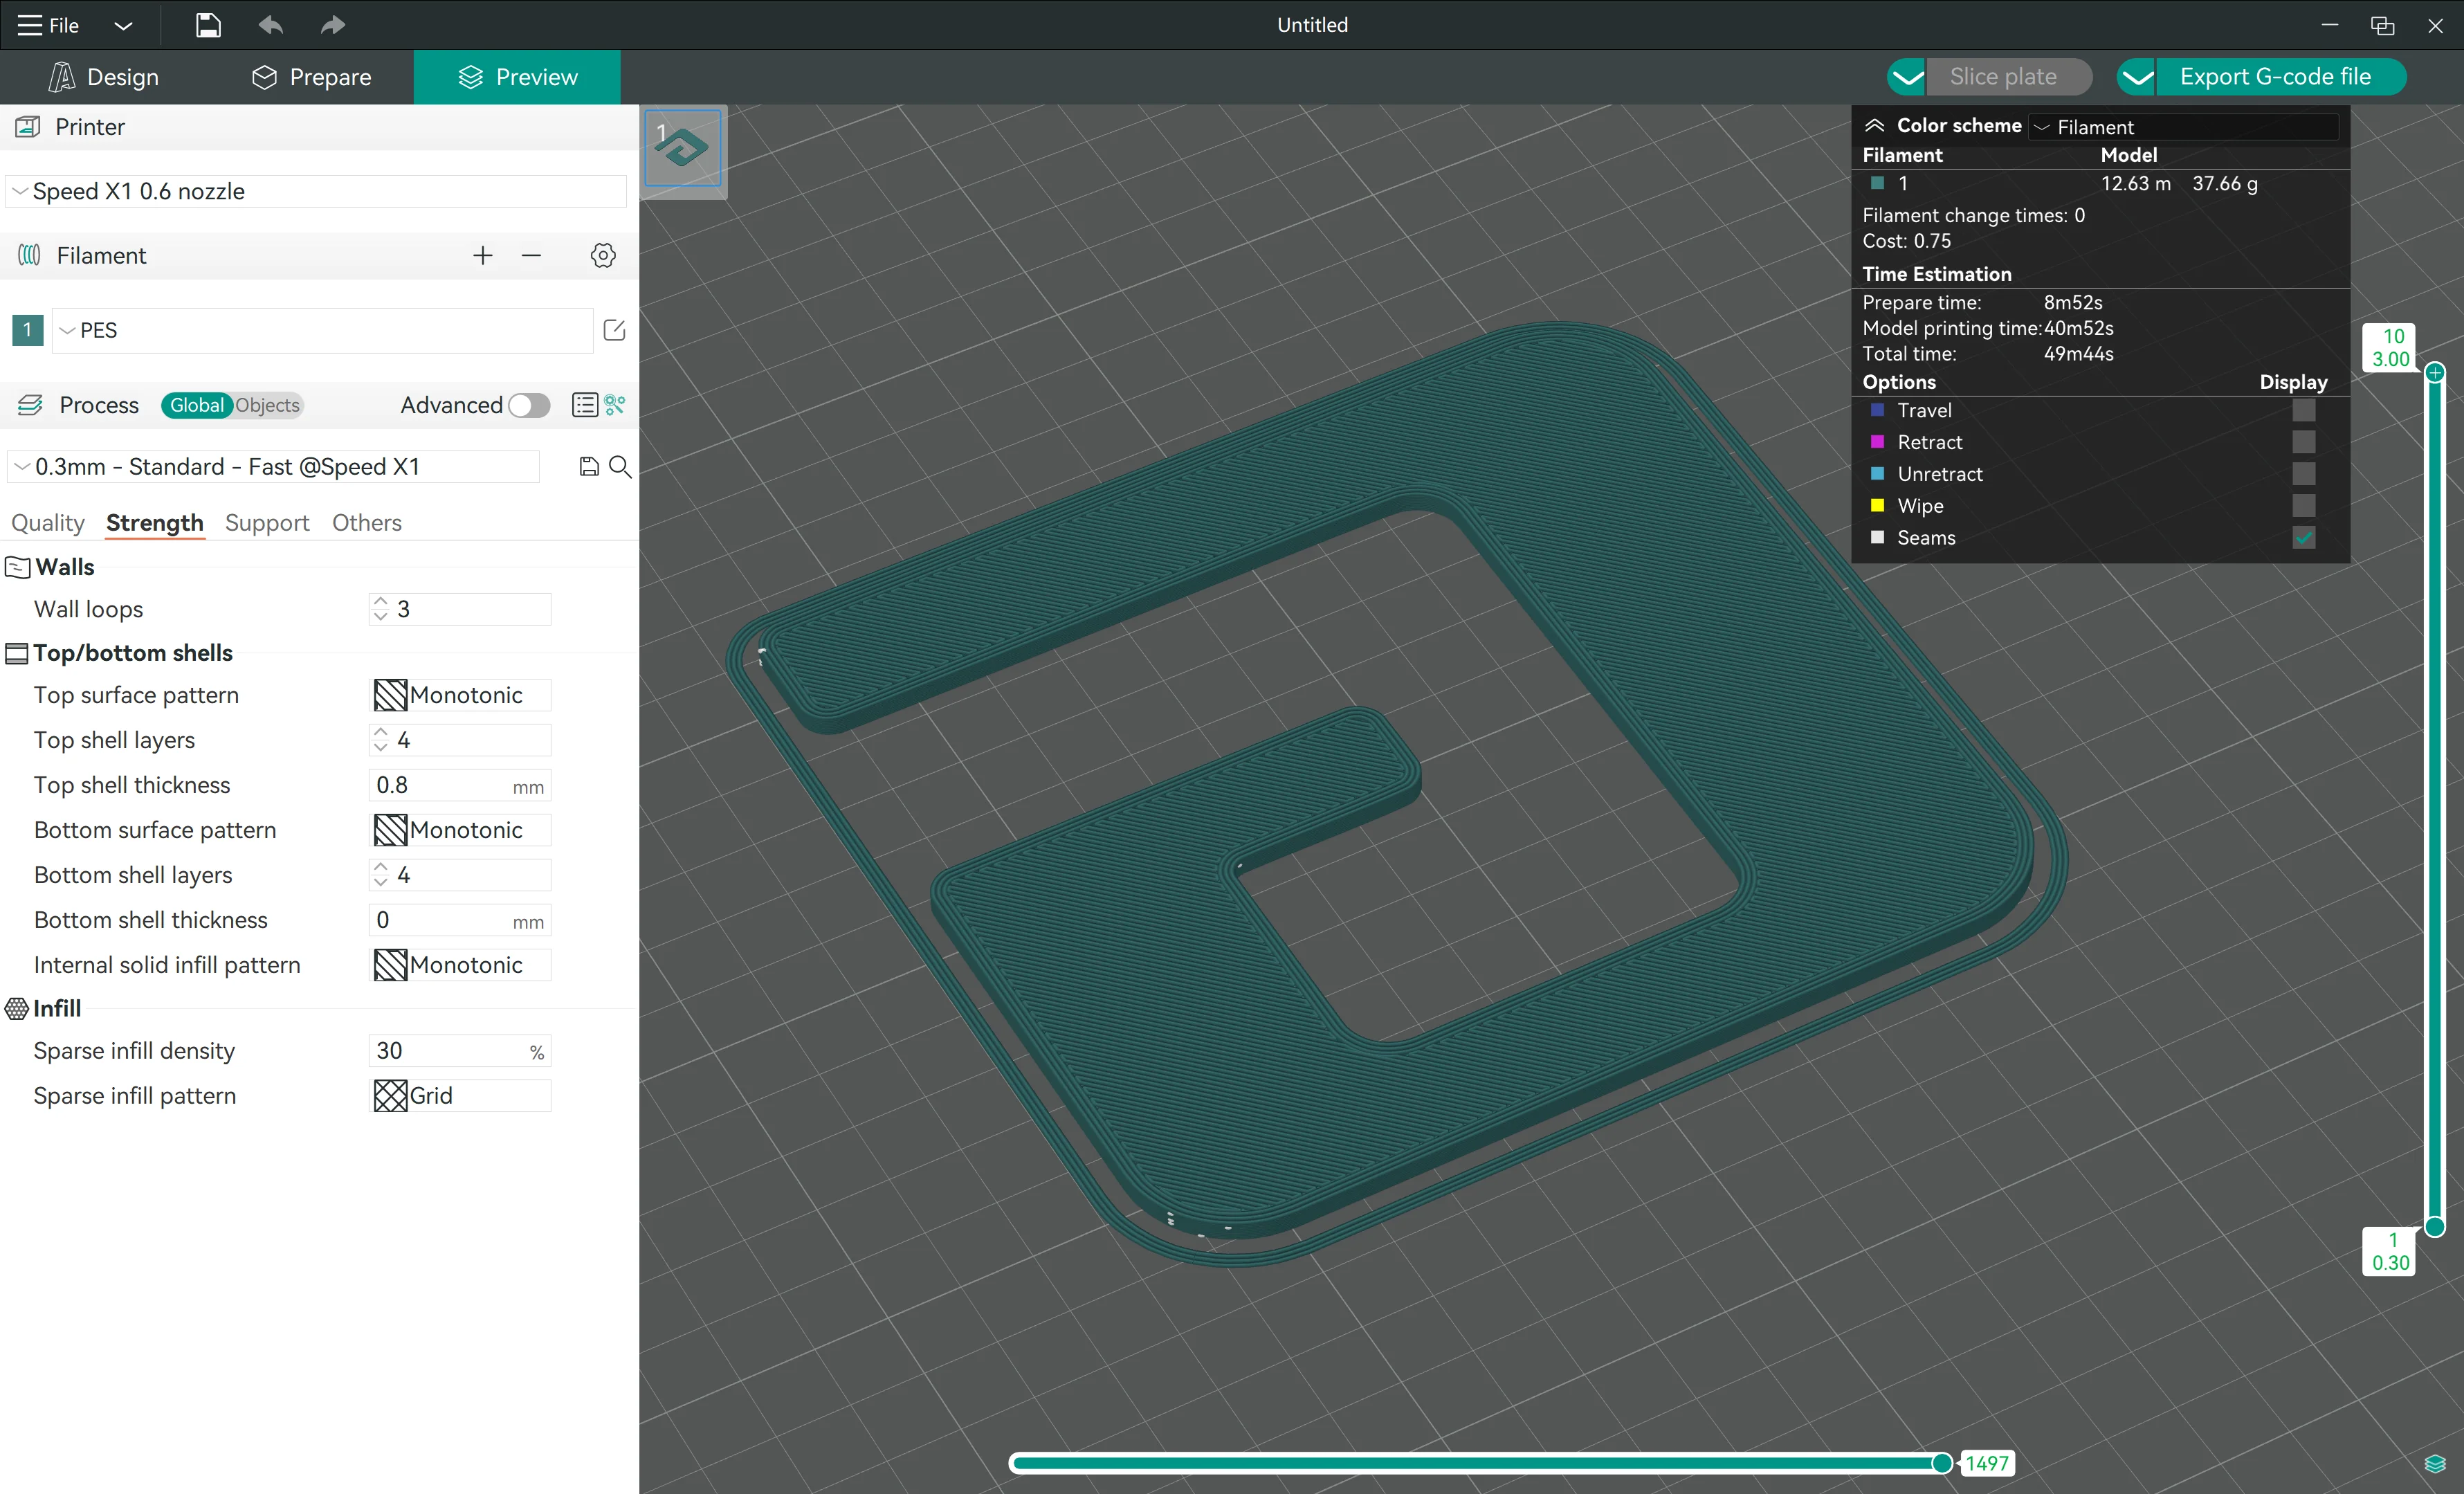
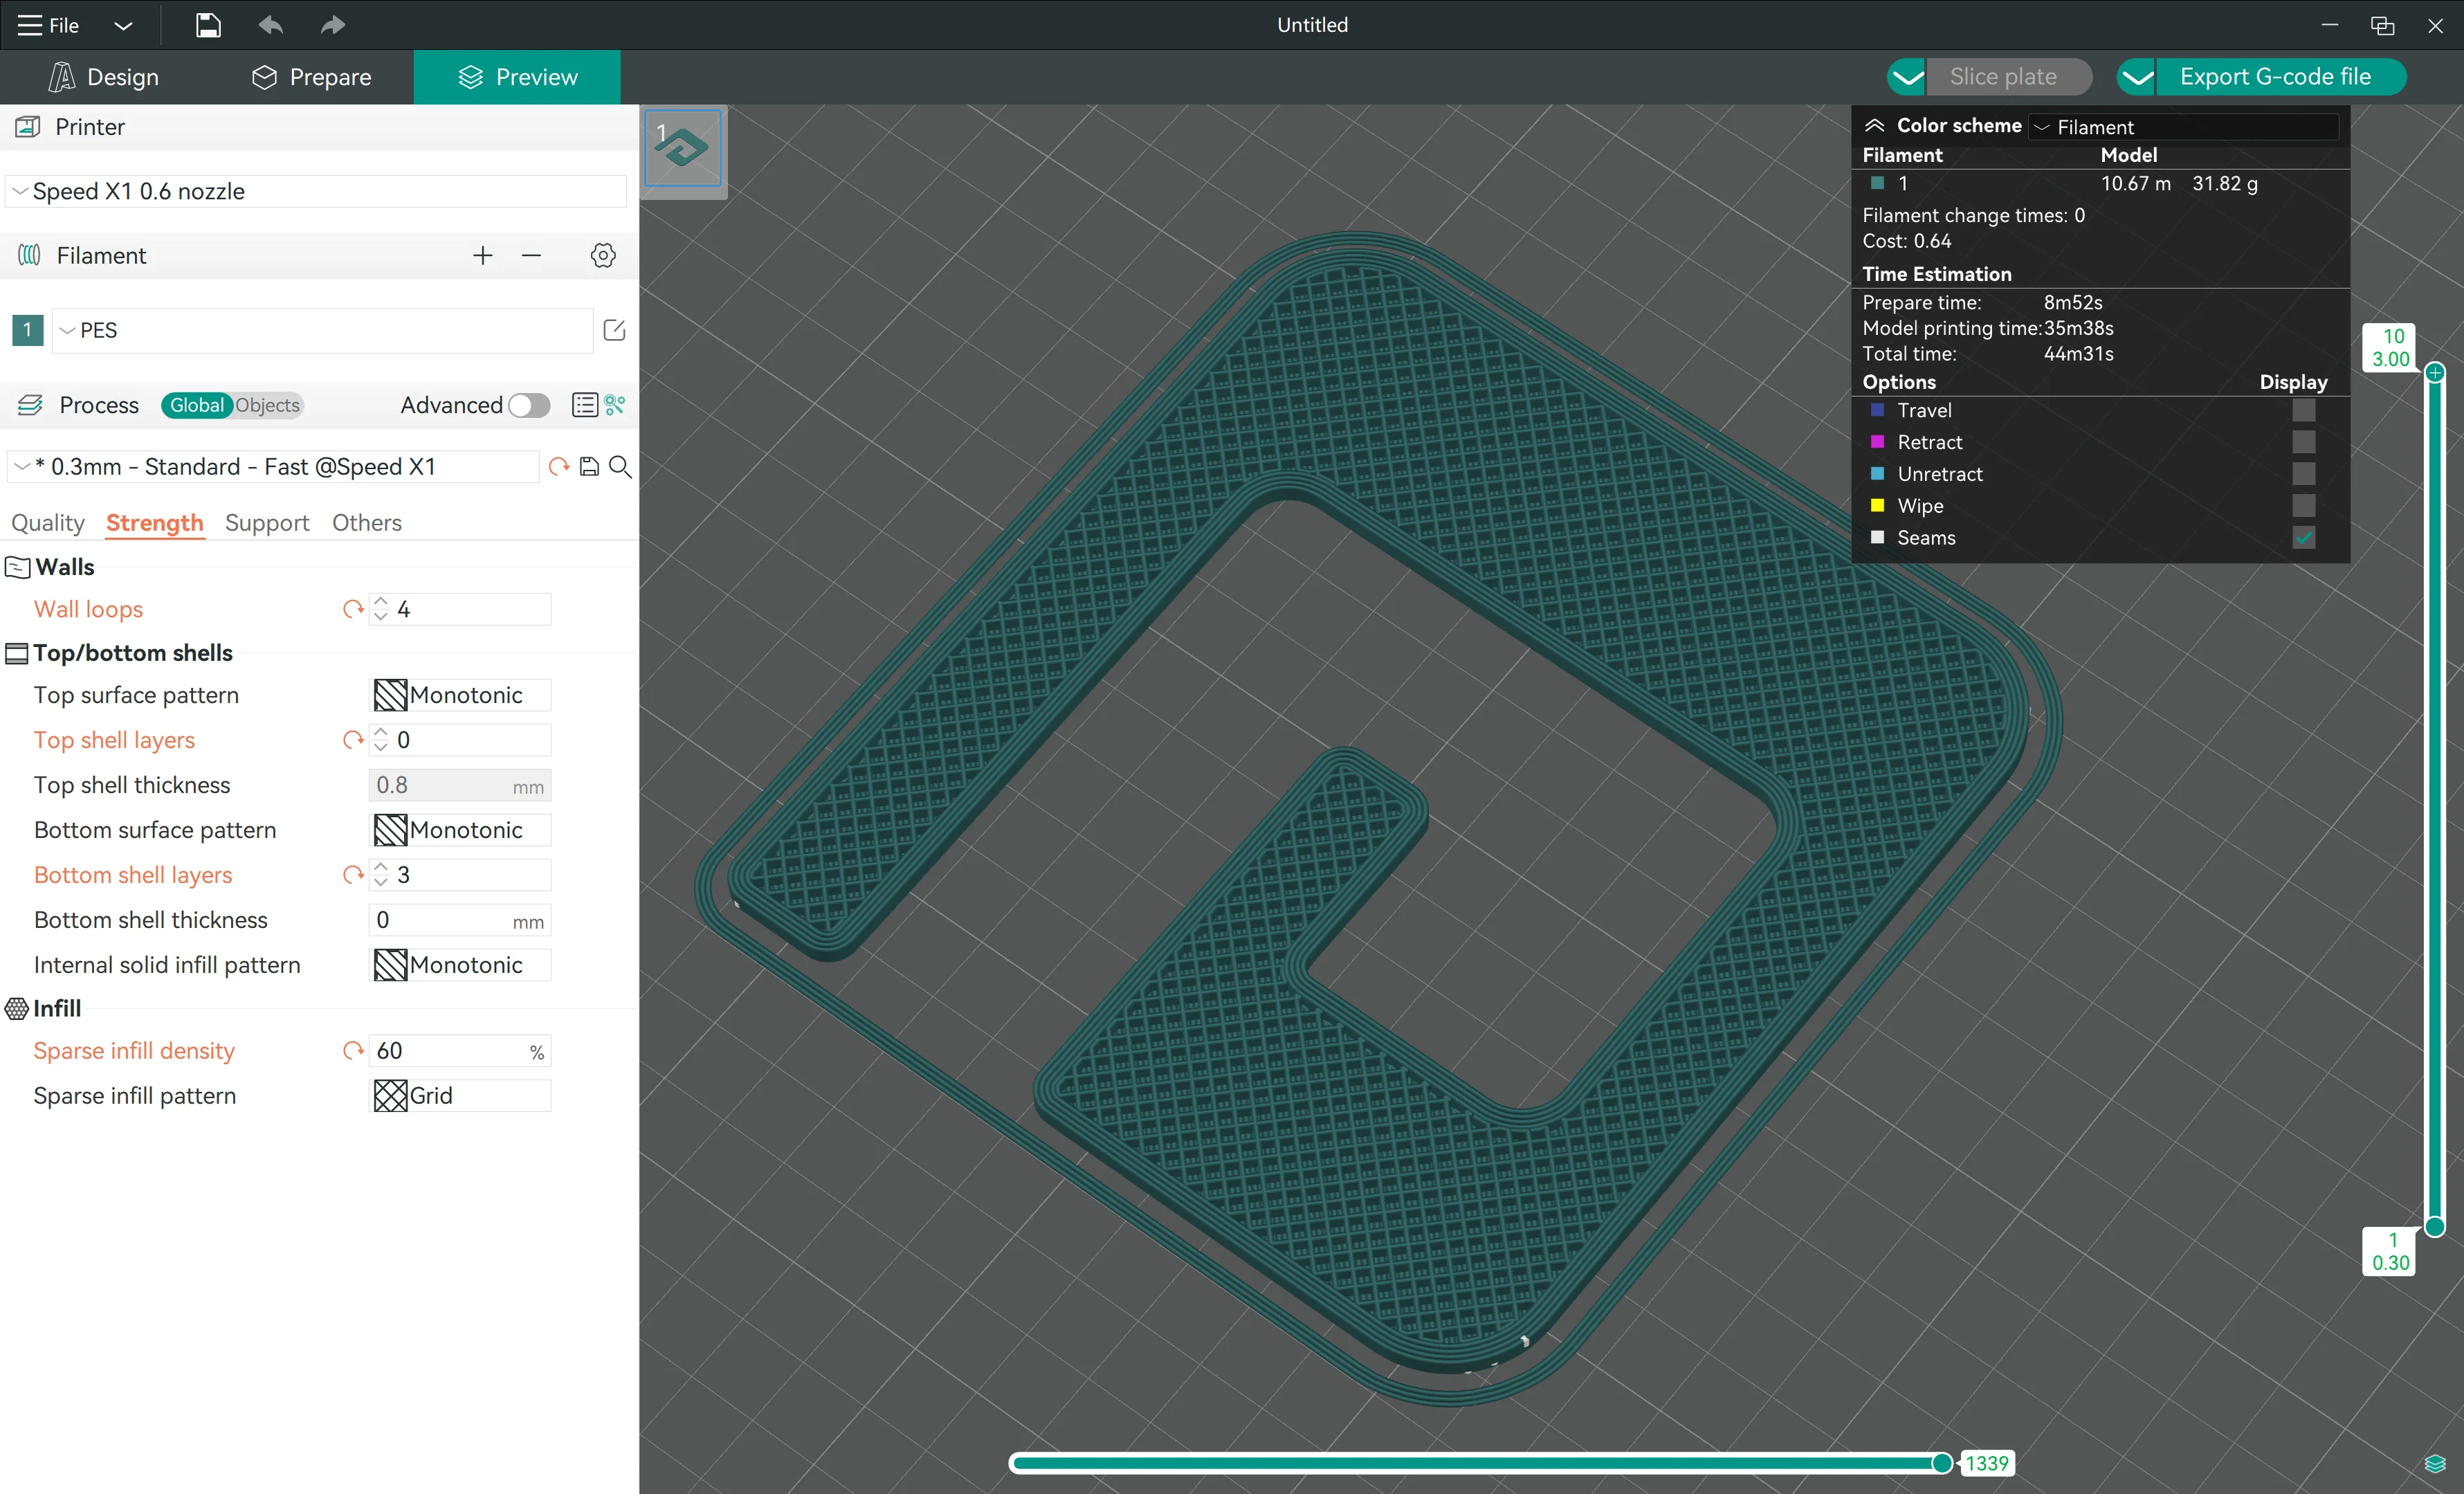
- Slice with the default settings to 3D print a solid backing (if the channel letter will be installed indoor, you can choose to slice with 0 top shell layers and 60% infill to save some time and material).
¶ 2. 3D print the face
In case you will 3D print the backing&channel, you want to 3D print the face too. Here is the guide:
¶ 2.1 Export DXF cutting path
 |
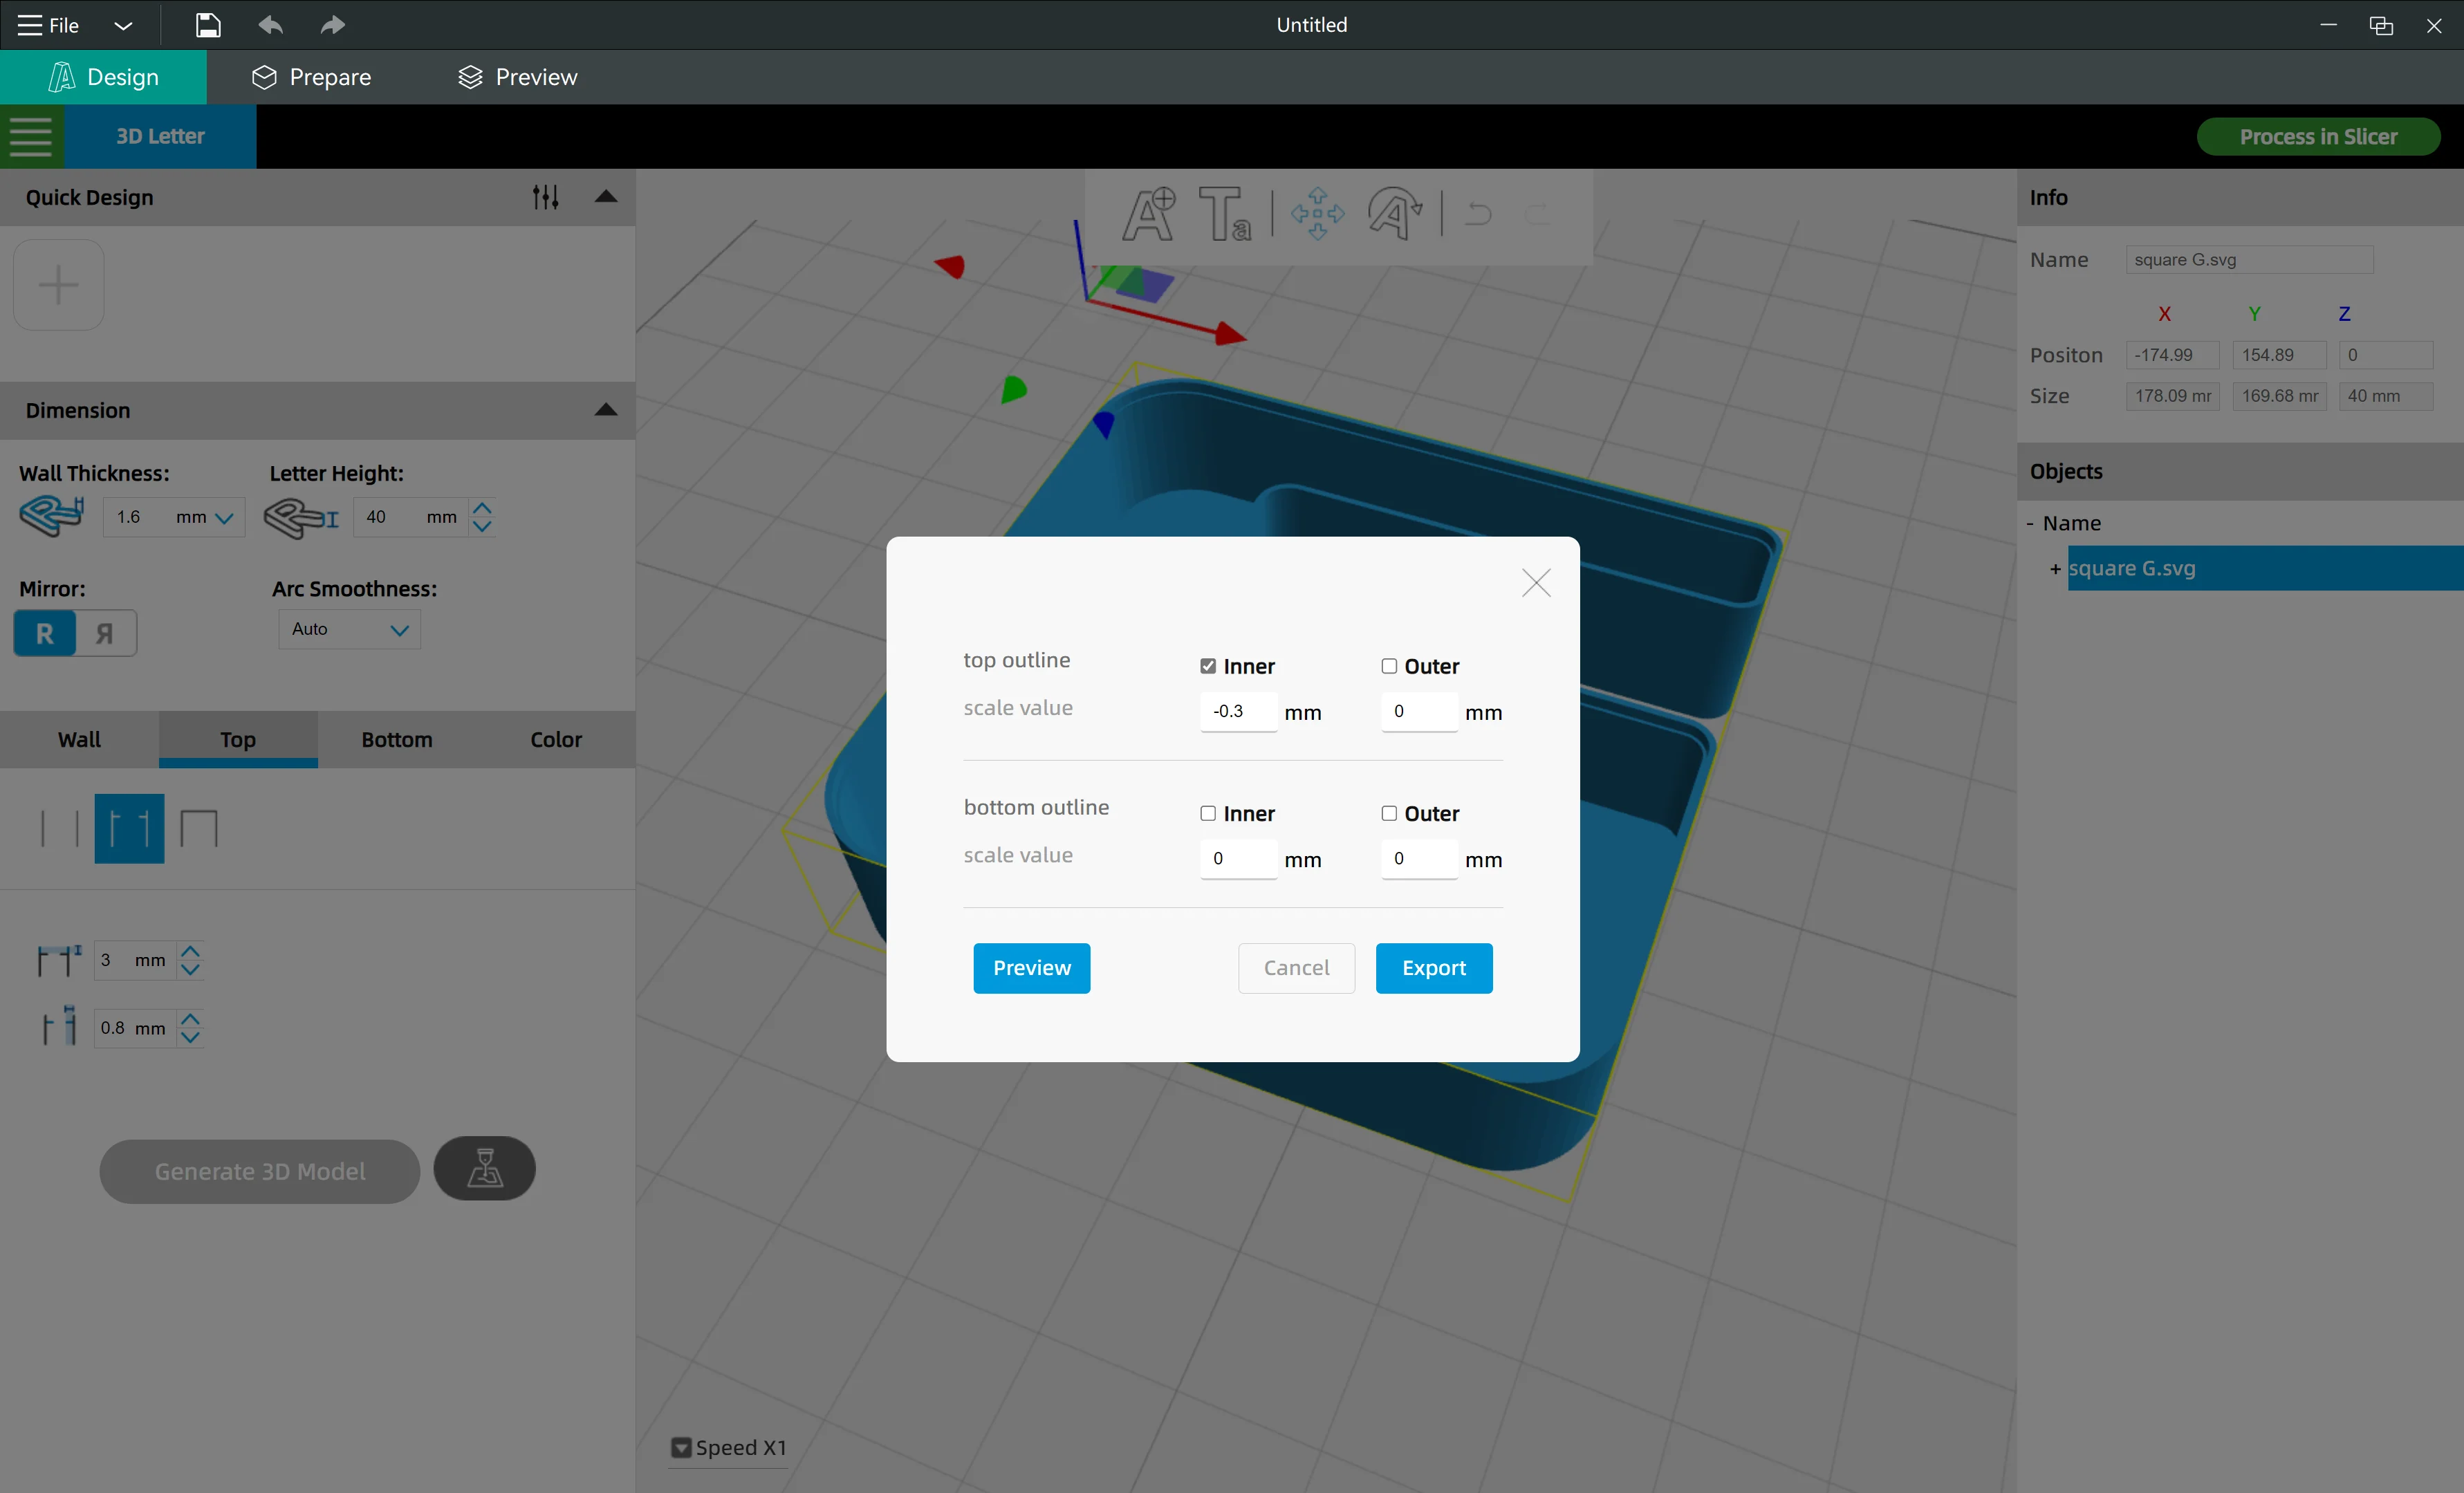 |
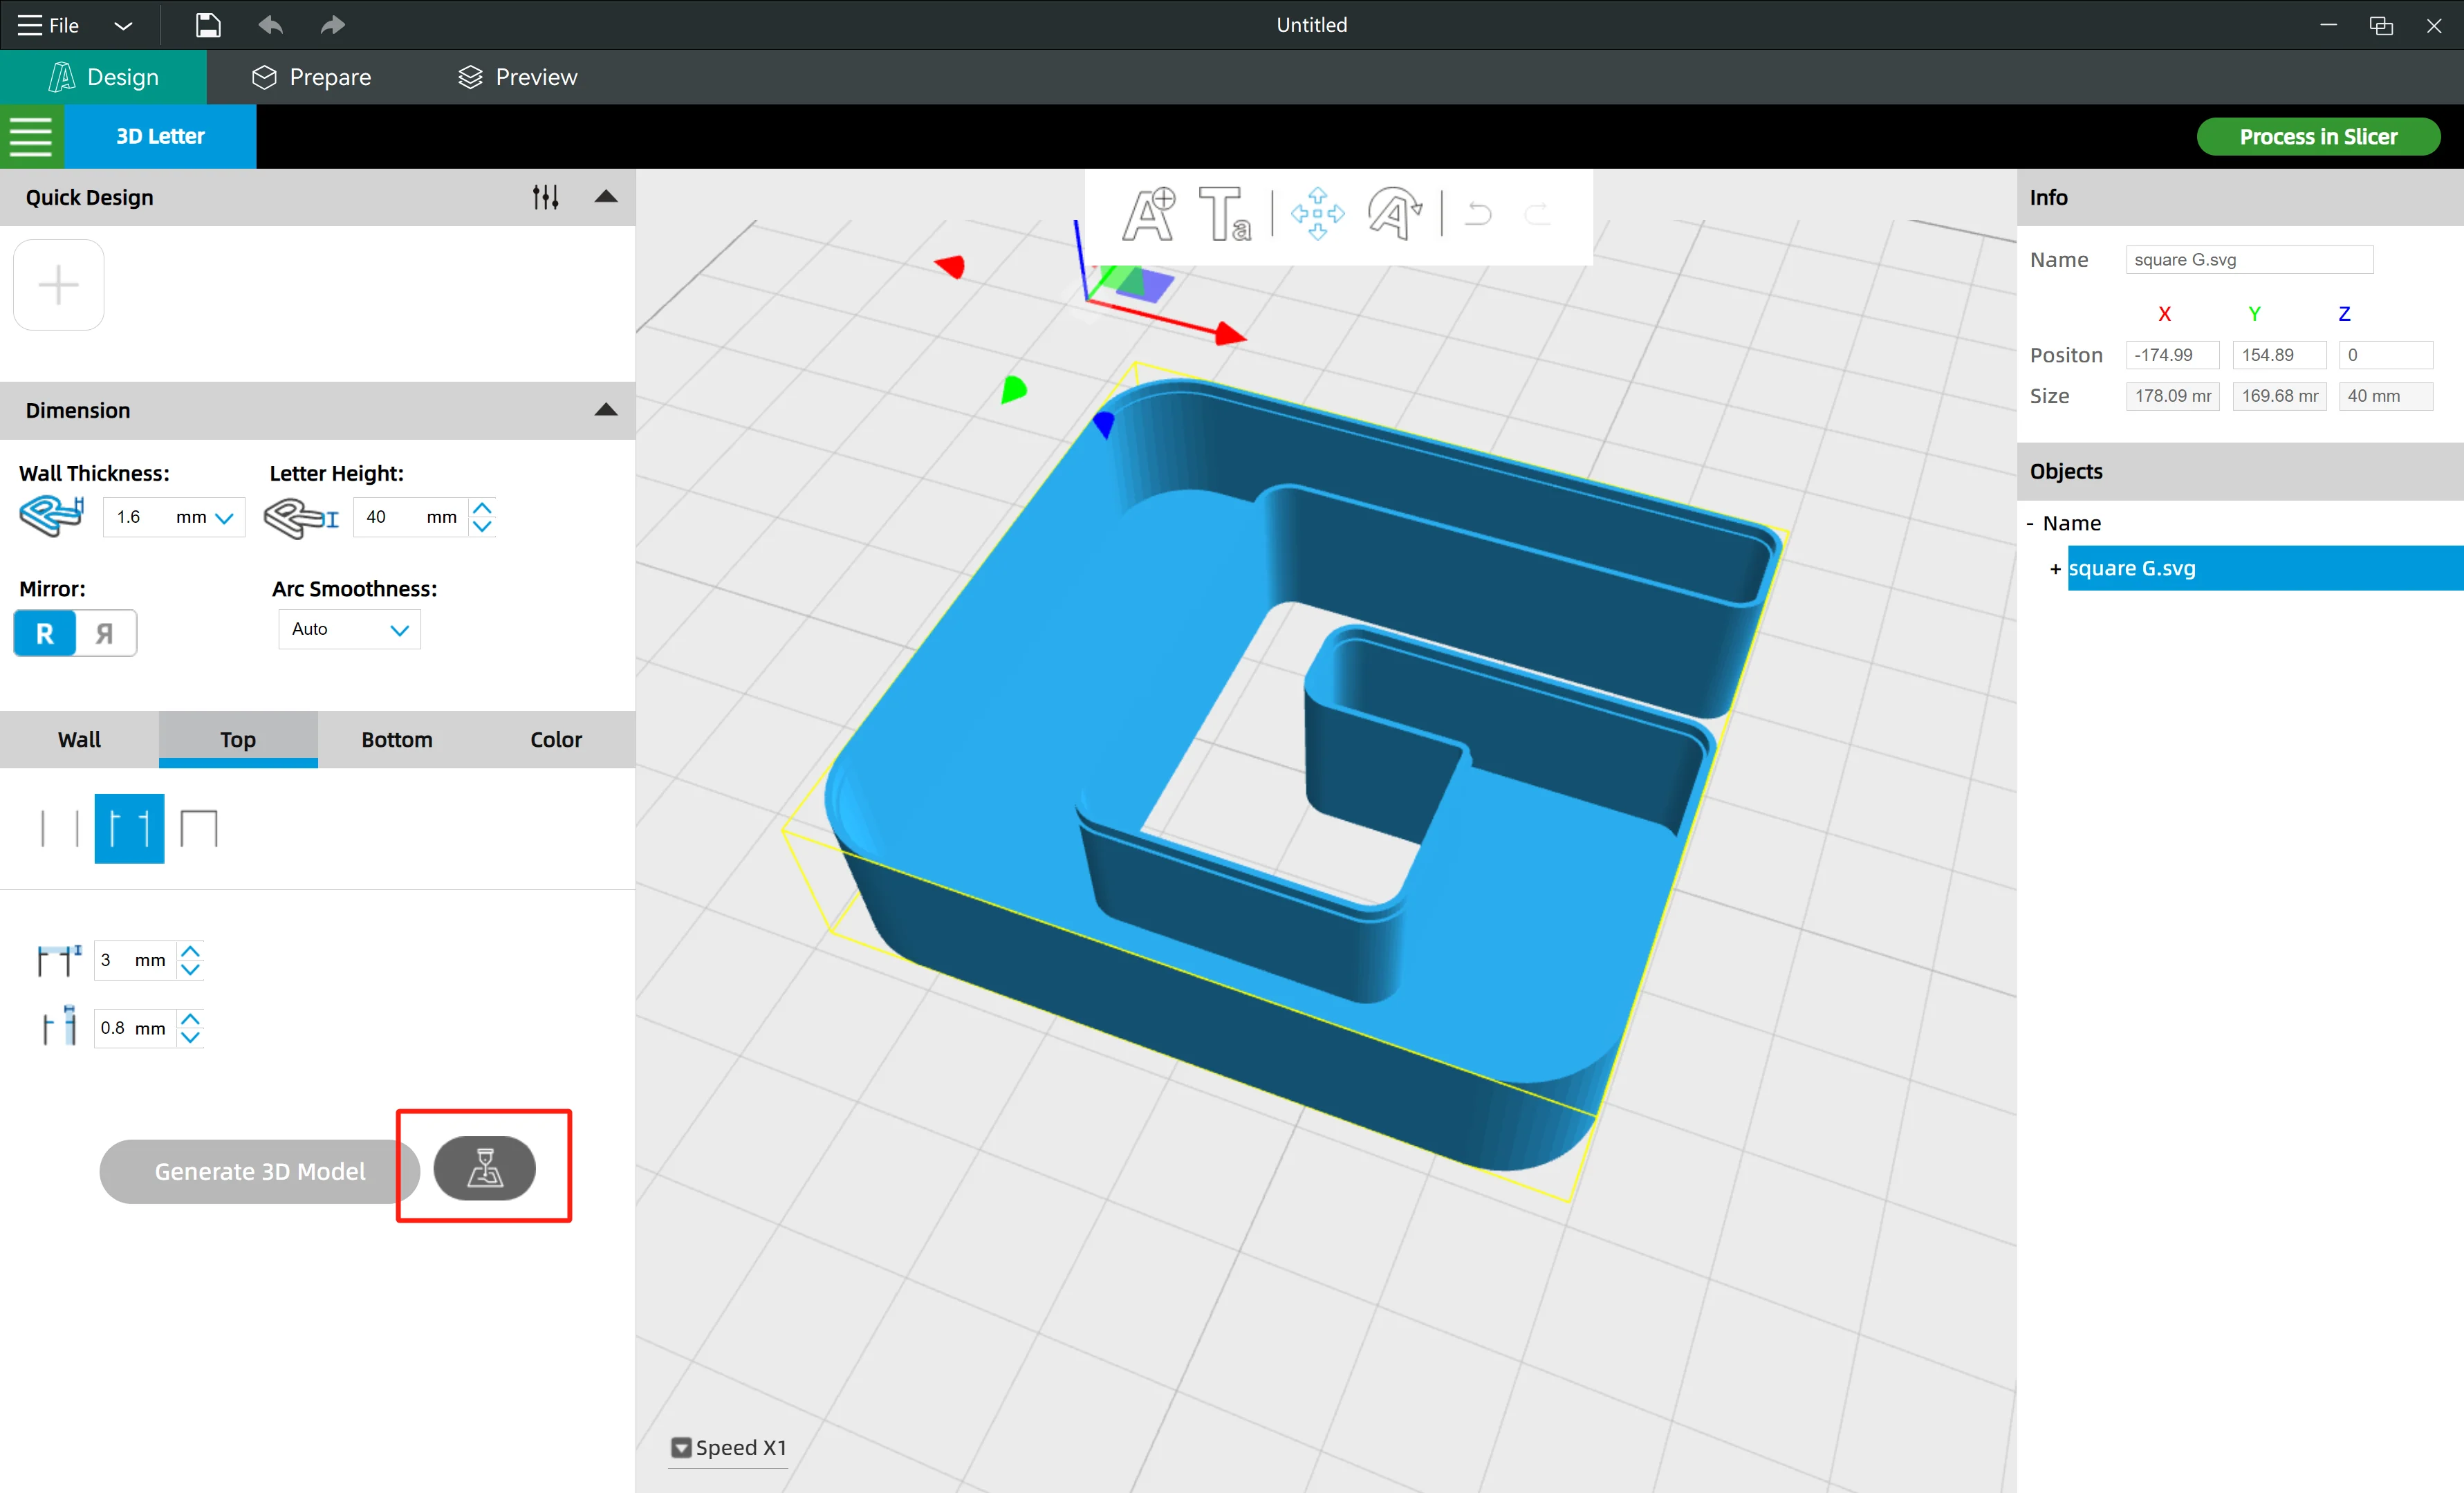
- Click the export icon, choose "top outline" and set "scale value" -0.2~-0.5mm, then click "export" button to save the DXF file
¶ 2.2 Convert DXF to SVG
|
|
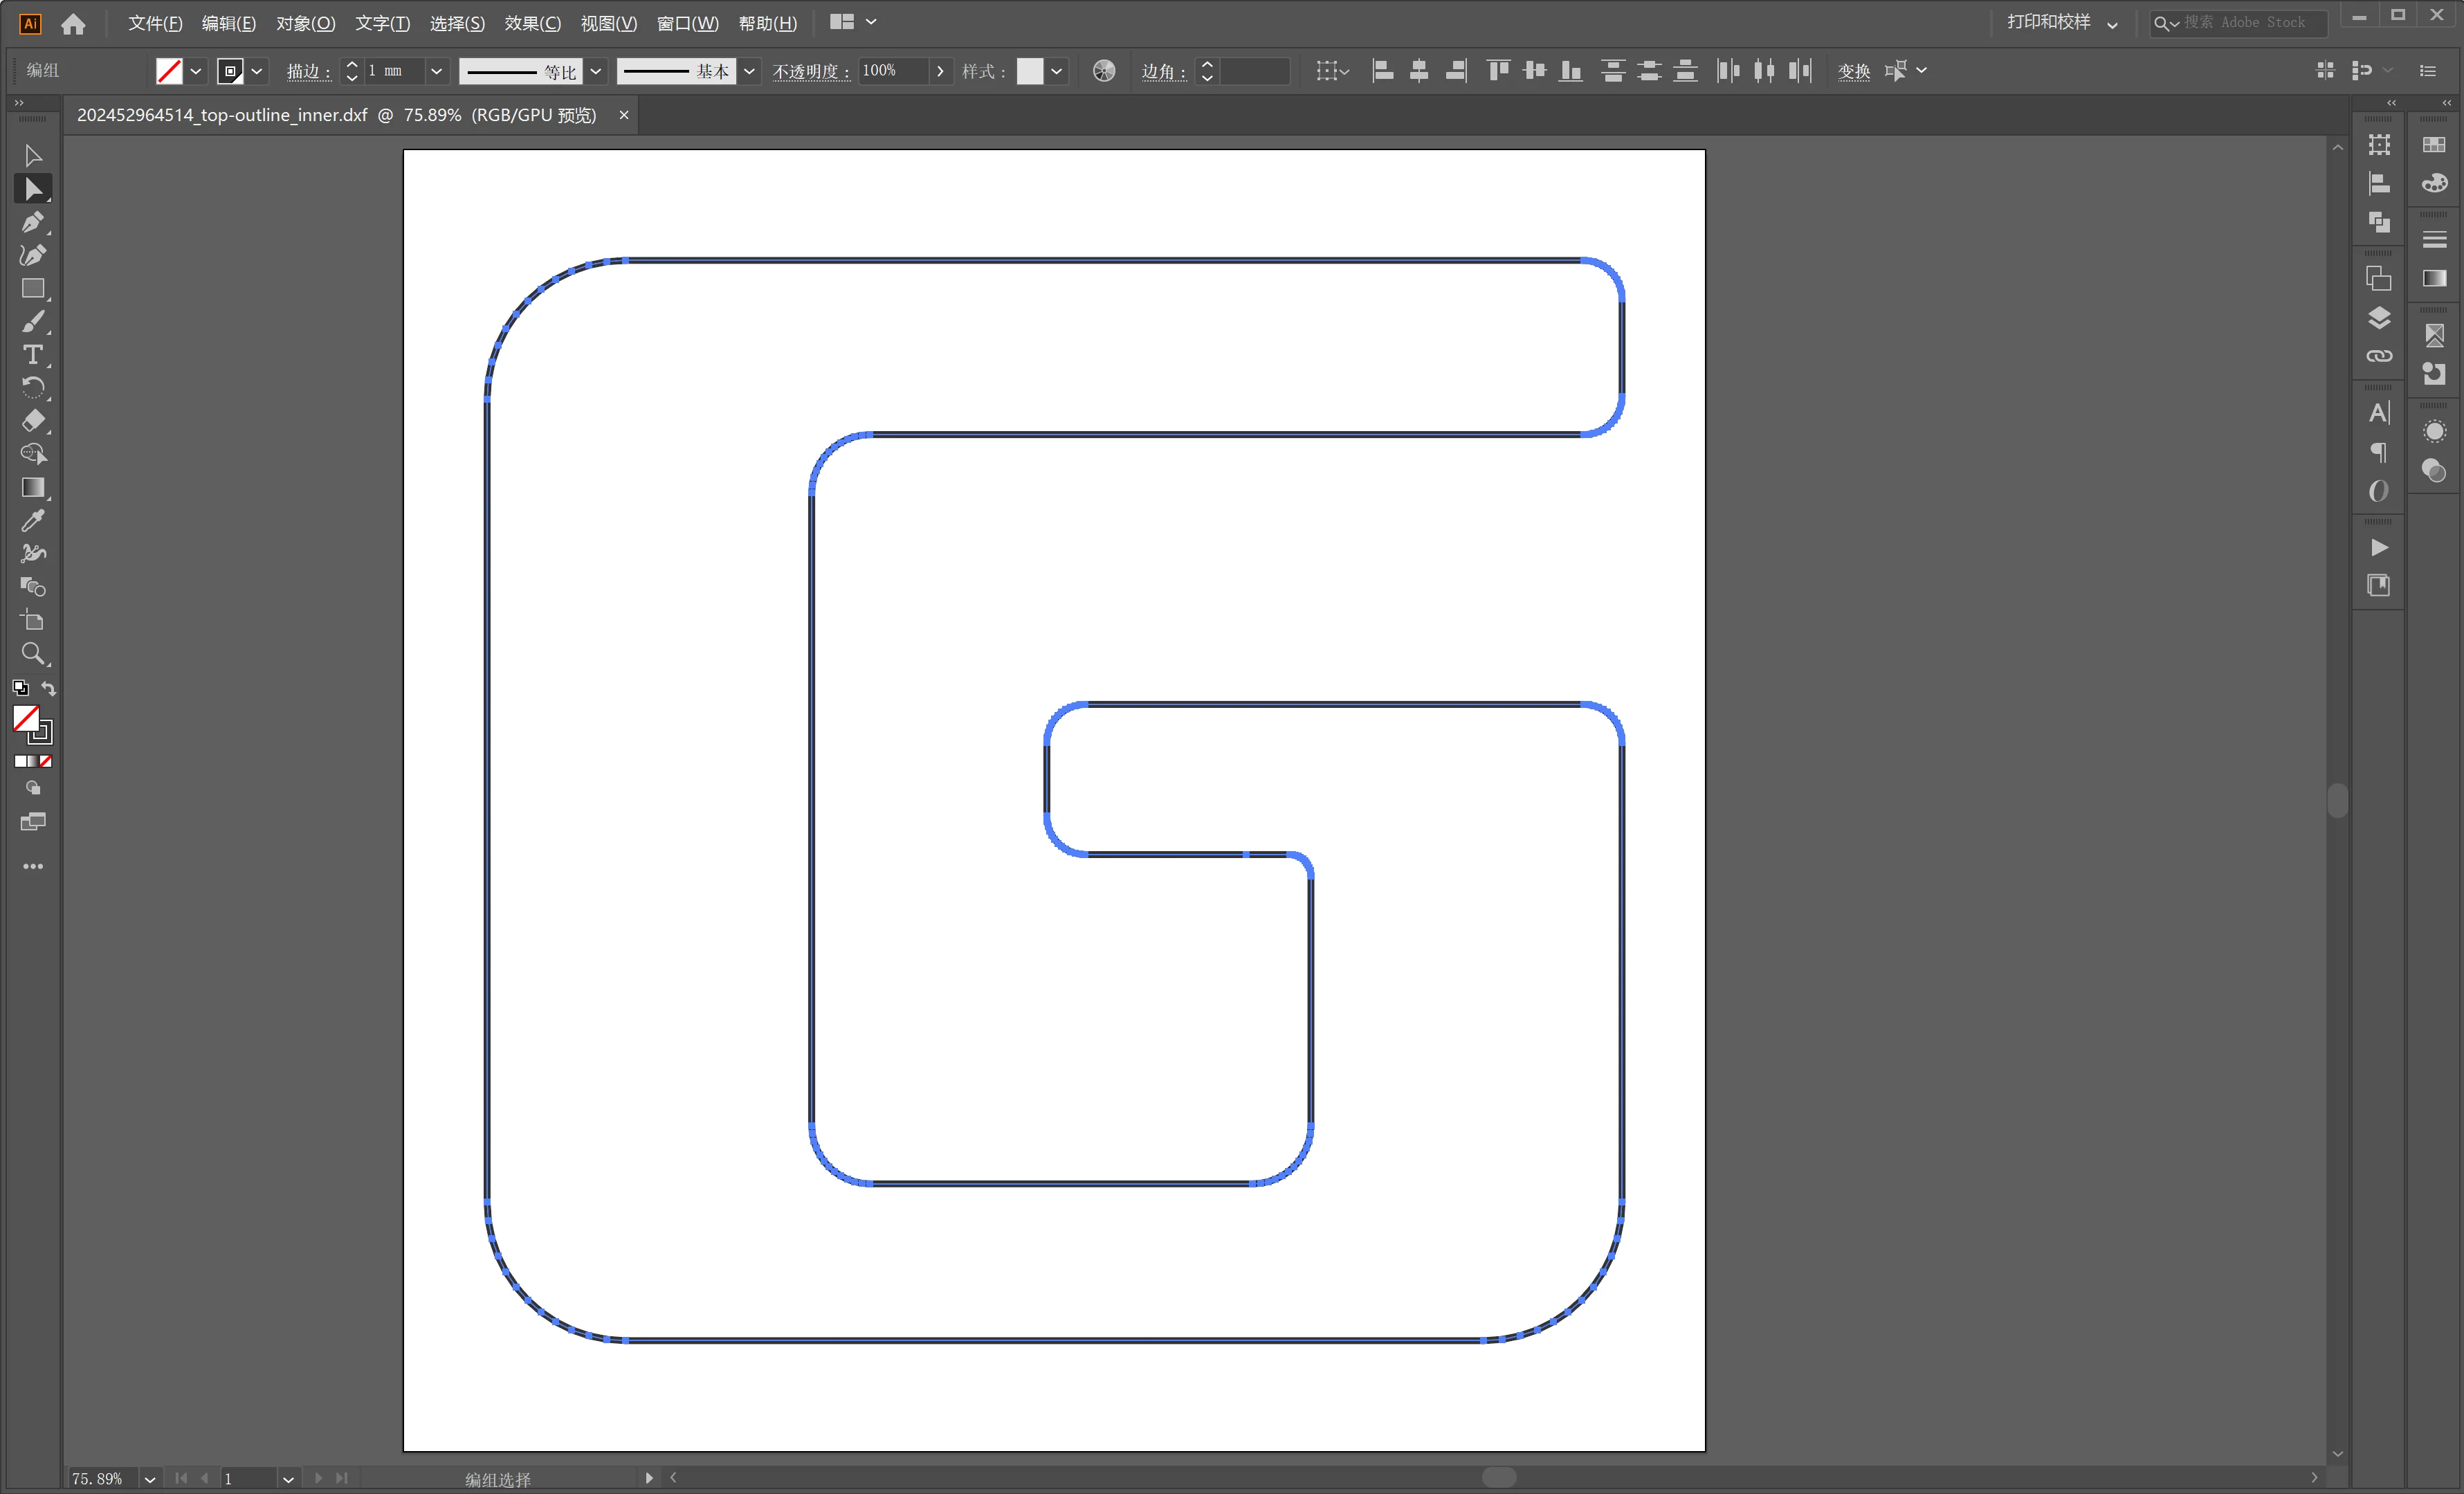
- Open the DXF file with Illustrator (Please note to open the file with the original size, don't scale it)
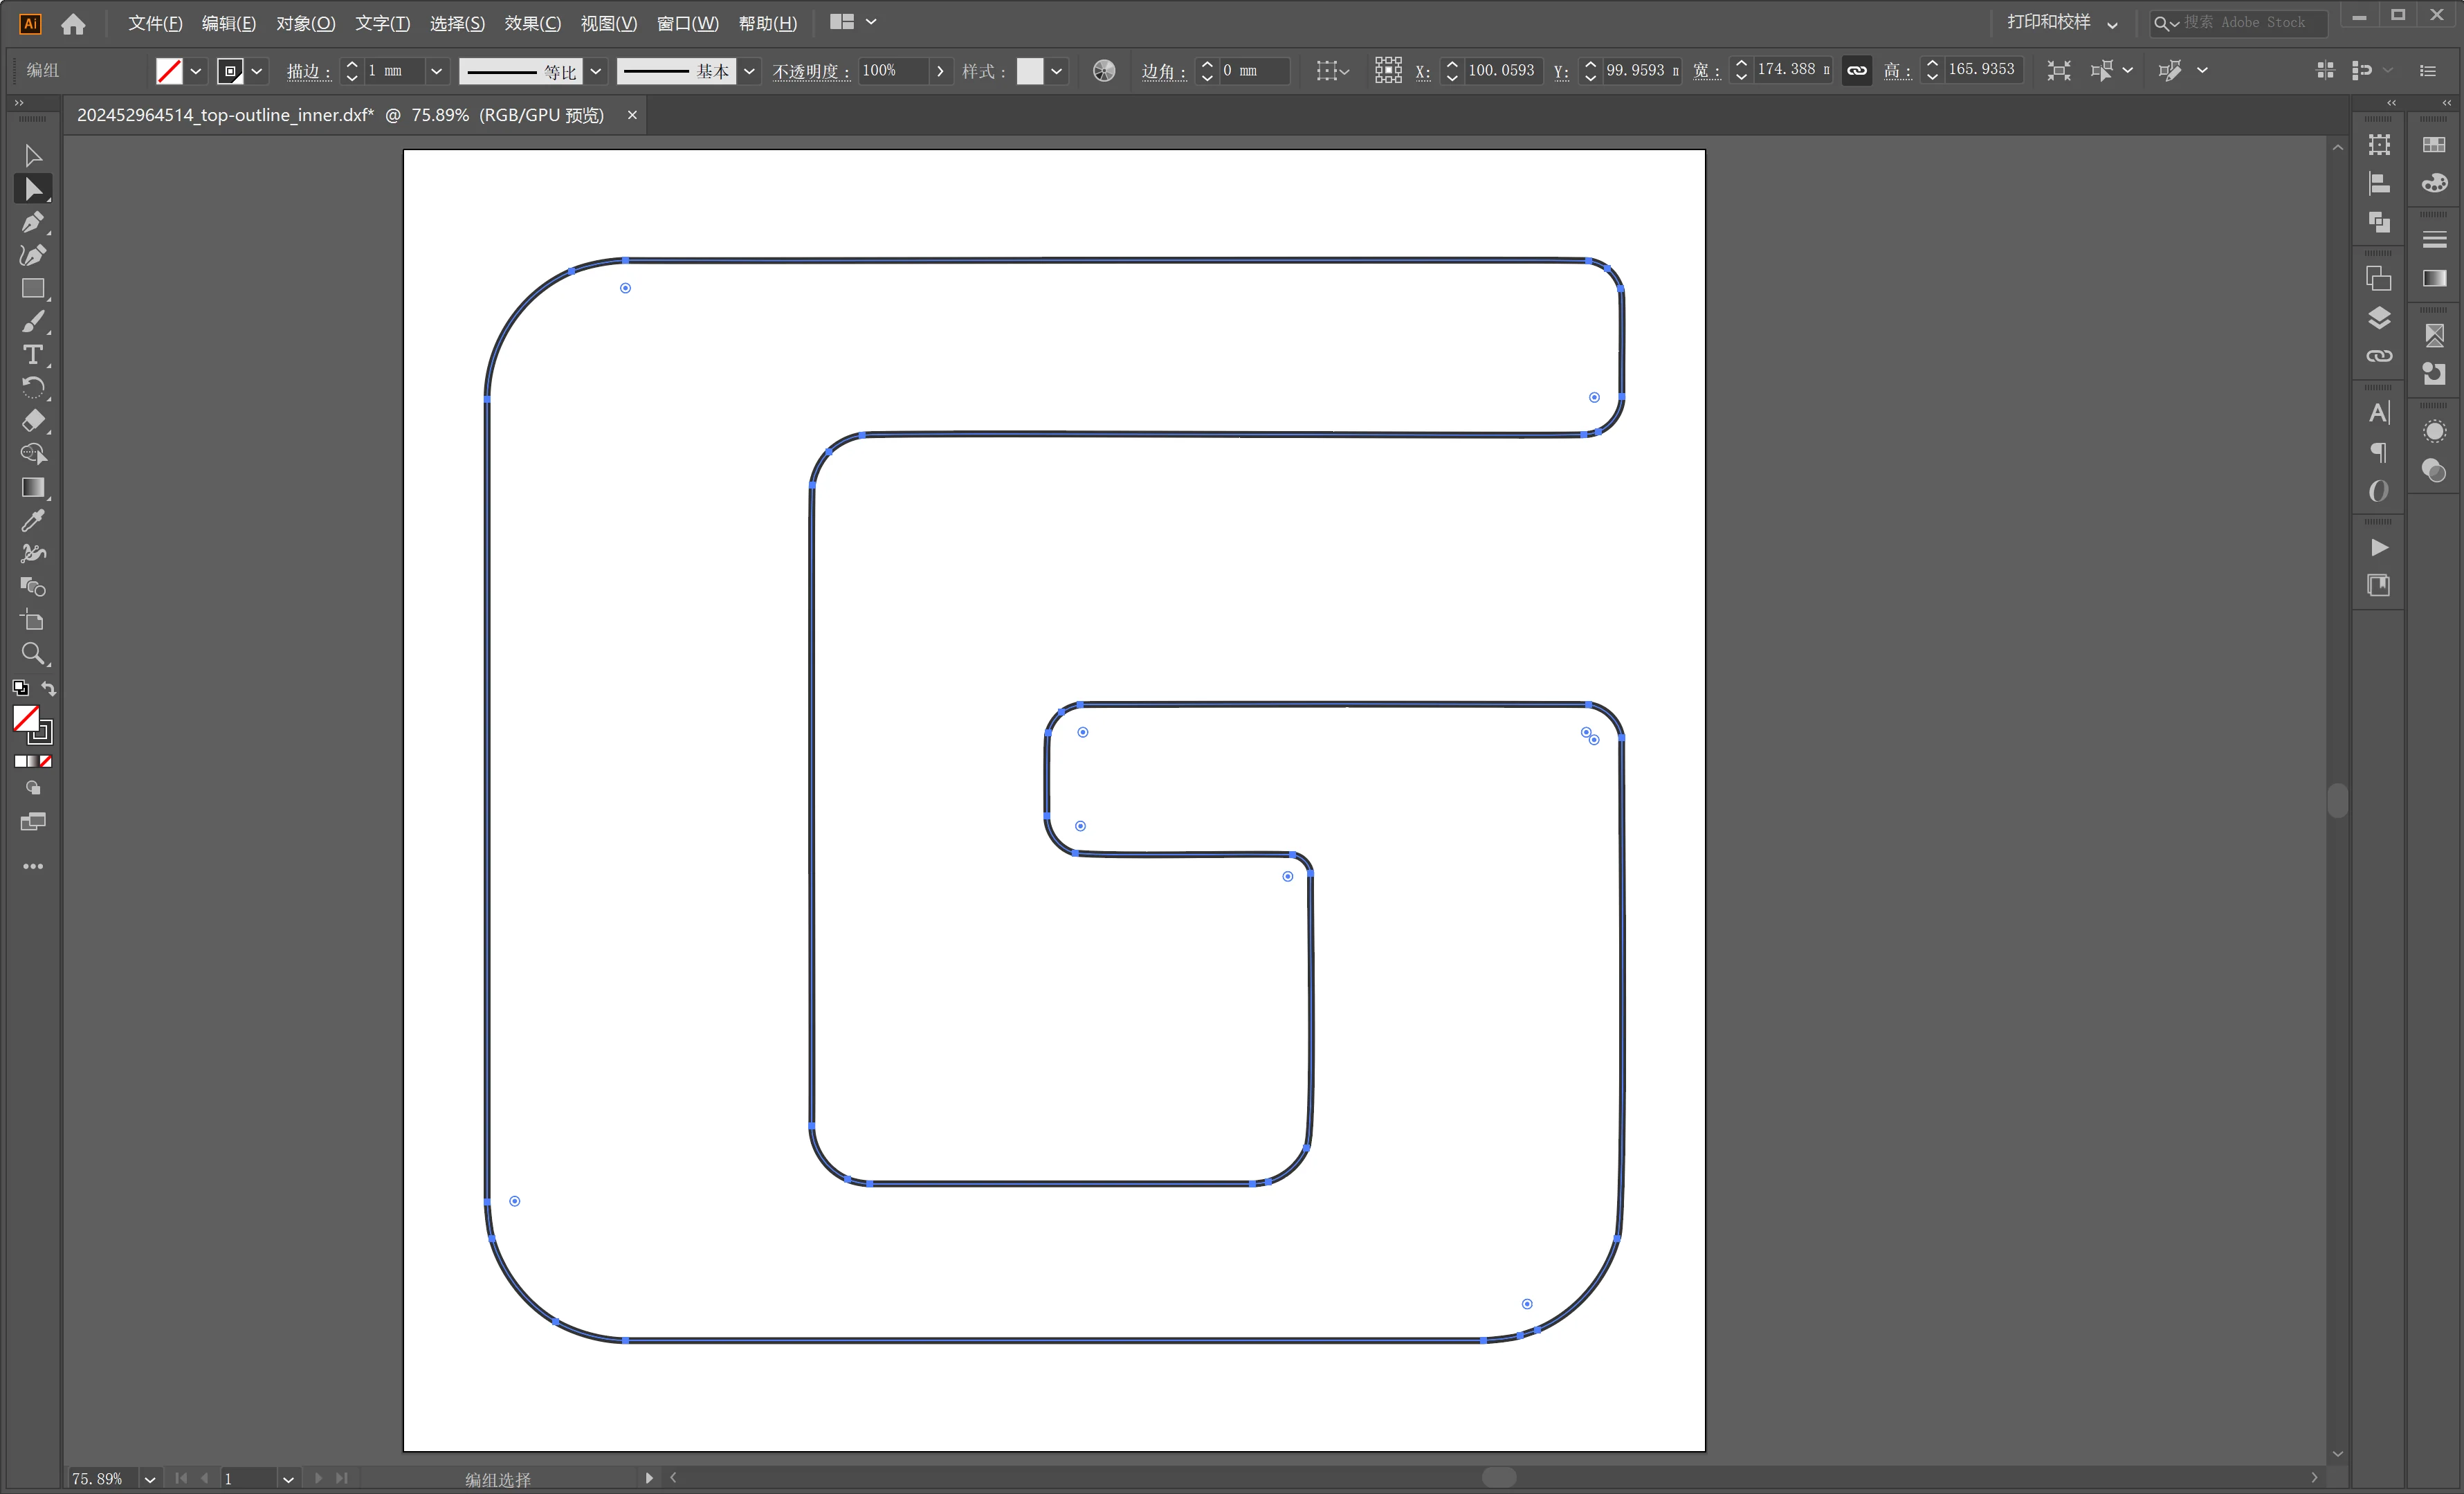
- Now the letter is combined with short paths, you need to connect all of them. Press Ctrl+A to select all the paths, then Ctrl+J (or go to menu "Object→Path→Join”) to join all the paths together
- Go to menu "Object→Path→Simplify” to reduce nodes on the path
- Press Shft+Ctrl+S to save the path with SVG format
¶ 3. Import SVG into slicer
 |
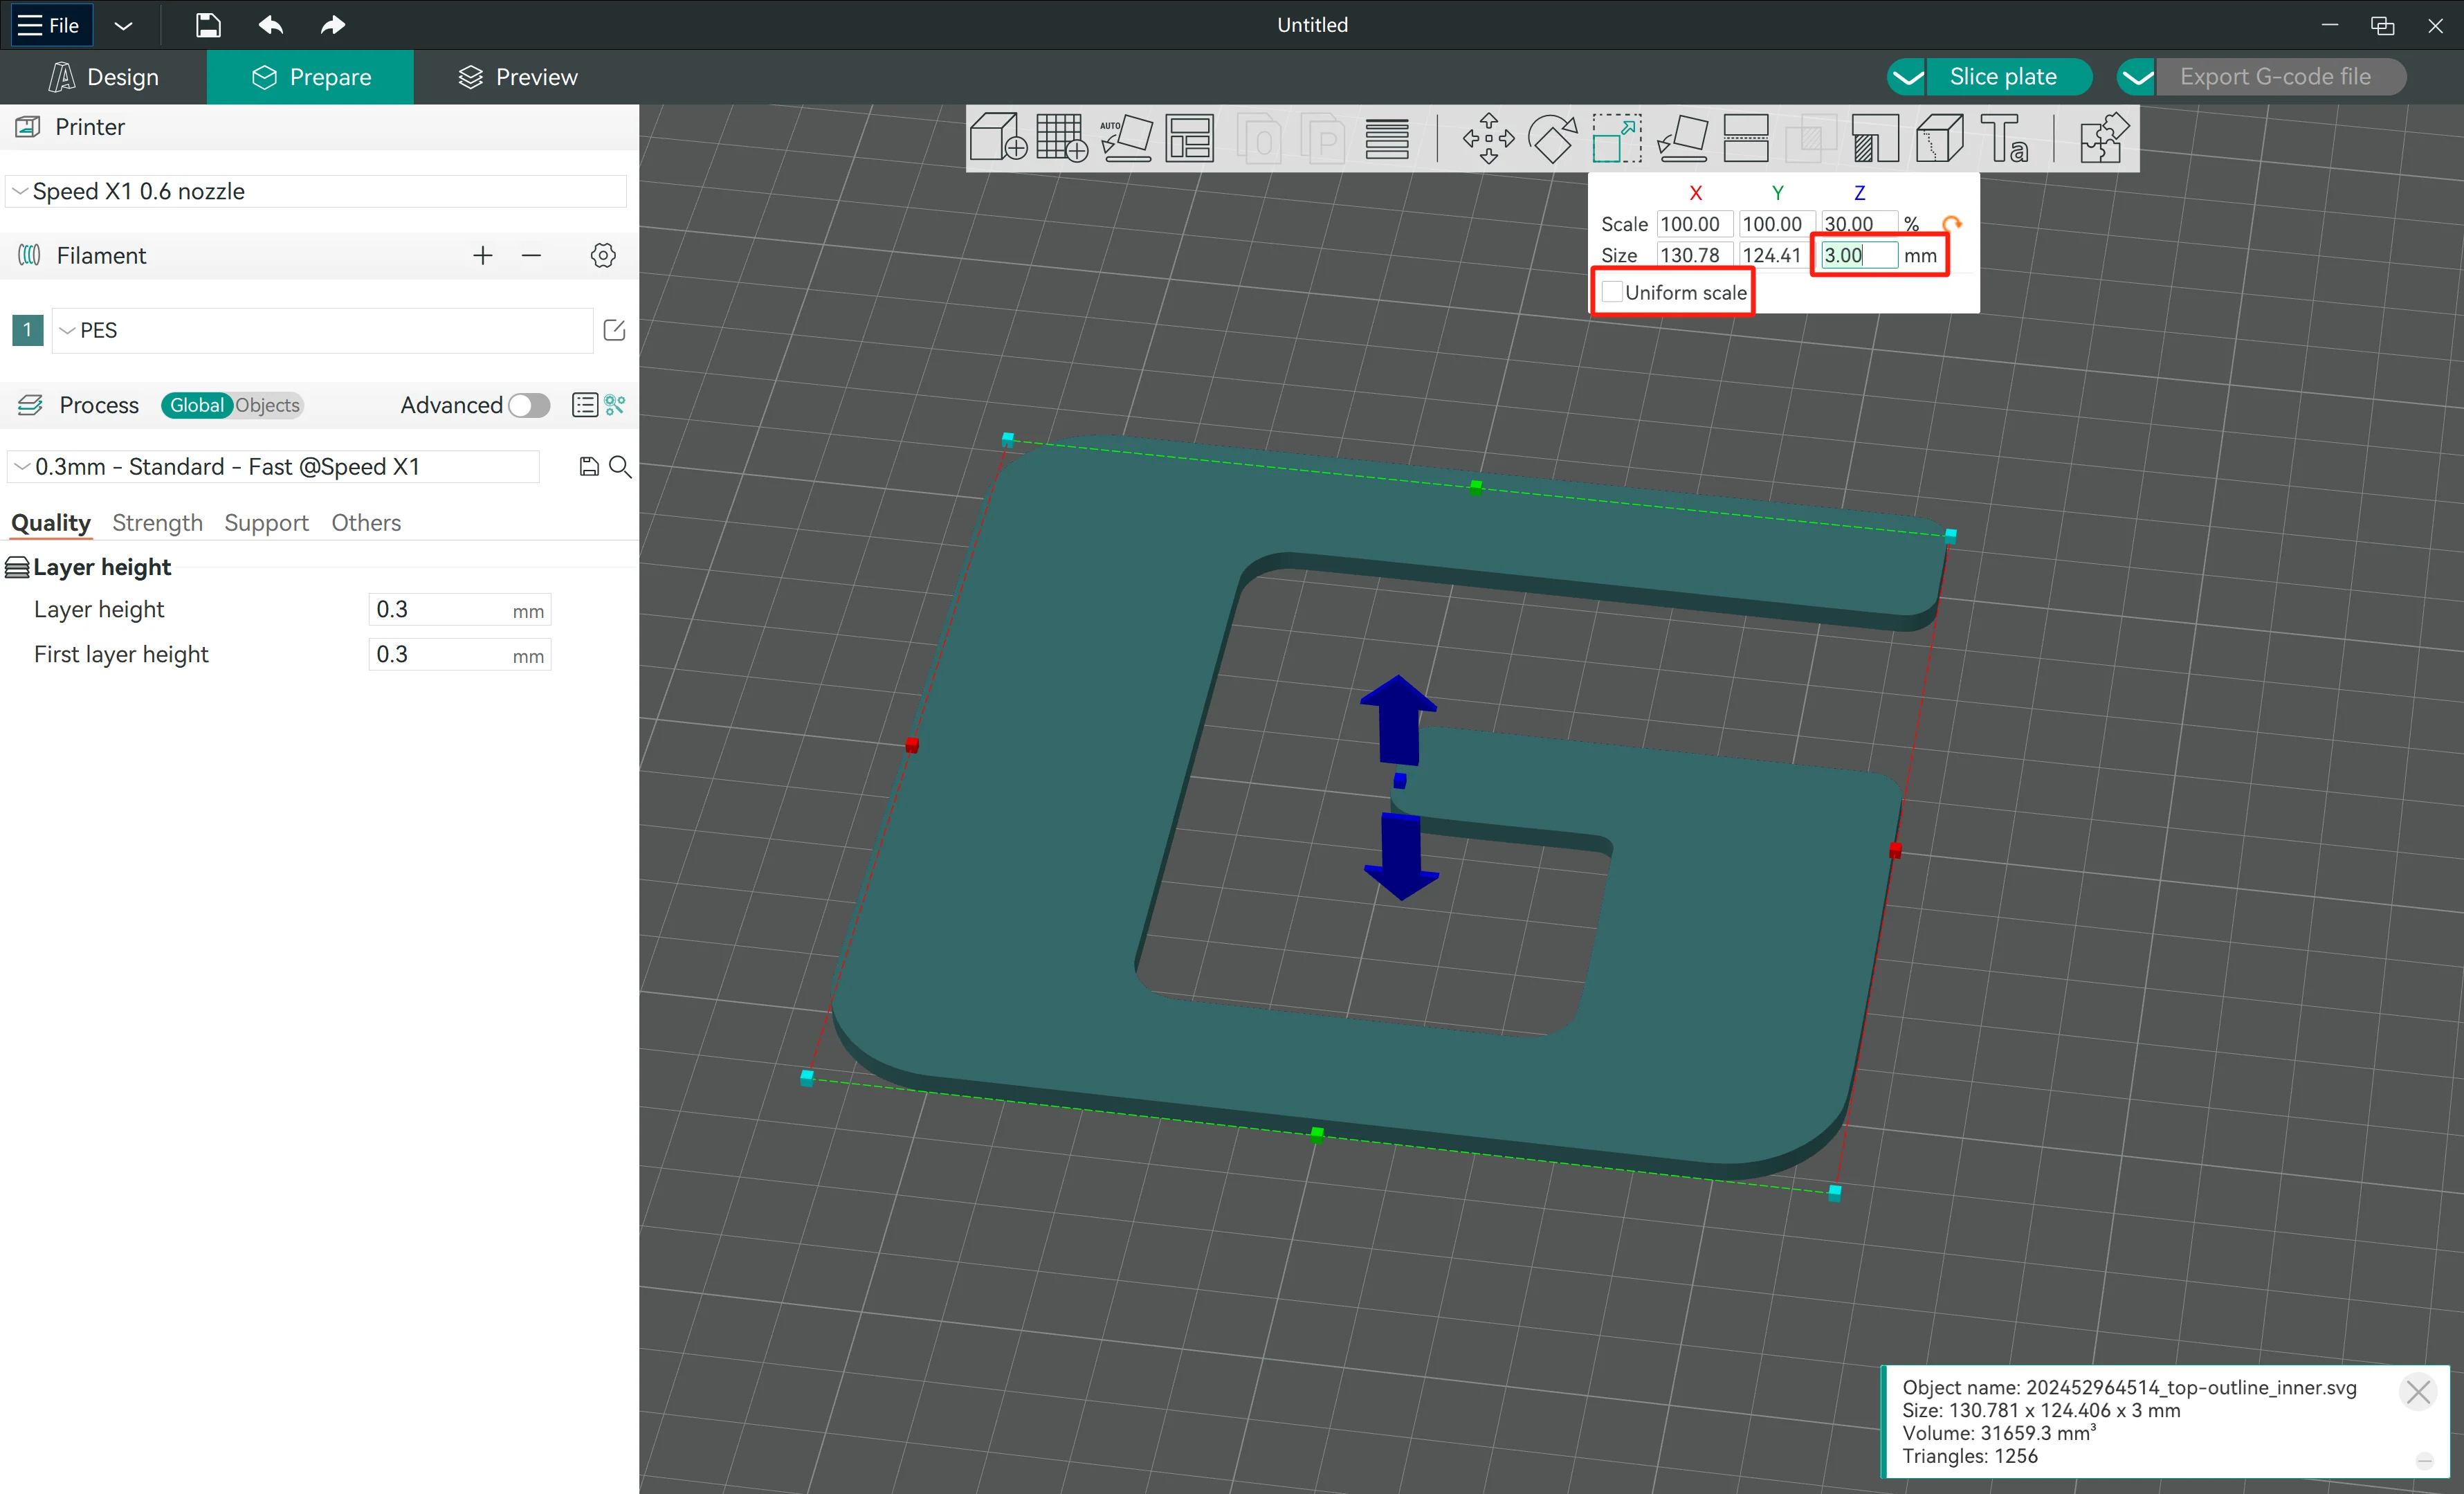 |
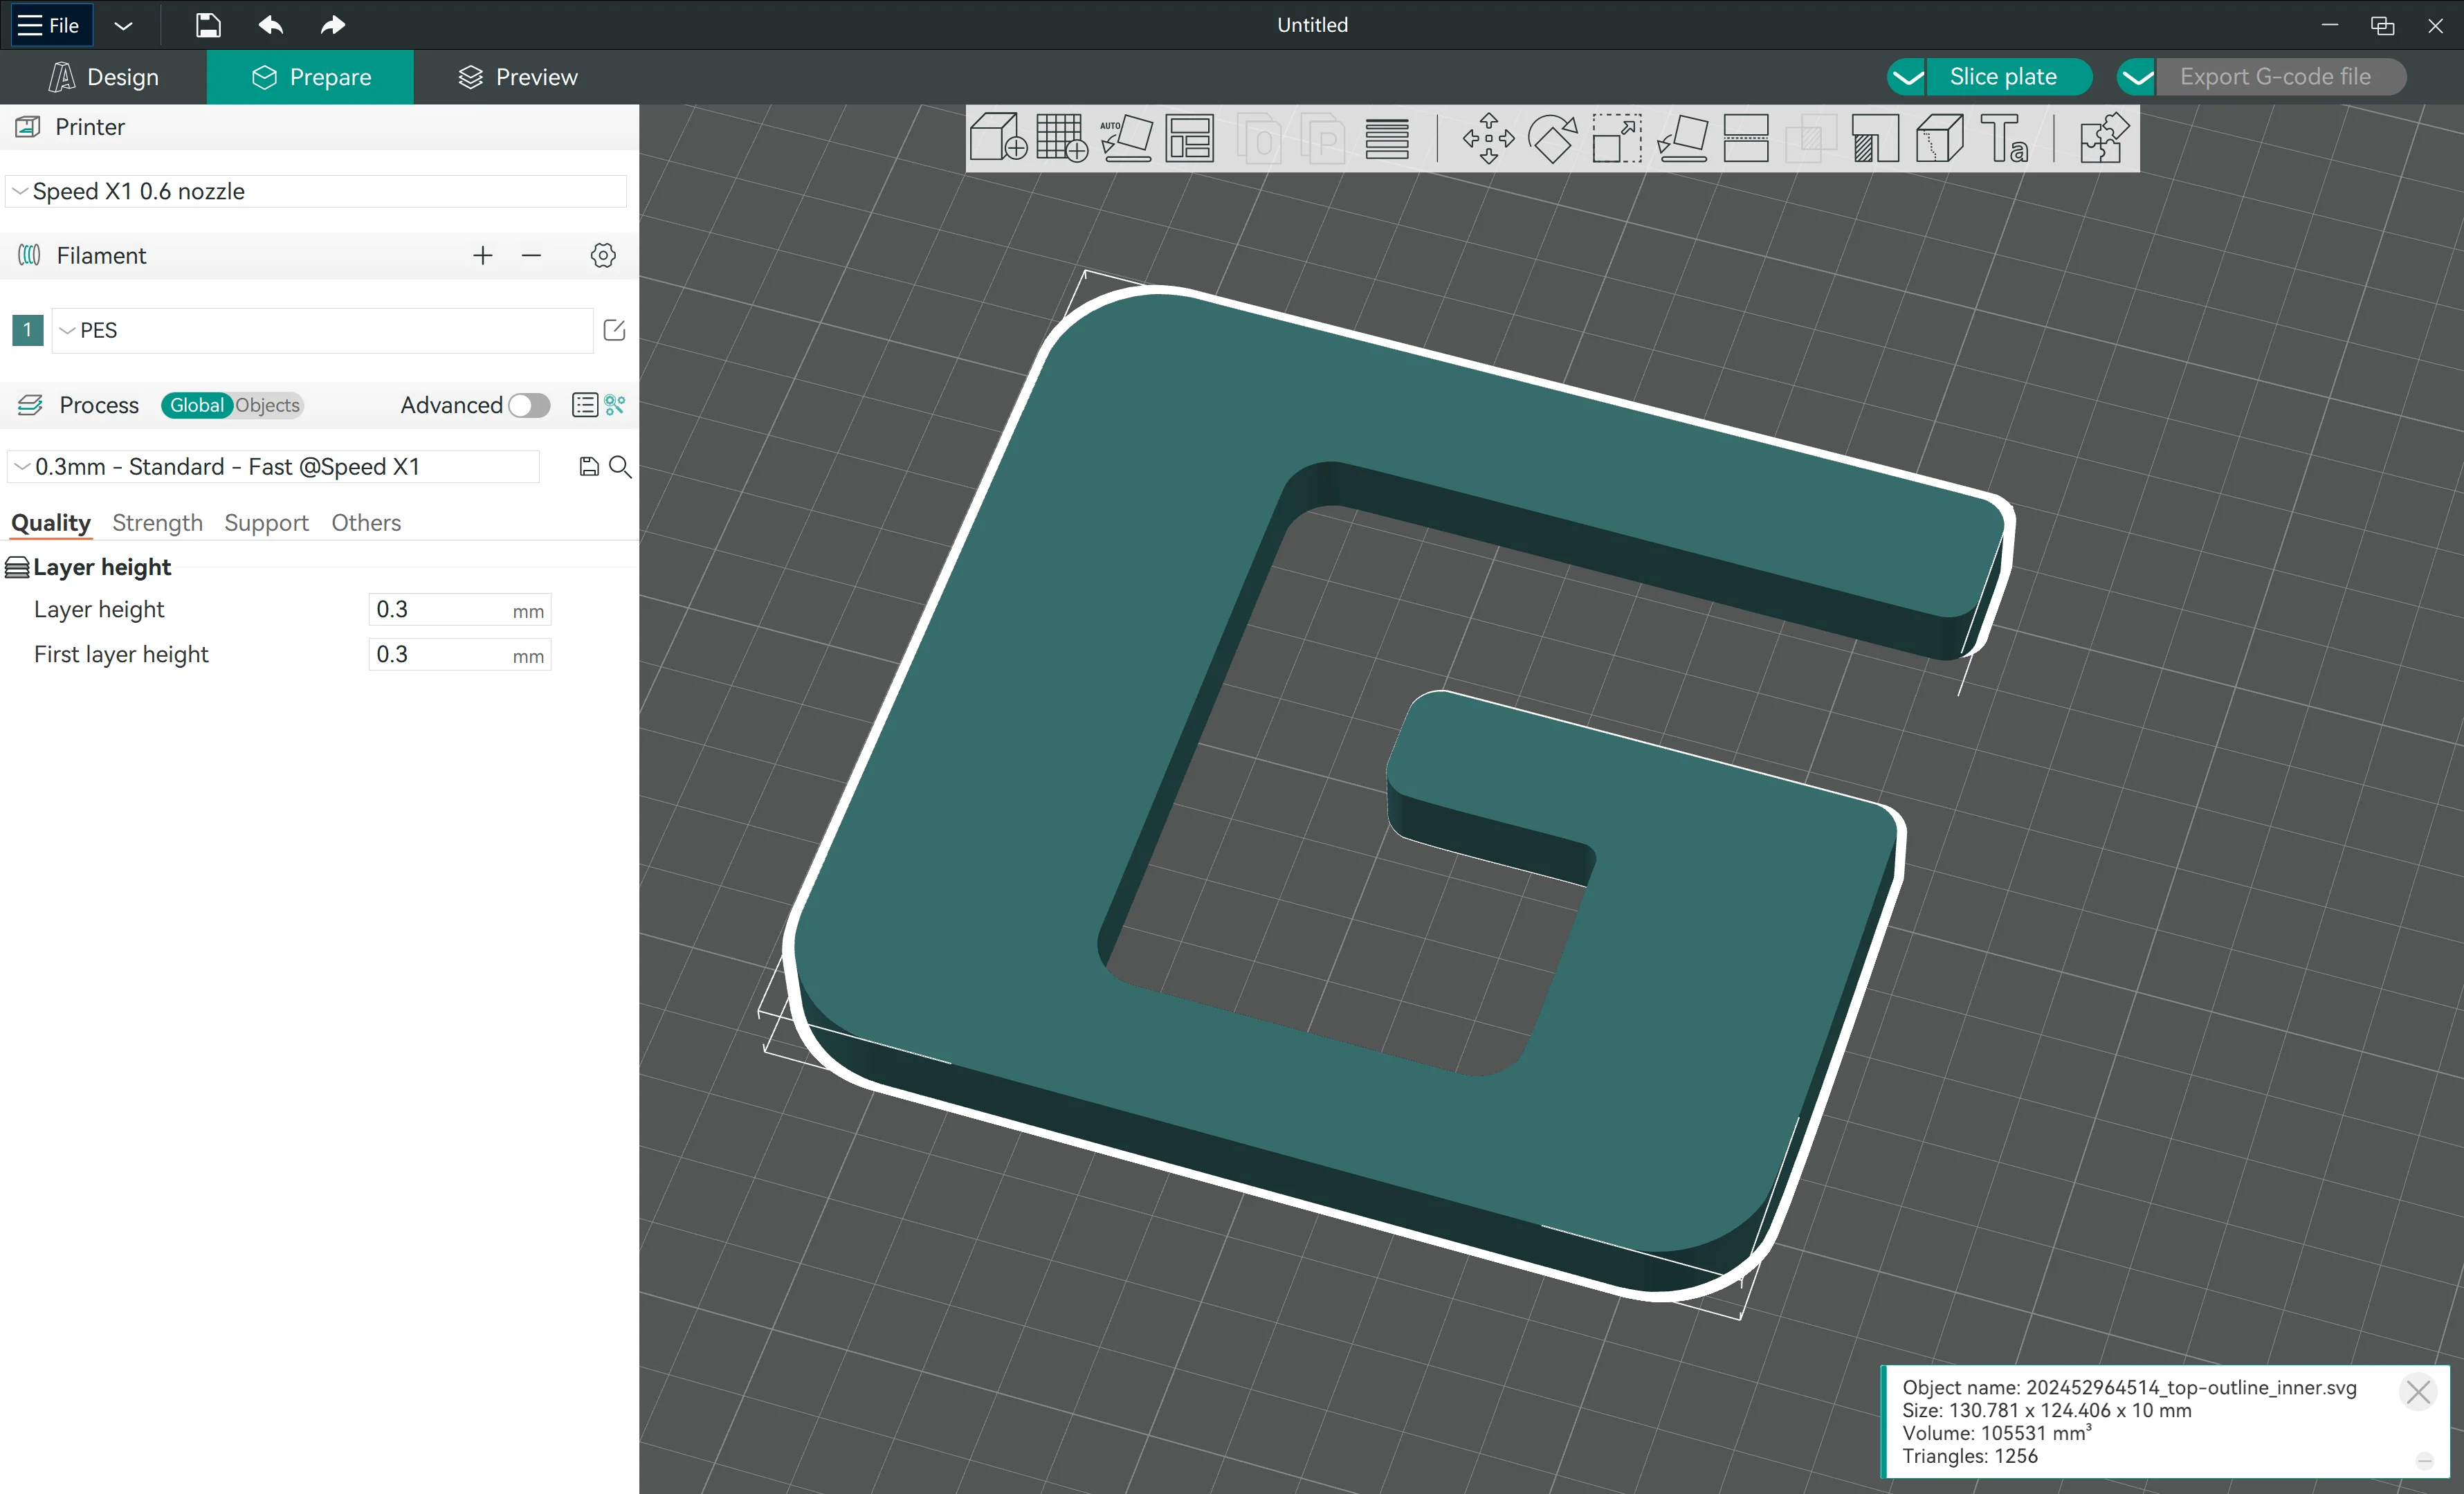
- Import the SVG into the slicer: "File → Import→Import STL/STEP/SVG/OBJ/AMF"
- Select the "Scale" tool on the tool bar
- Unselect "Uniform scale" first, then set the Z size to the proper thickness of the backing, let's say 3mm
¶ 3.1 Solid face
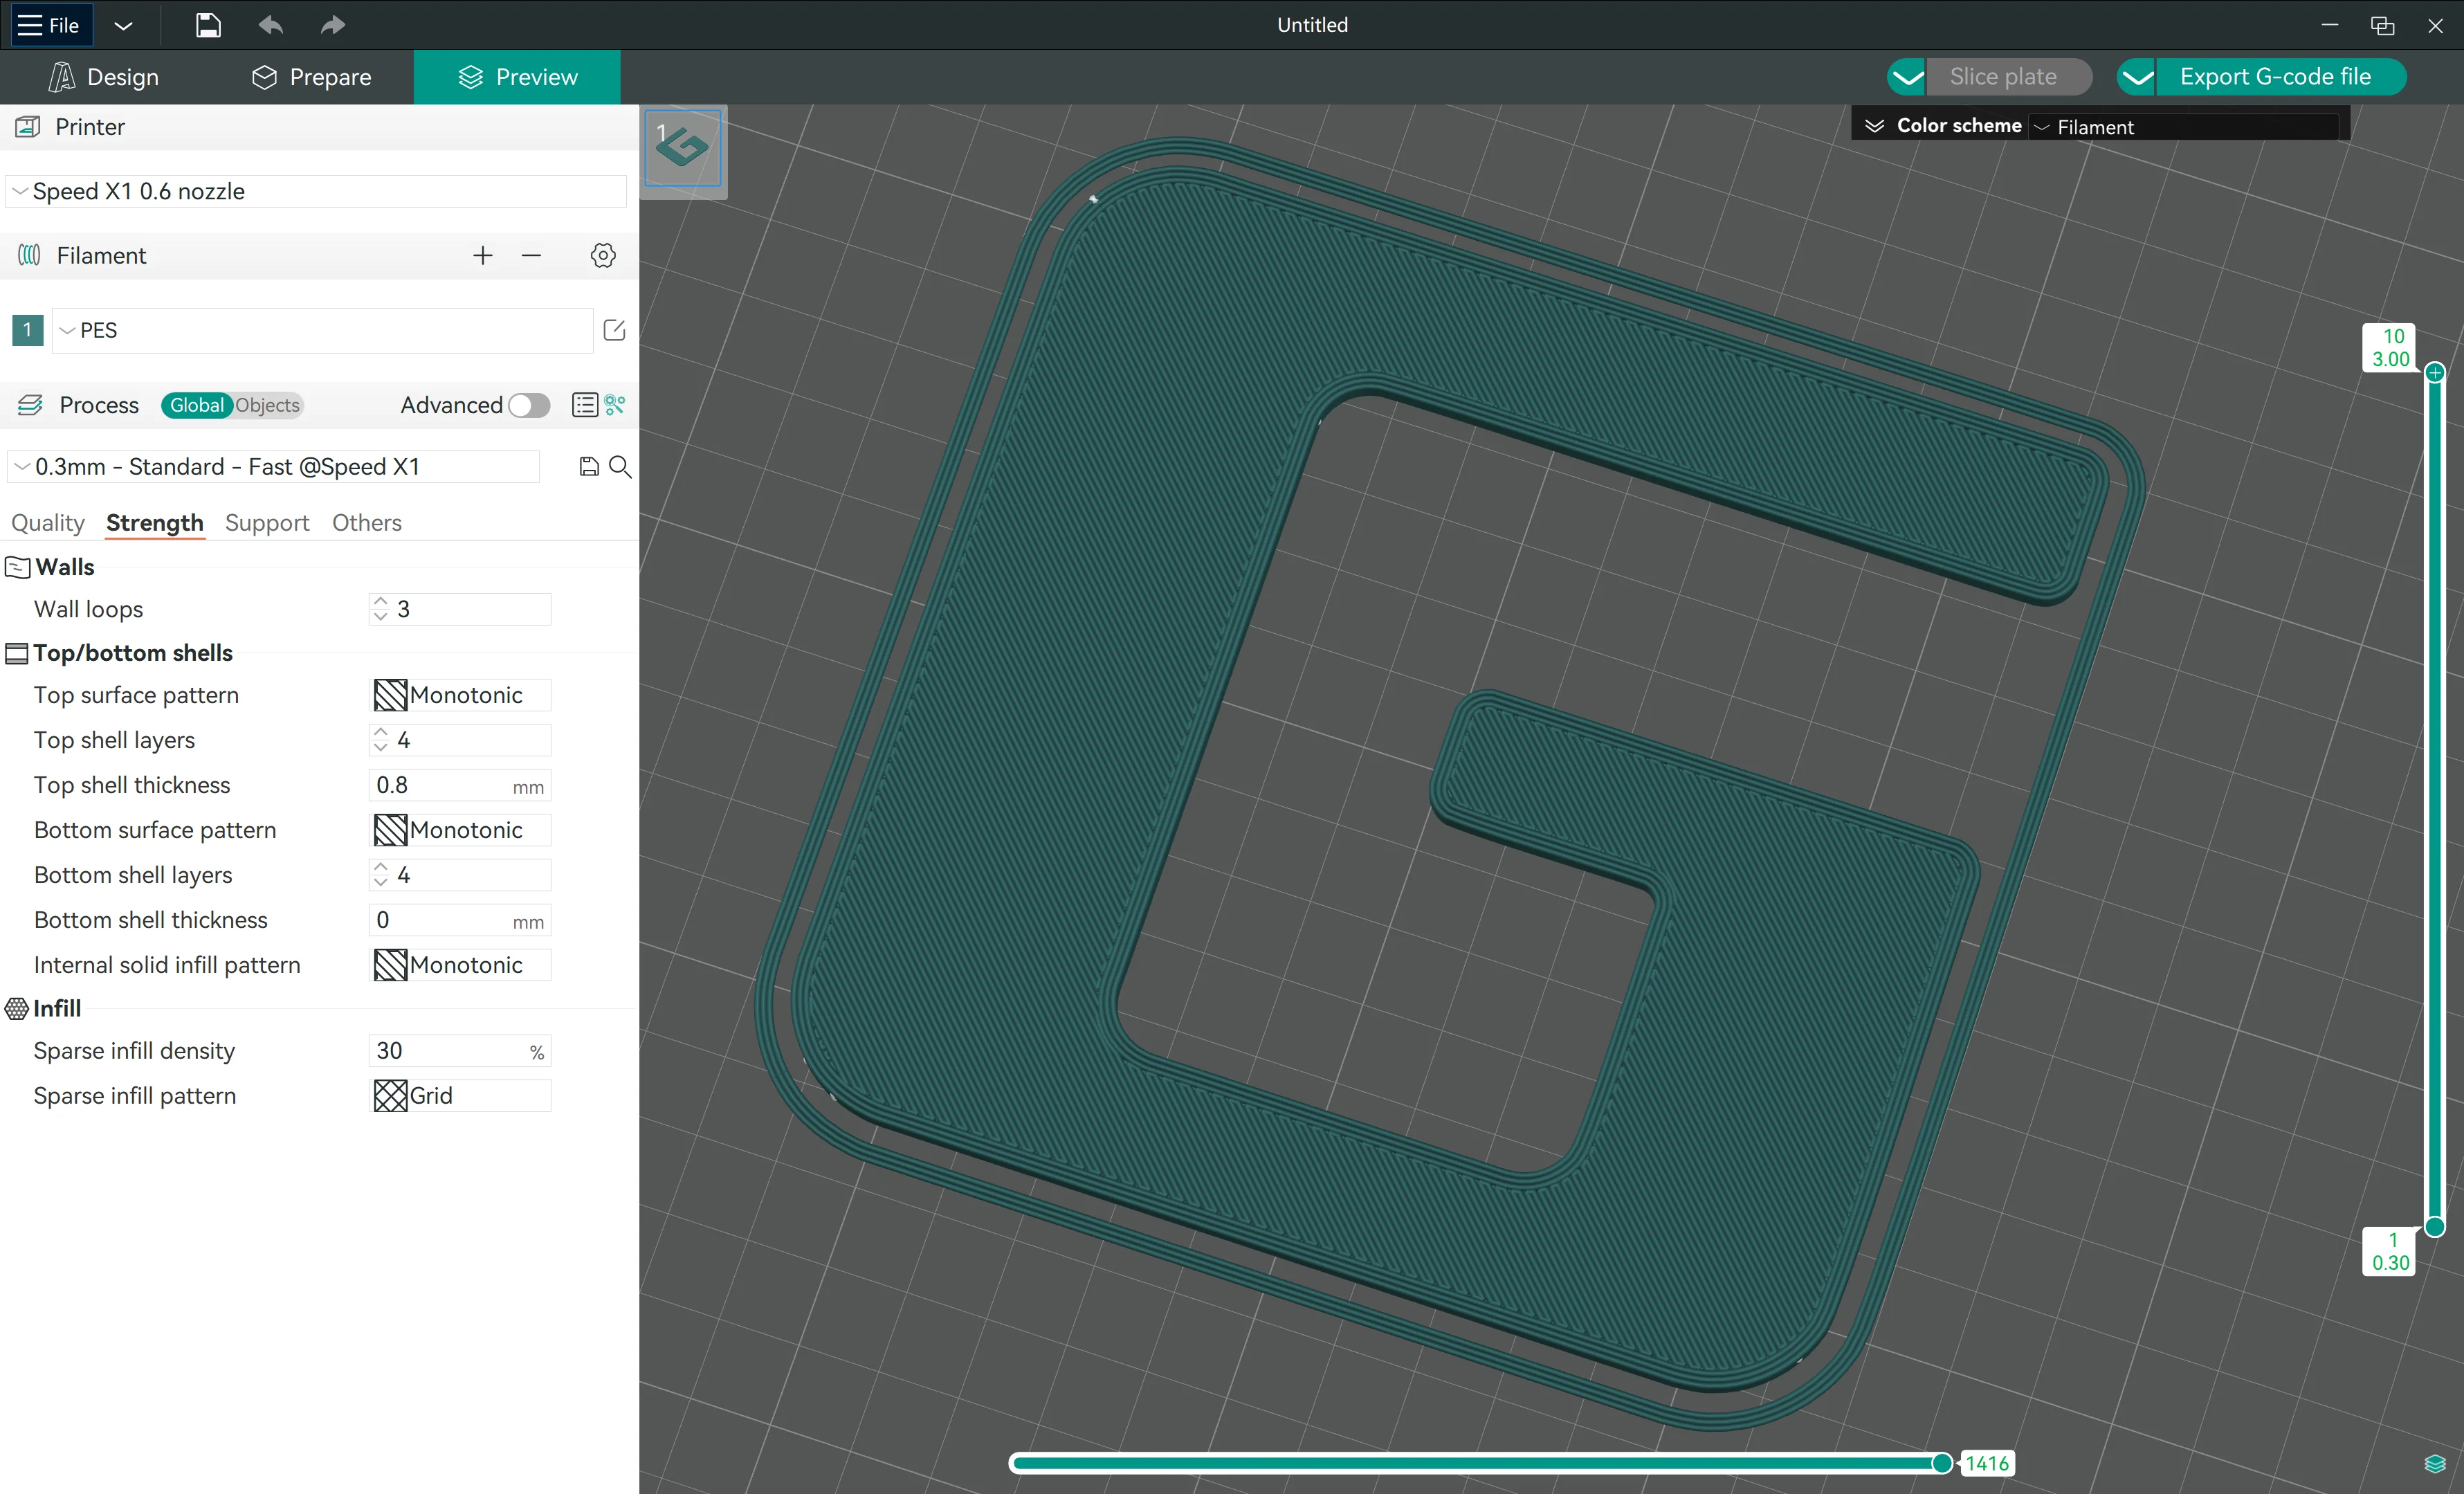
Slice with the default settings to 3D print a solid backing.
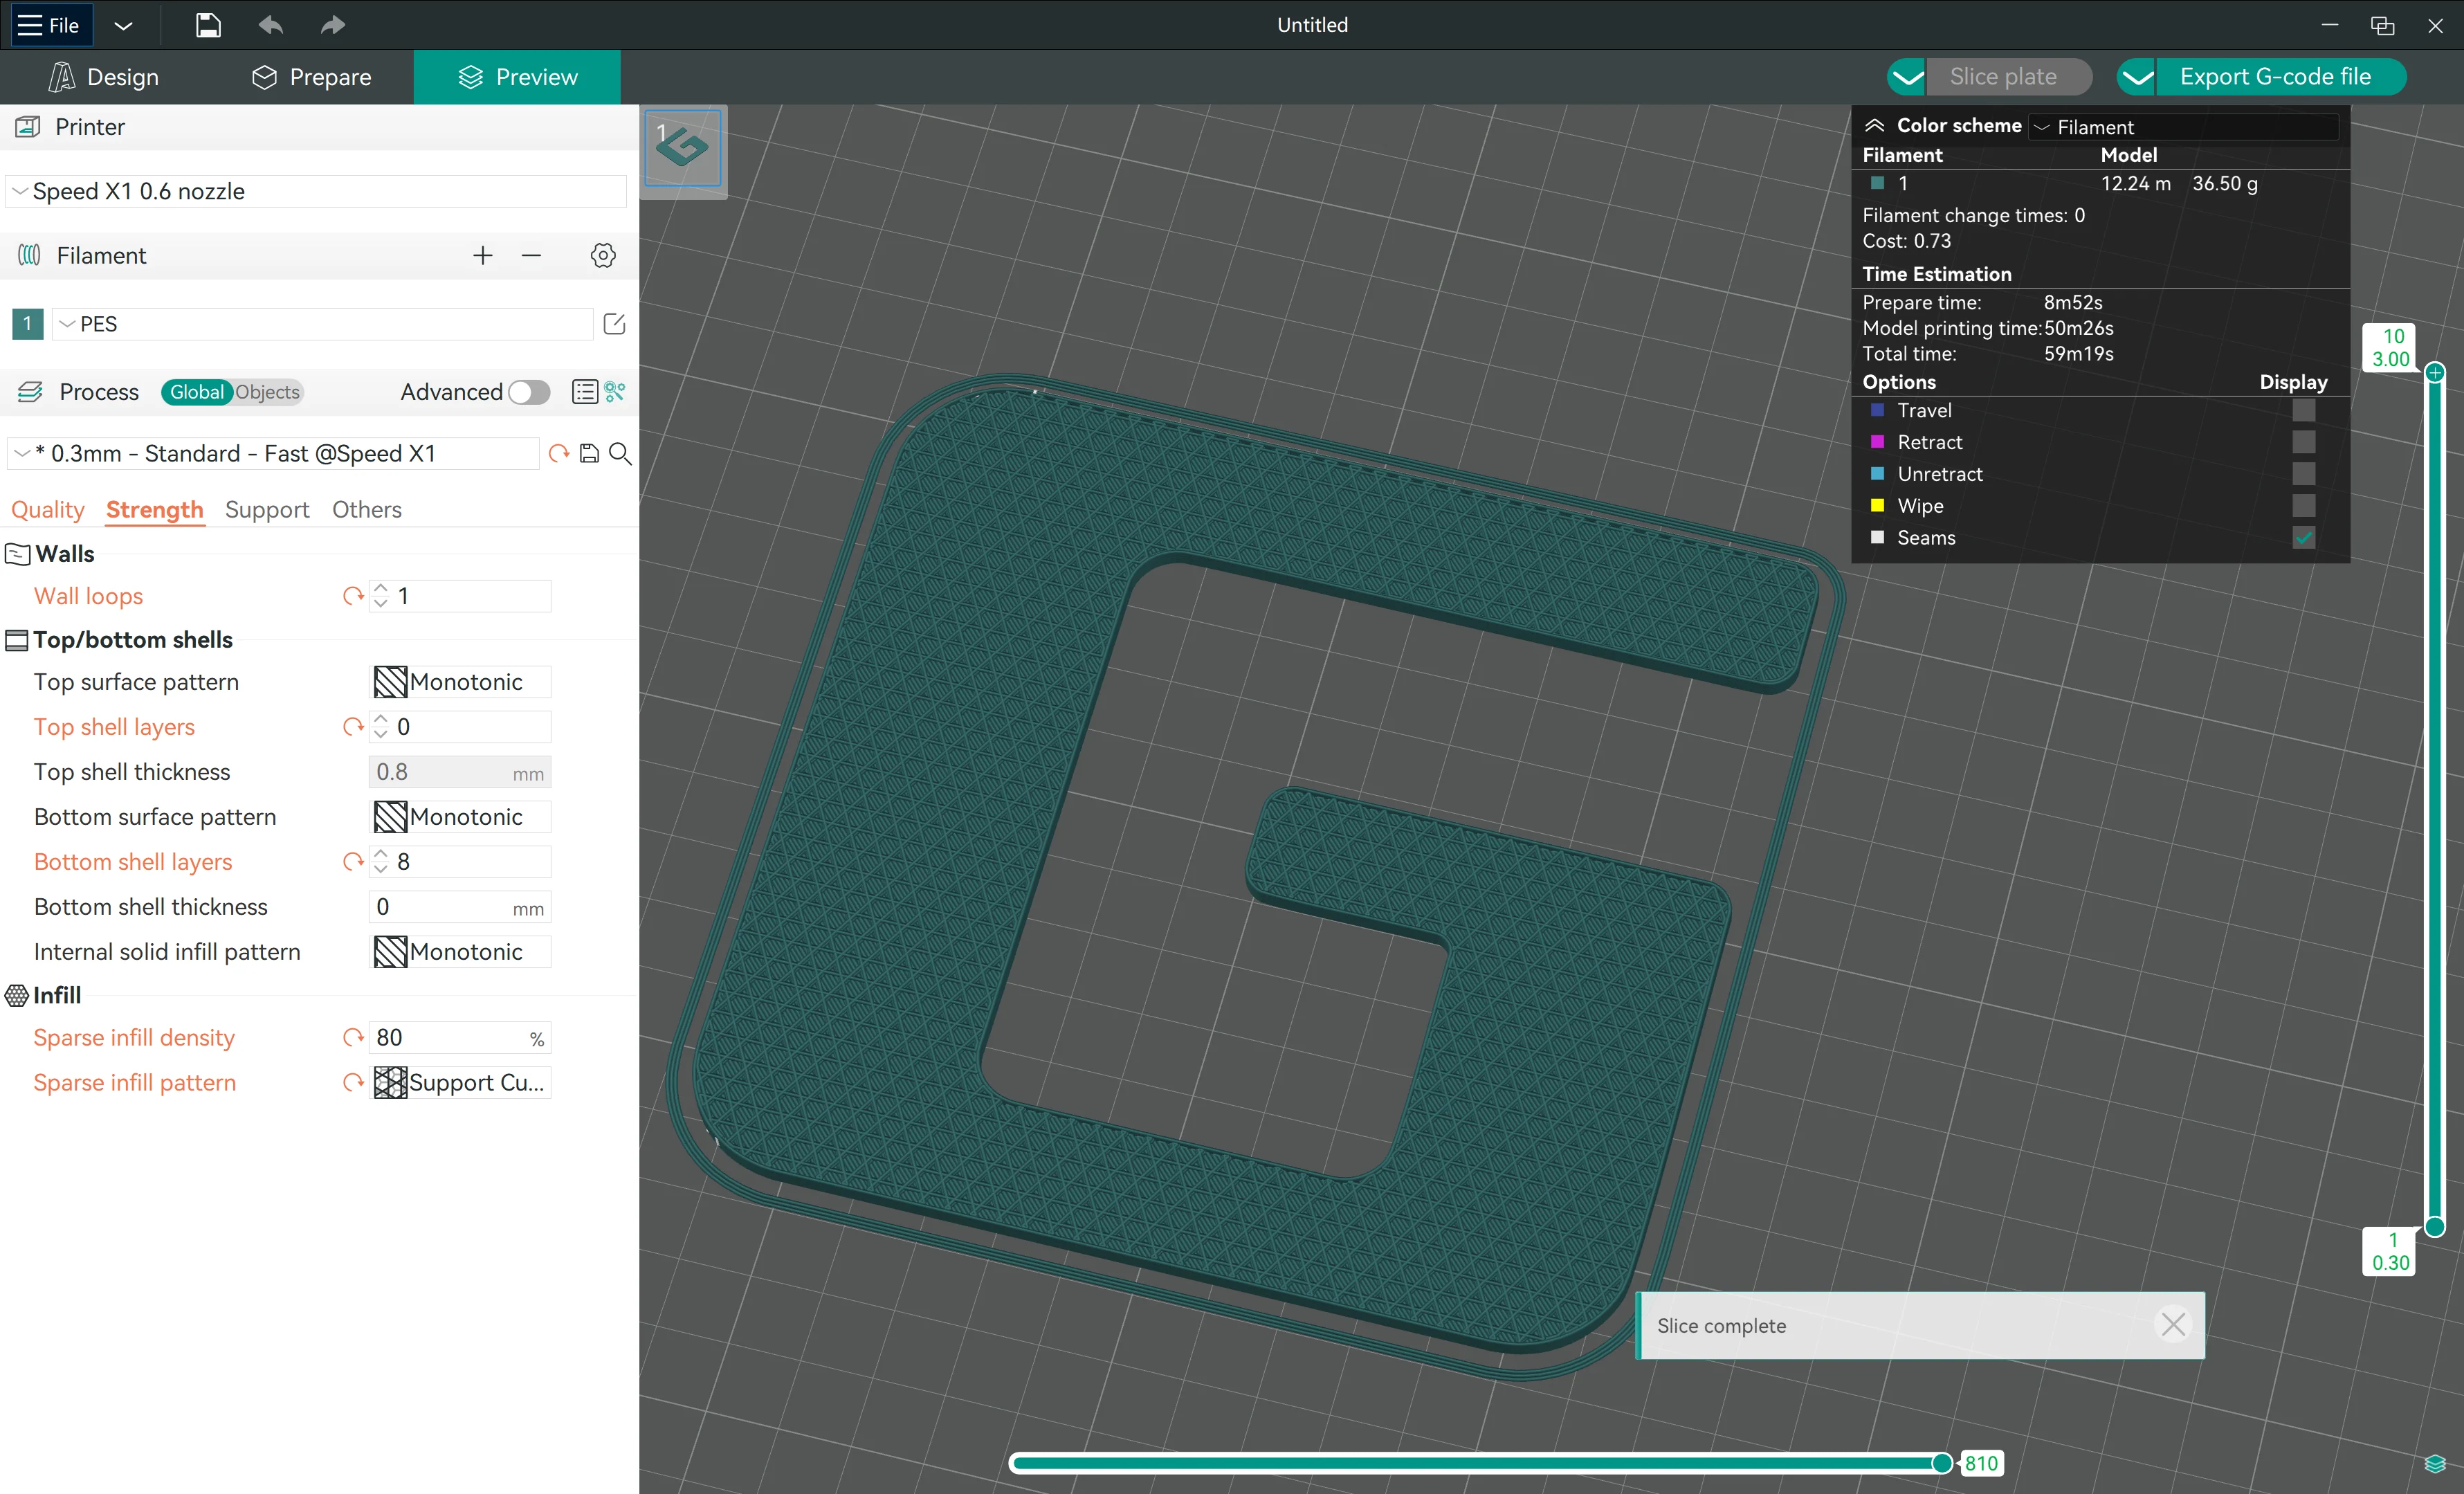
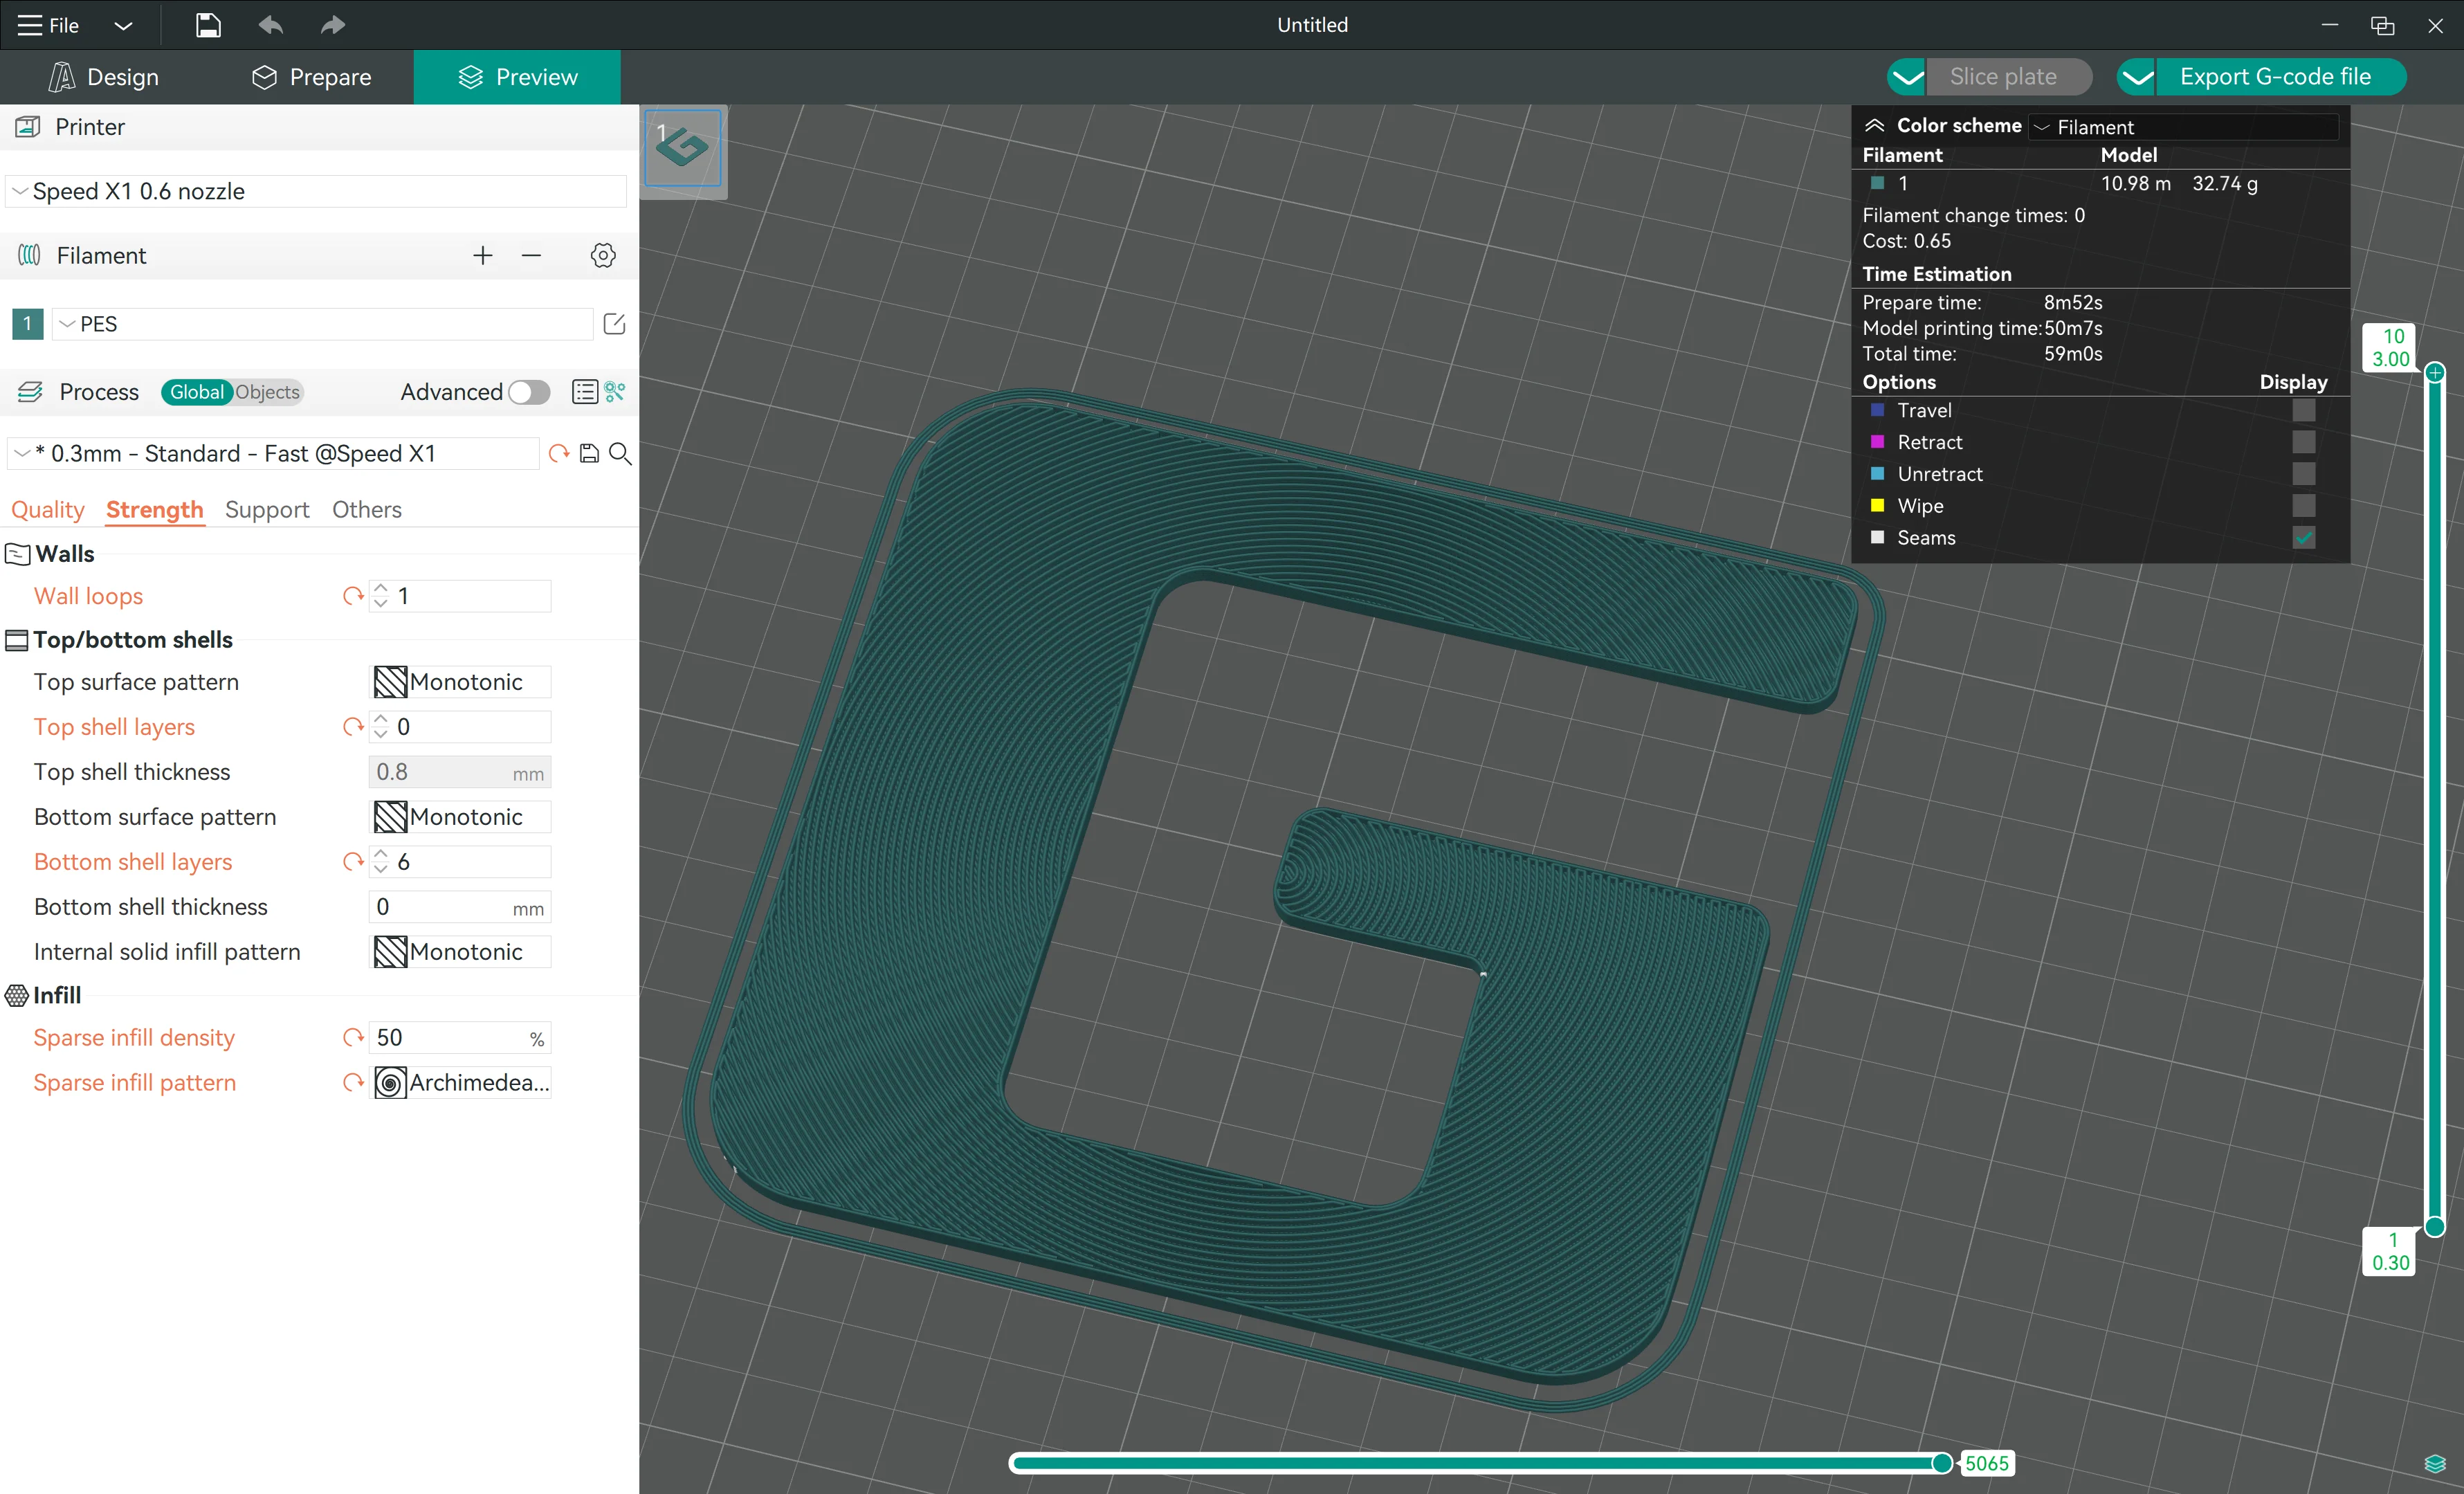
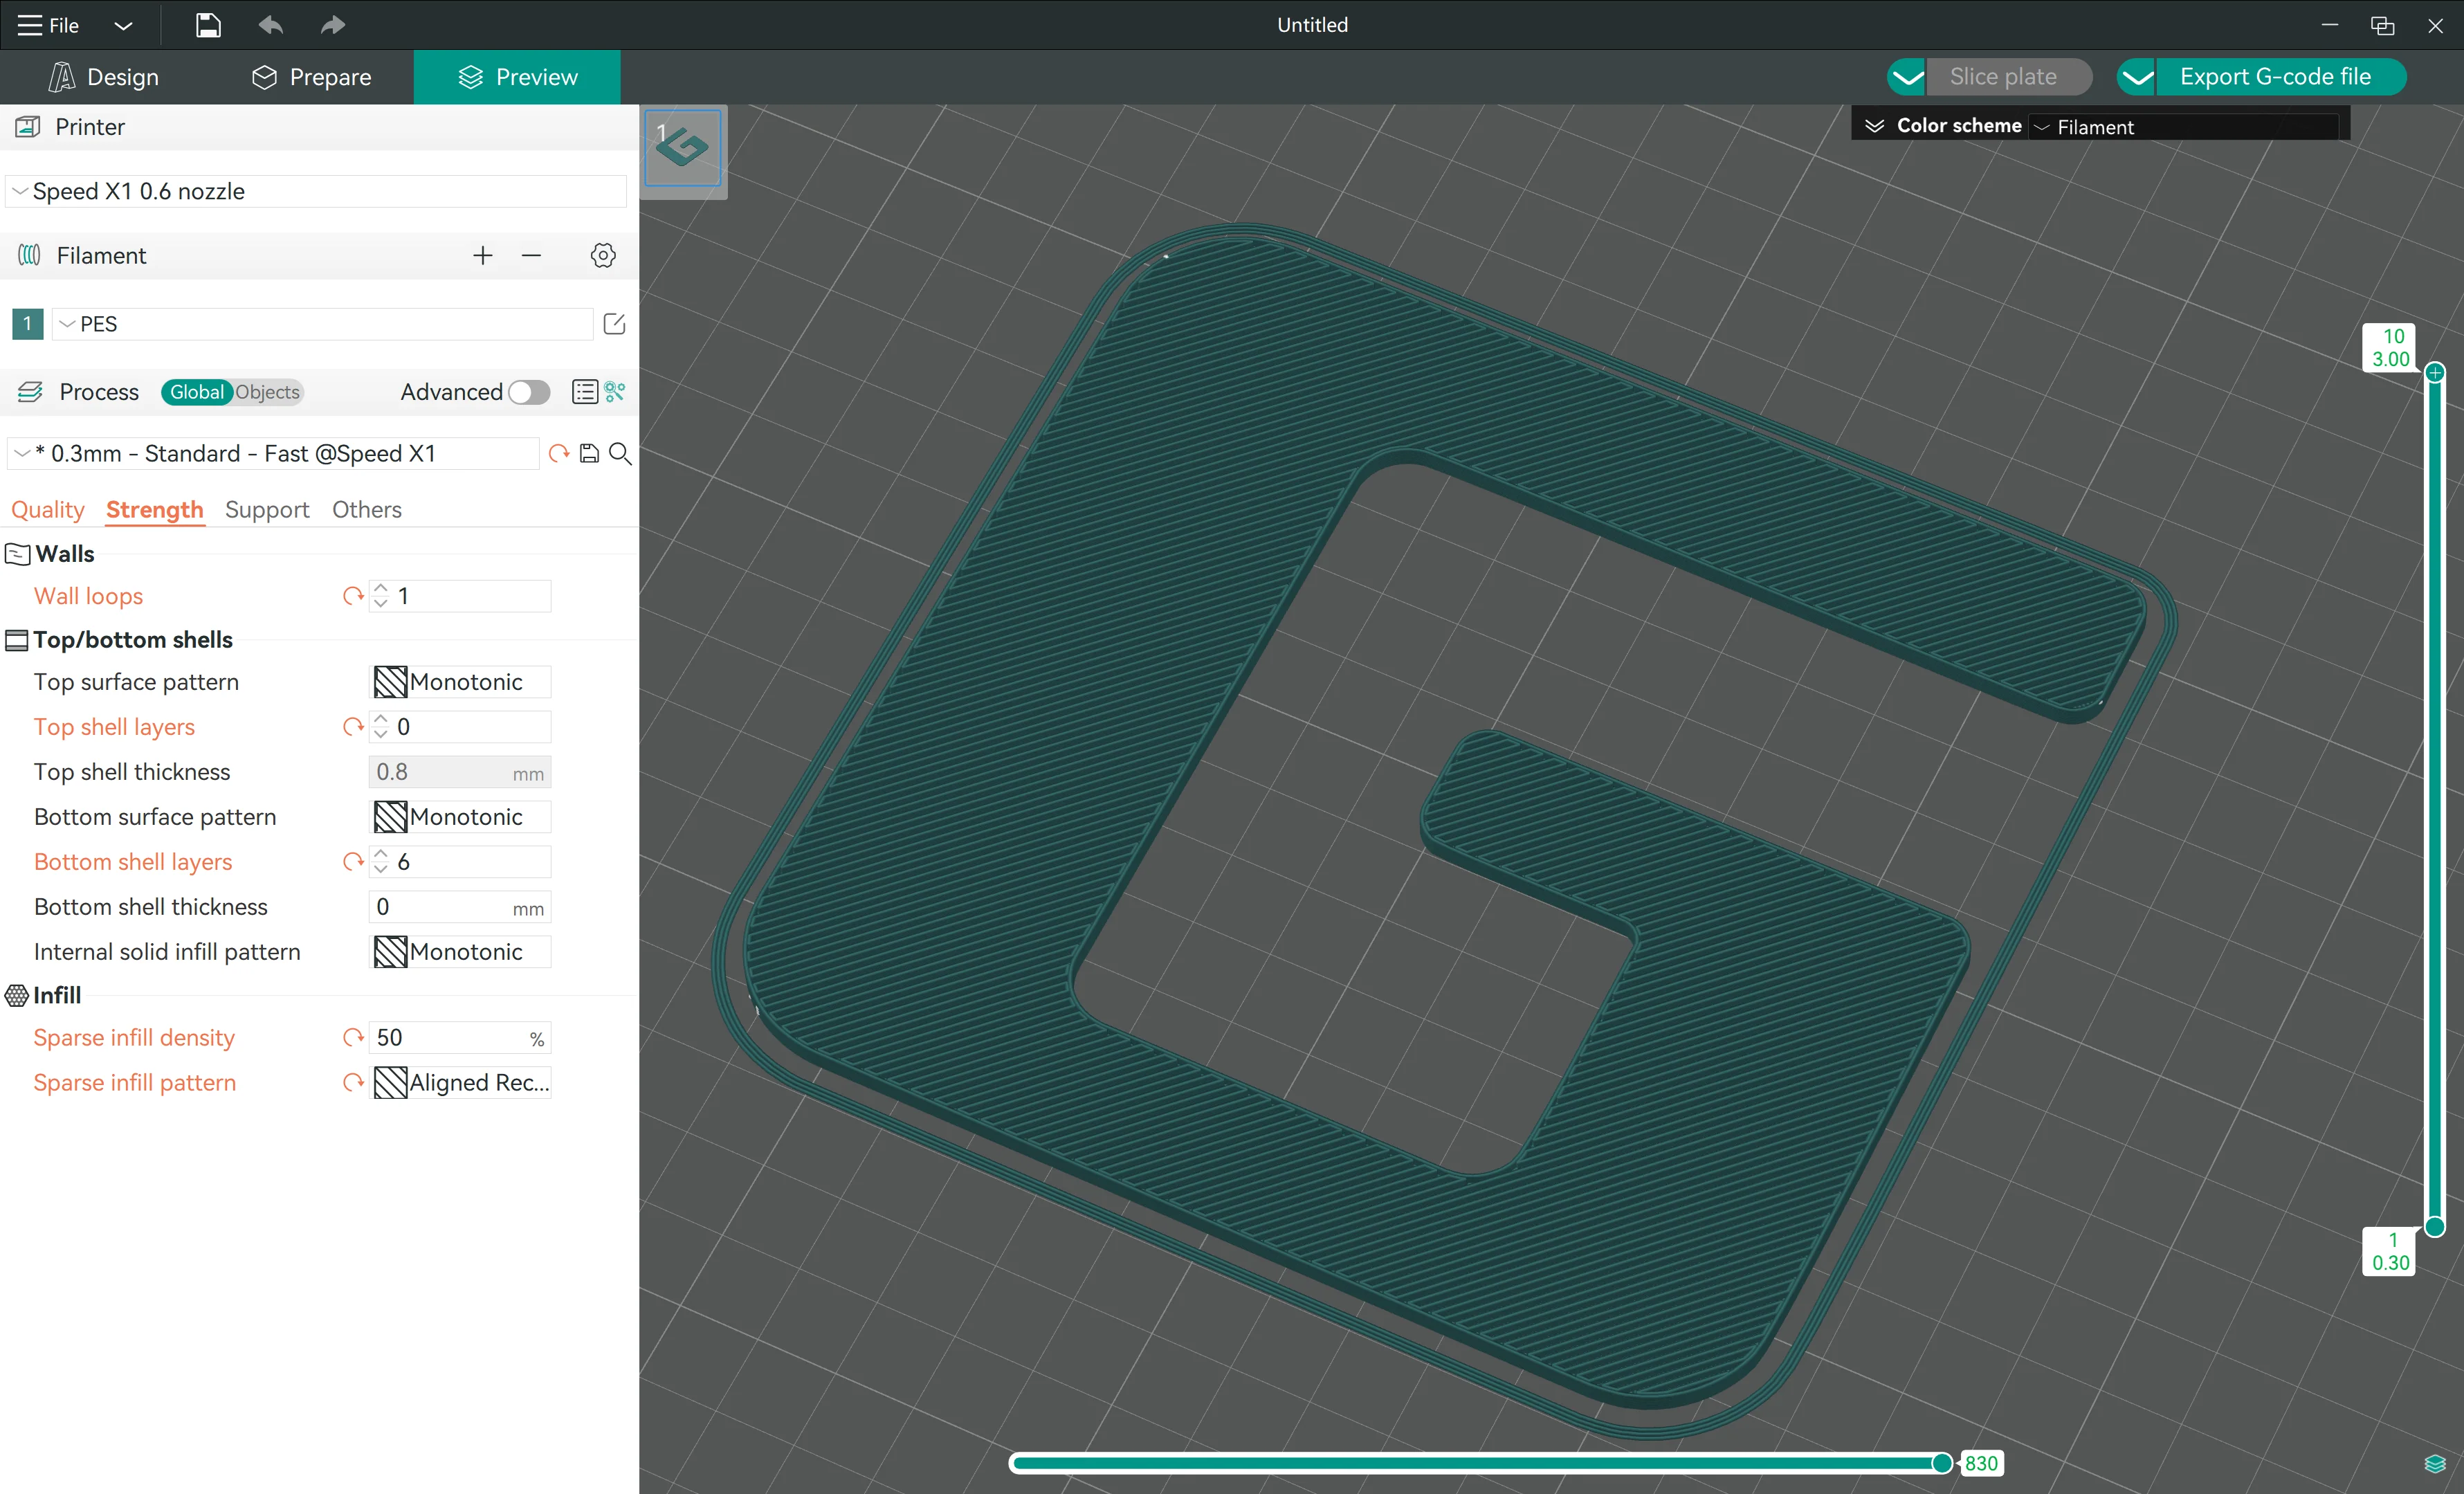
¶ 3.2 Textured face, Type A, B, C, D
 |
 |
 |
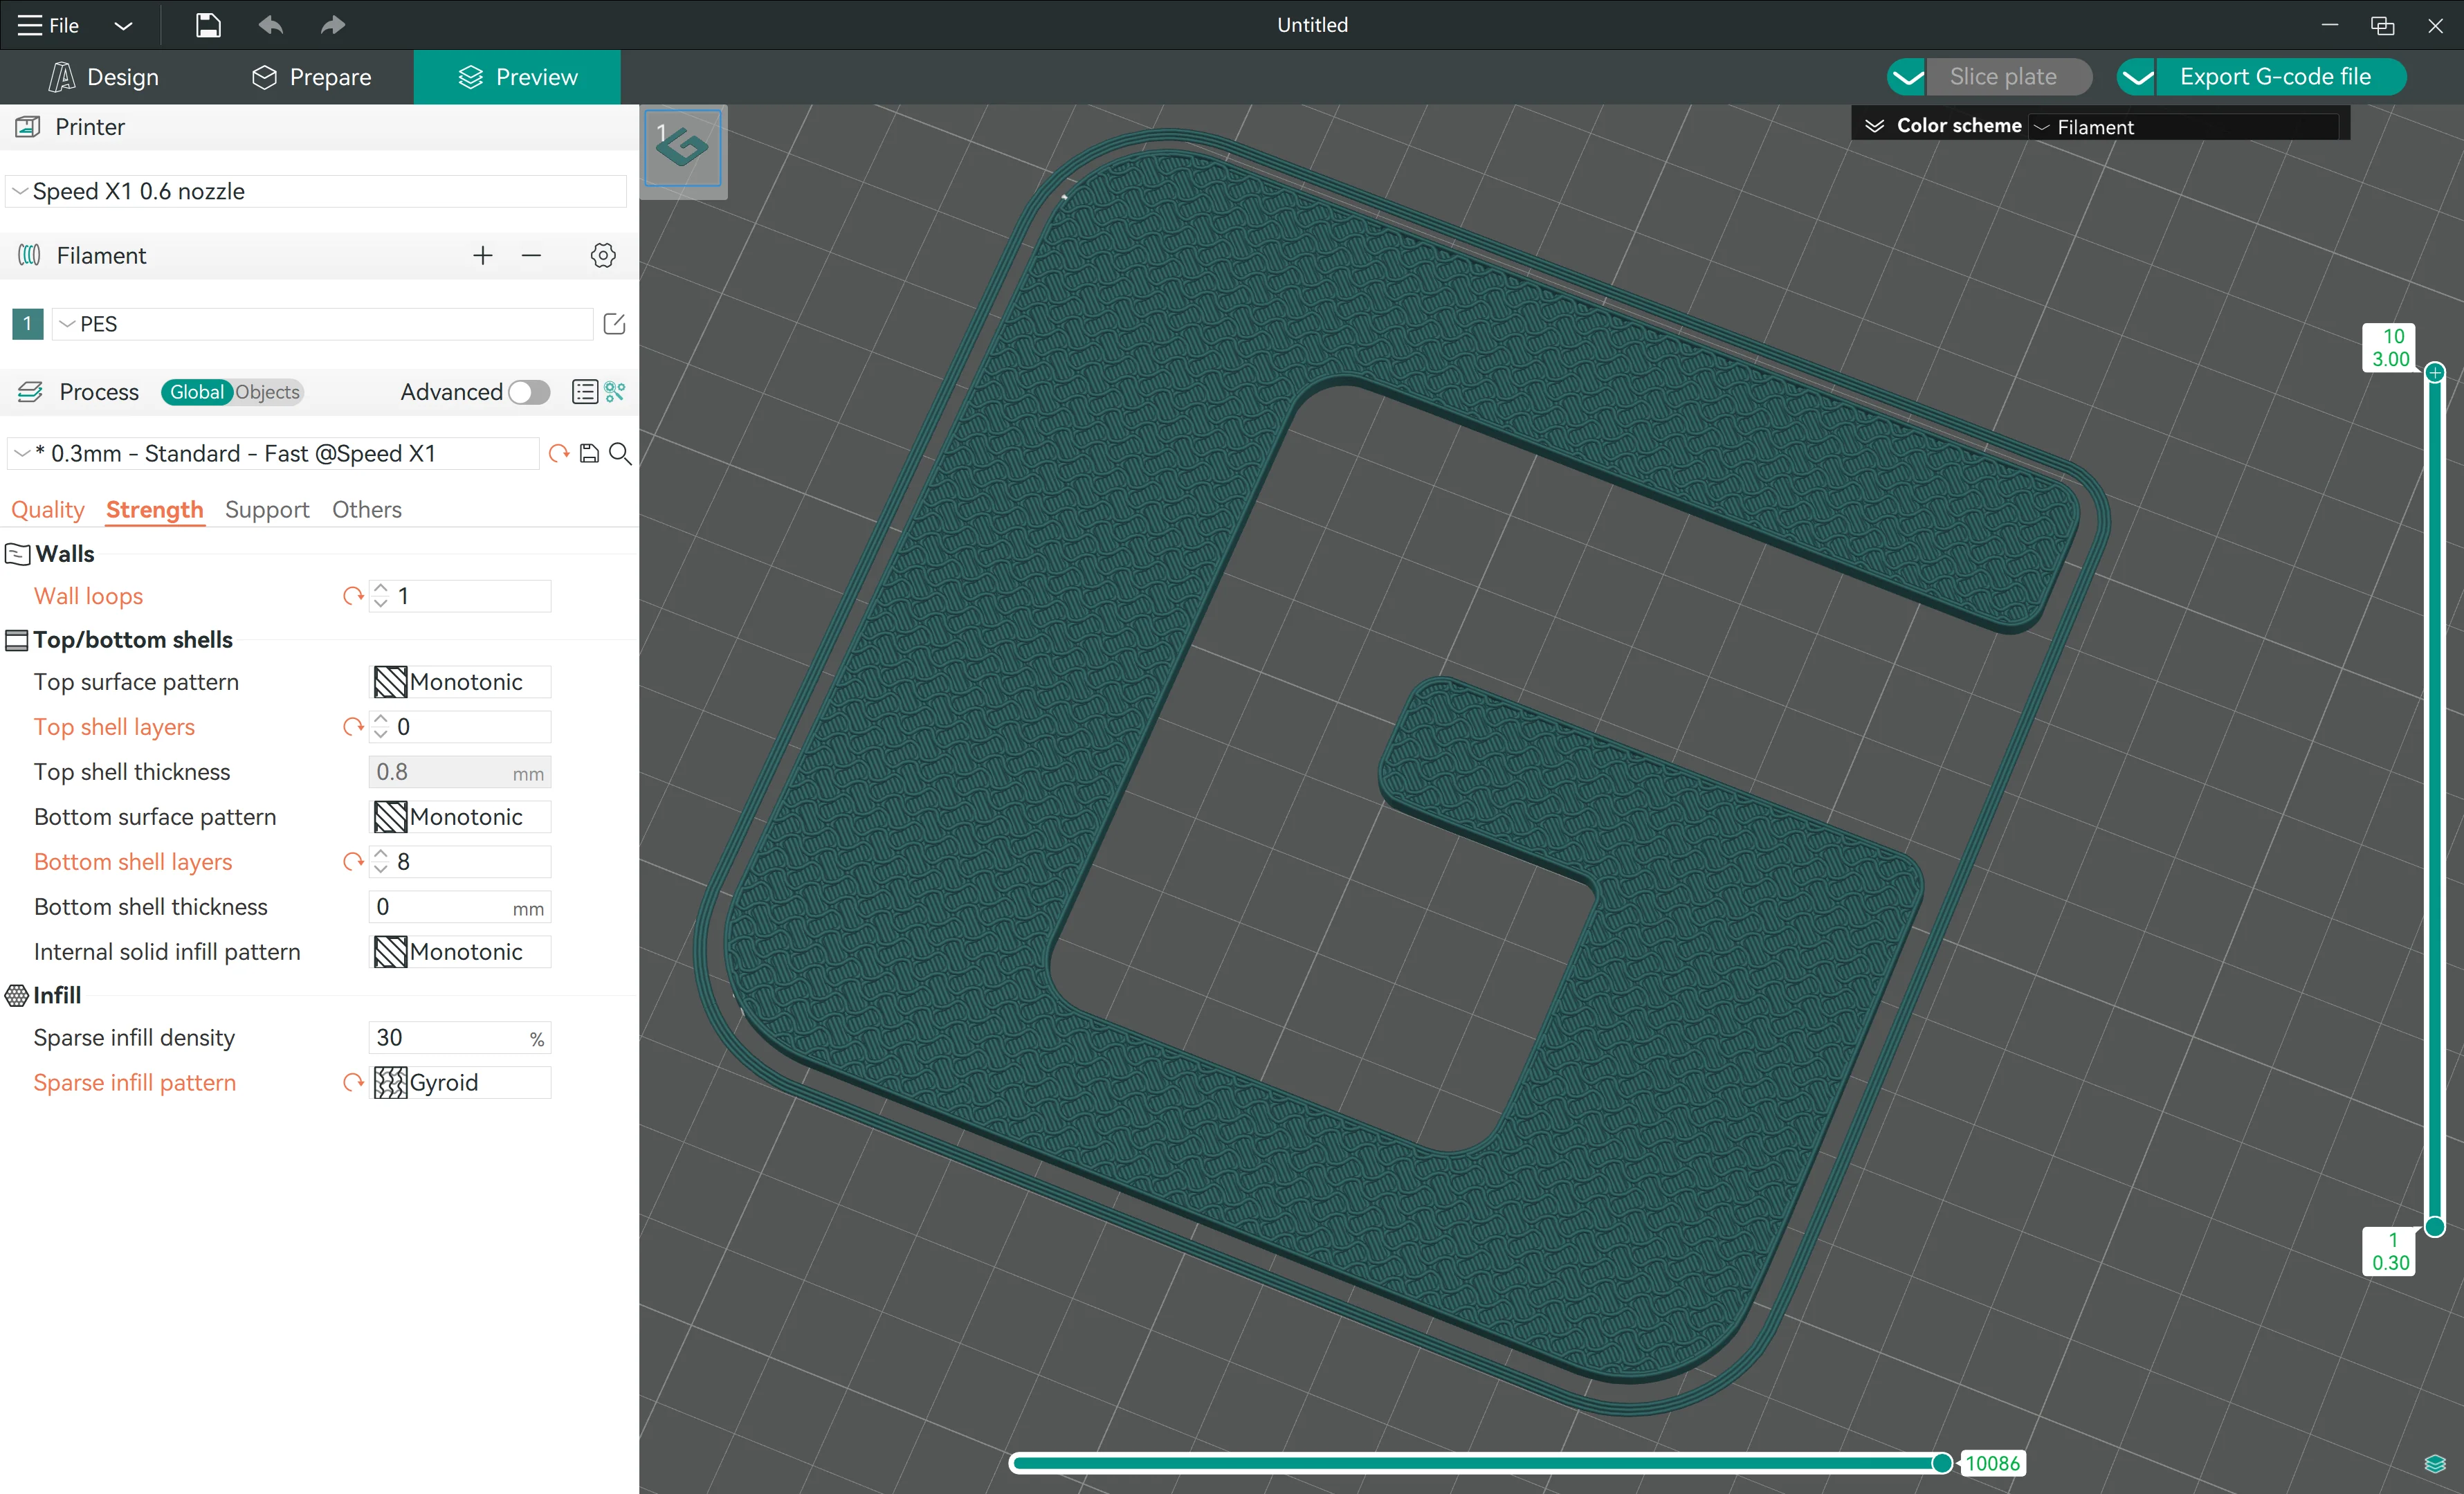 |
Please click to enlarge the photos to check the slice settings.
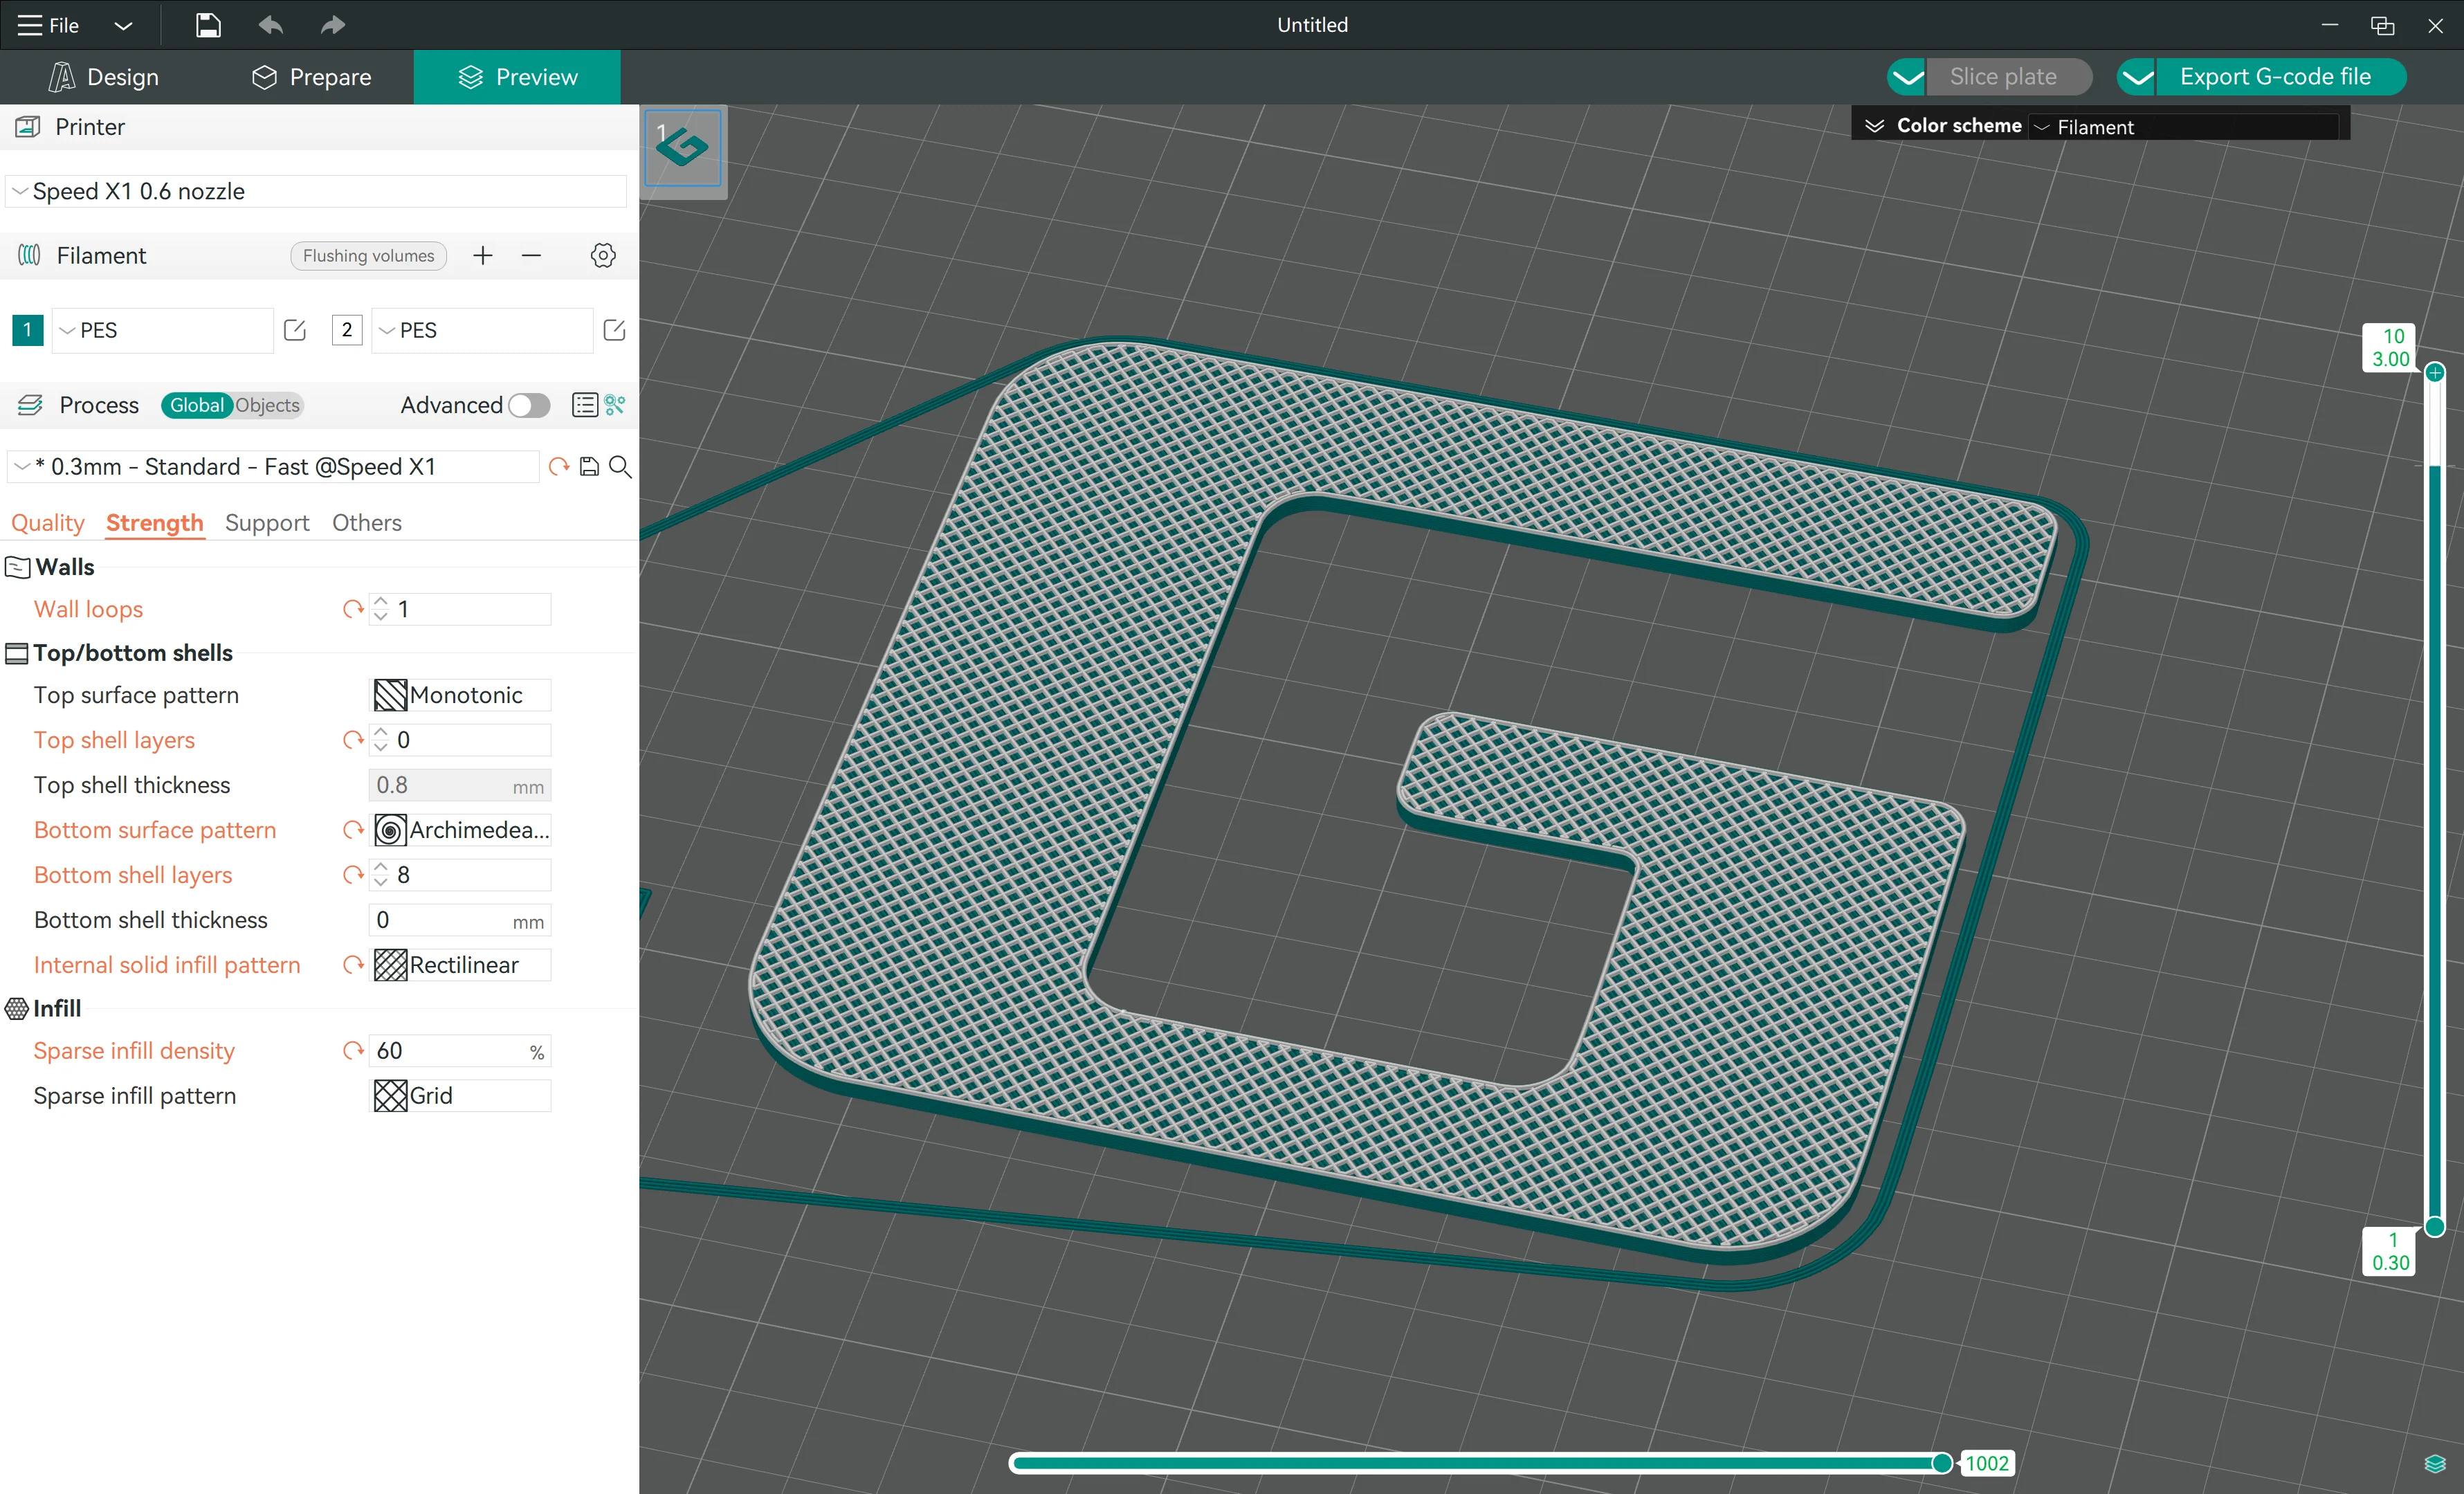
¶ 3.3 Textured face, dual color printing
 |
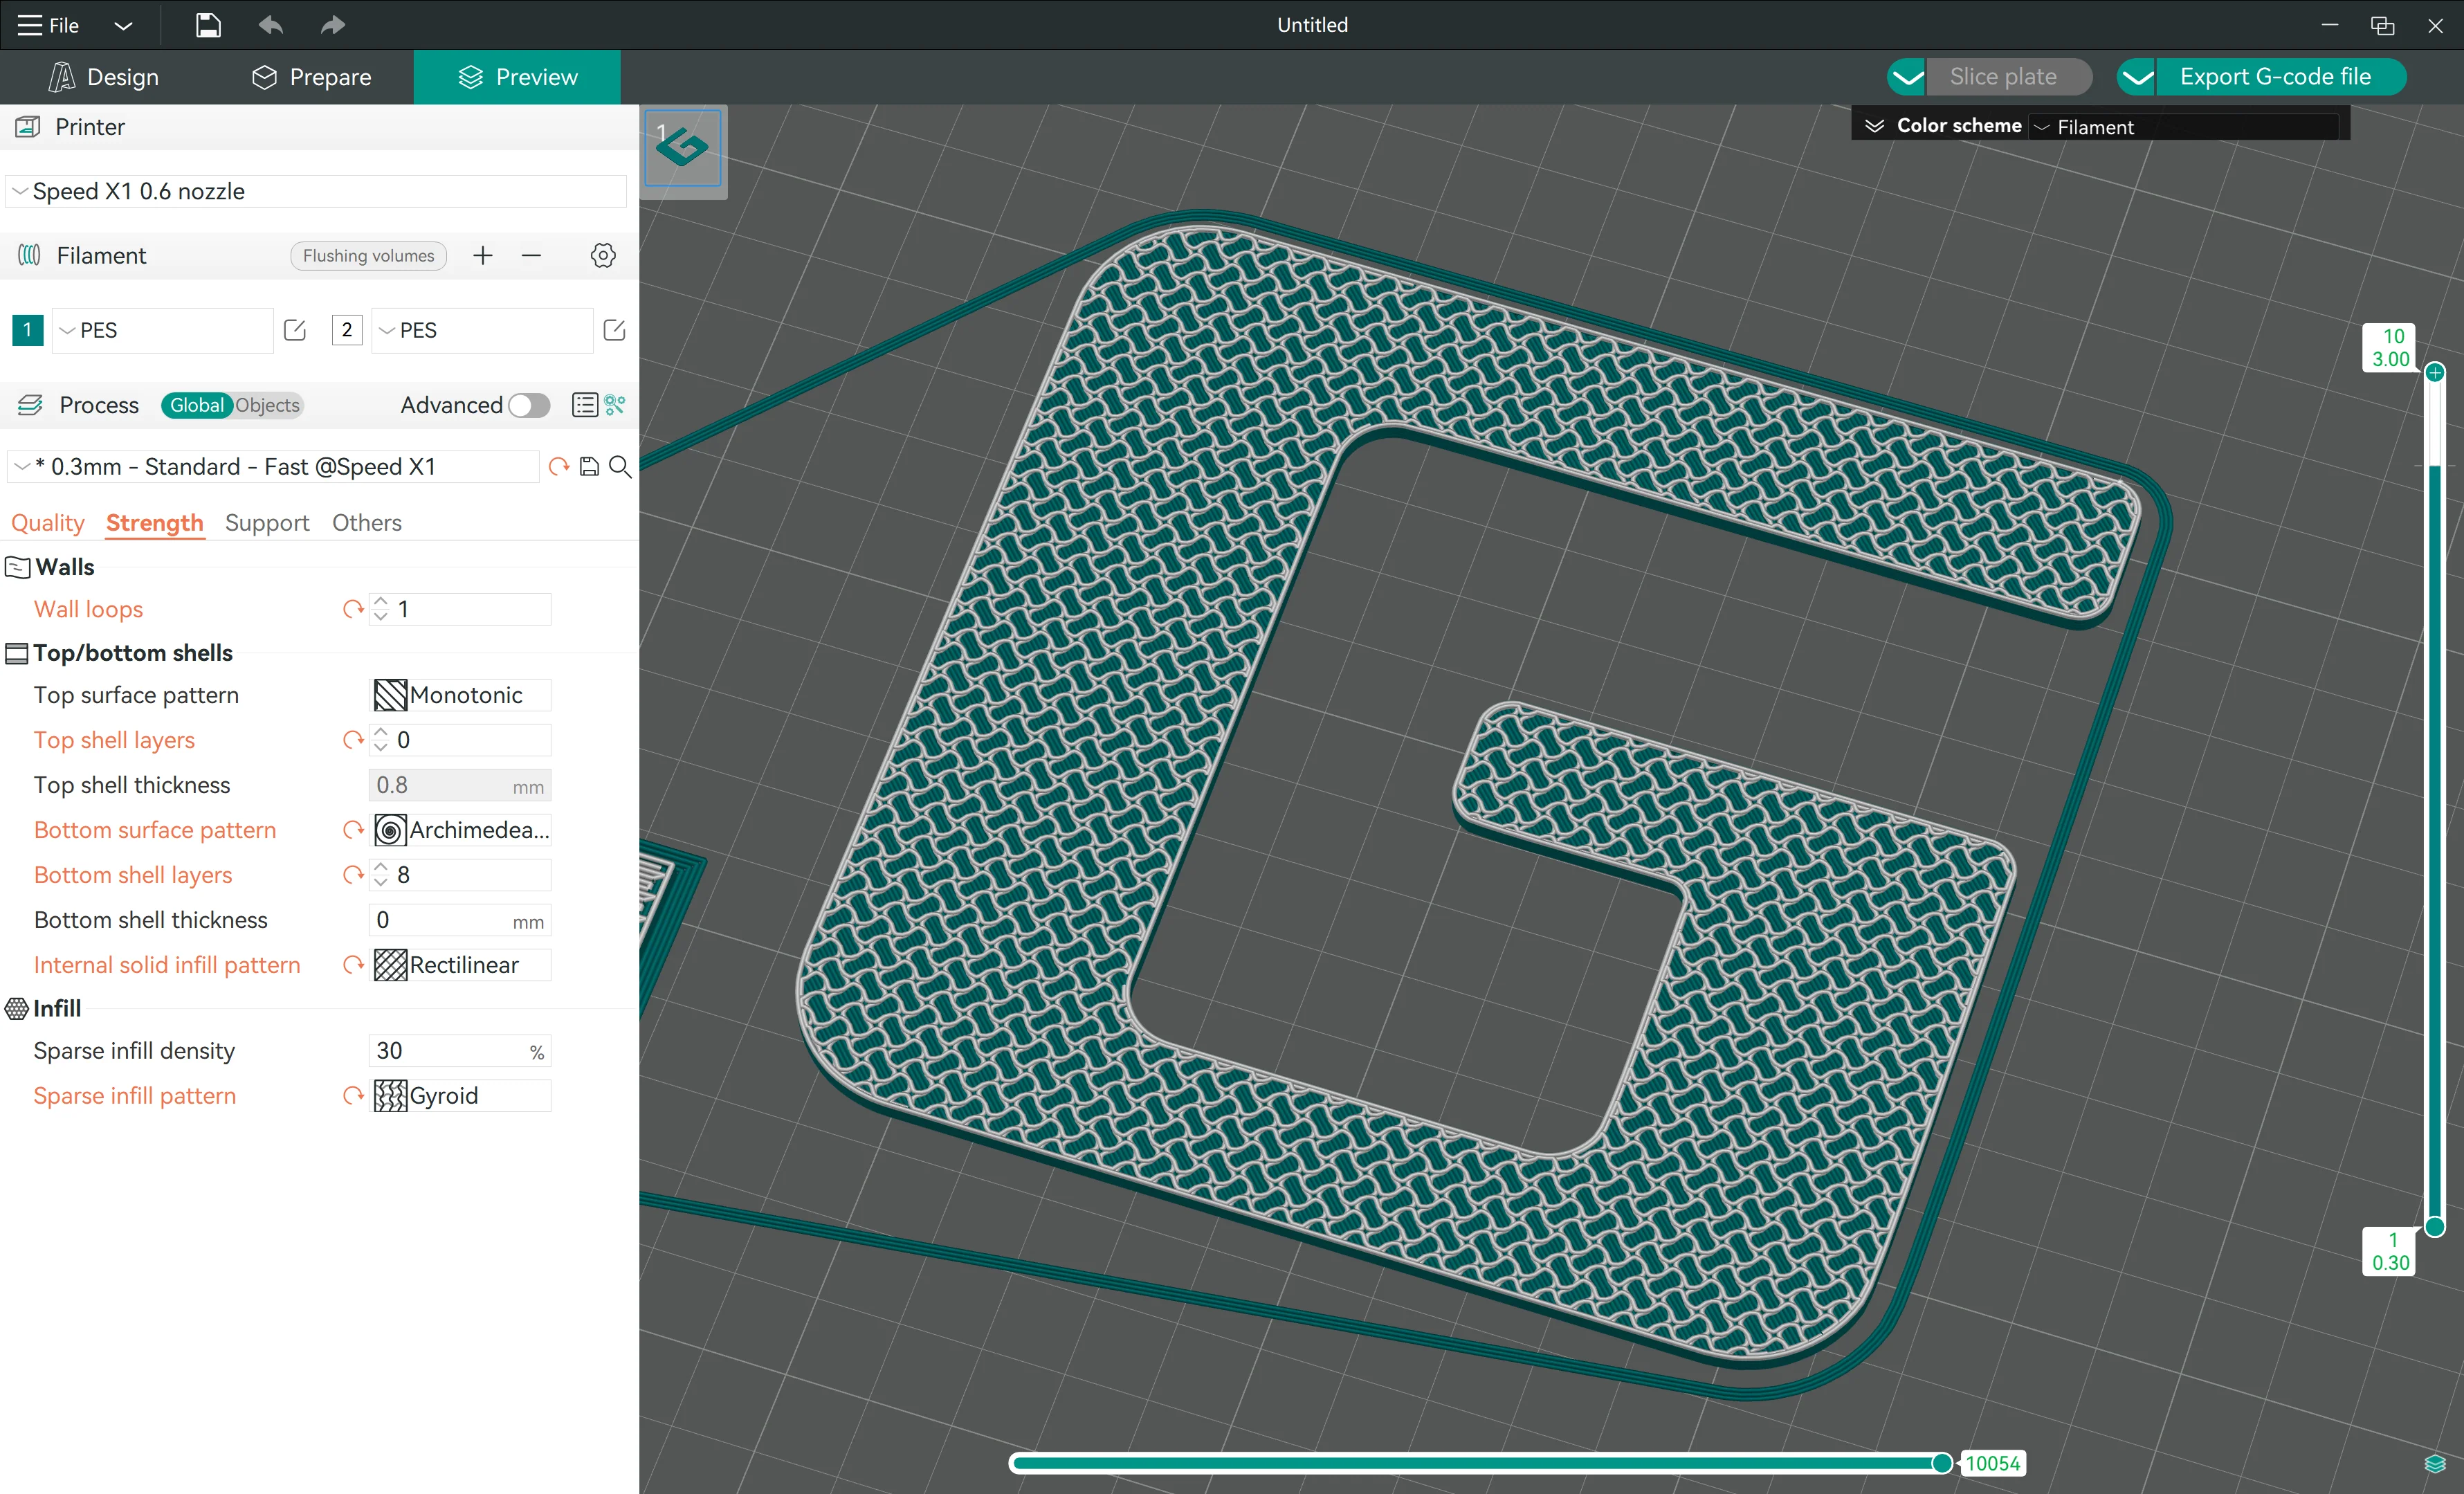 |
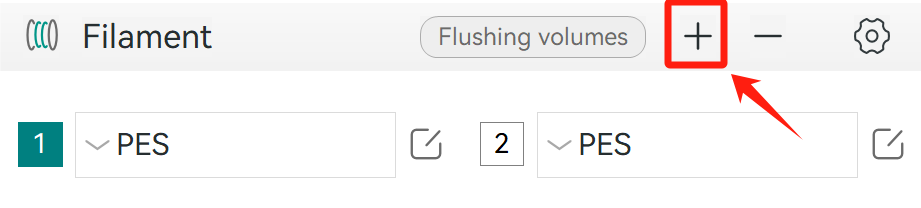
- Click the "+" button to add a filament
- Click "Slice plate" button to preview the G-code file
- Move the layer preview bar to the first infill layer, then right-click your mouse, go to "Change filament" to select the second filament you added just now
- Click "Slice plate" again, move the layer preview bar to the top to preview the whole G-code again
- A dual color texture face is ready for 3D printing