Design with FormLetter is as easy as one, two, three.
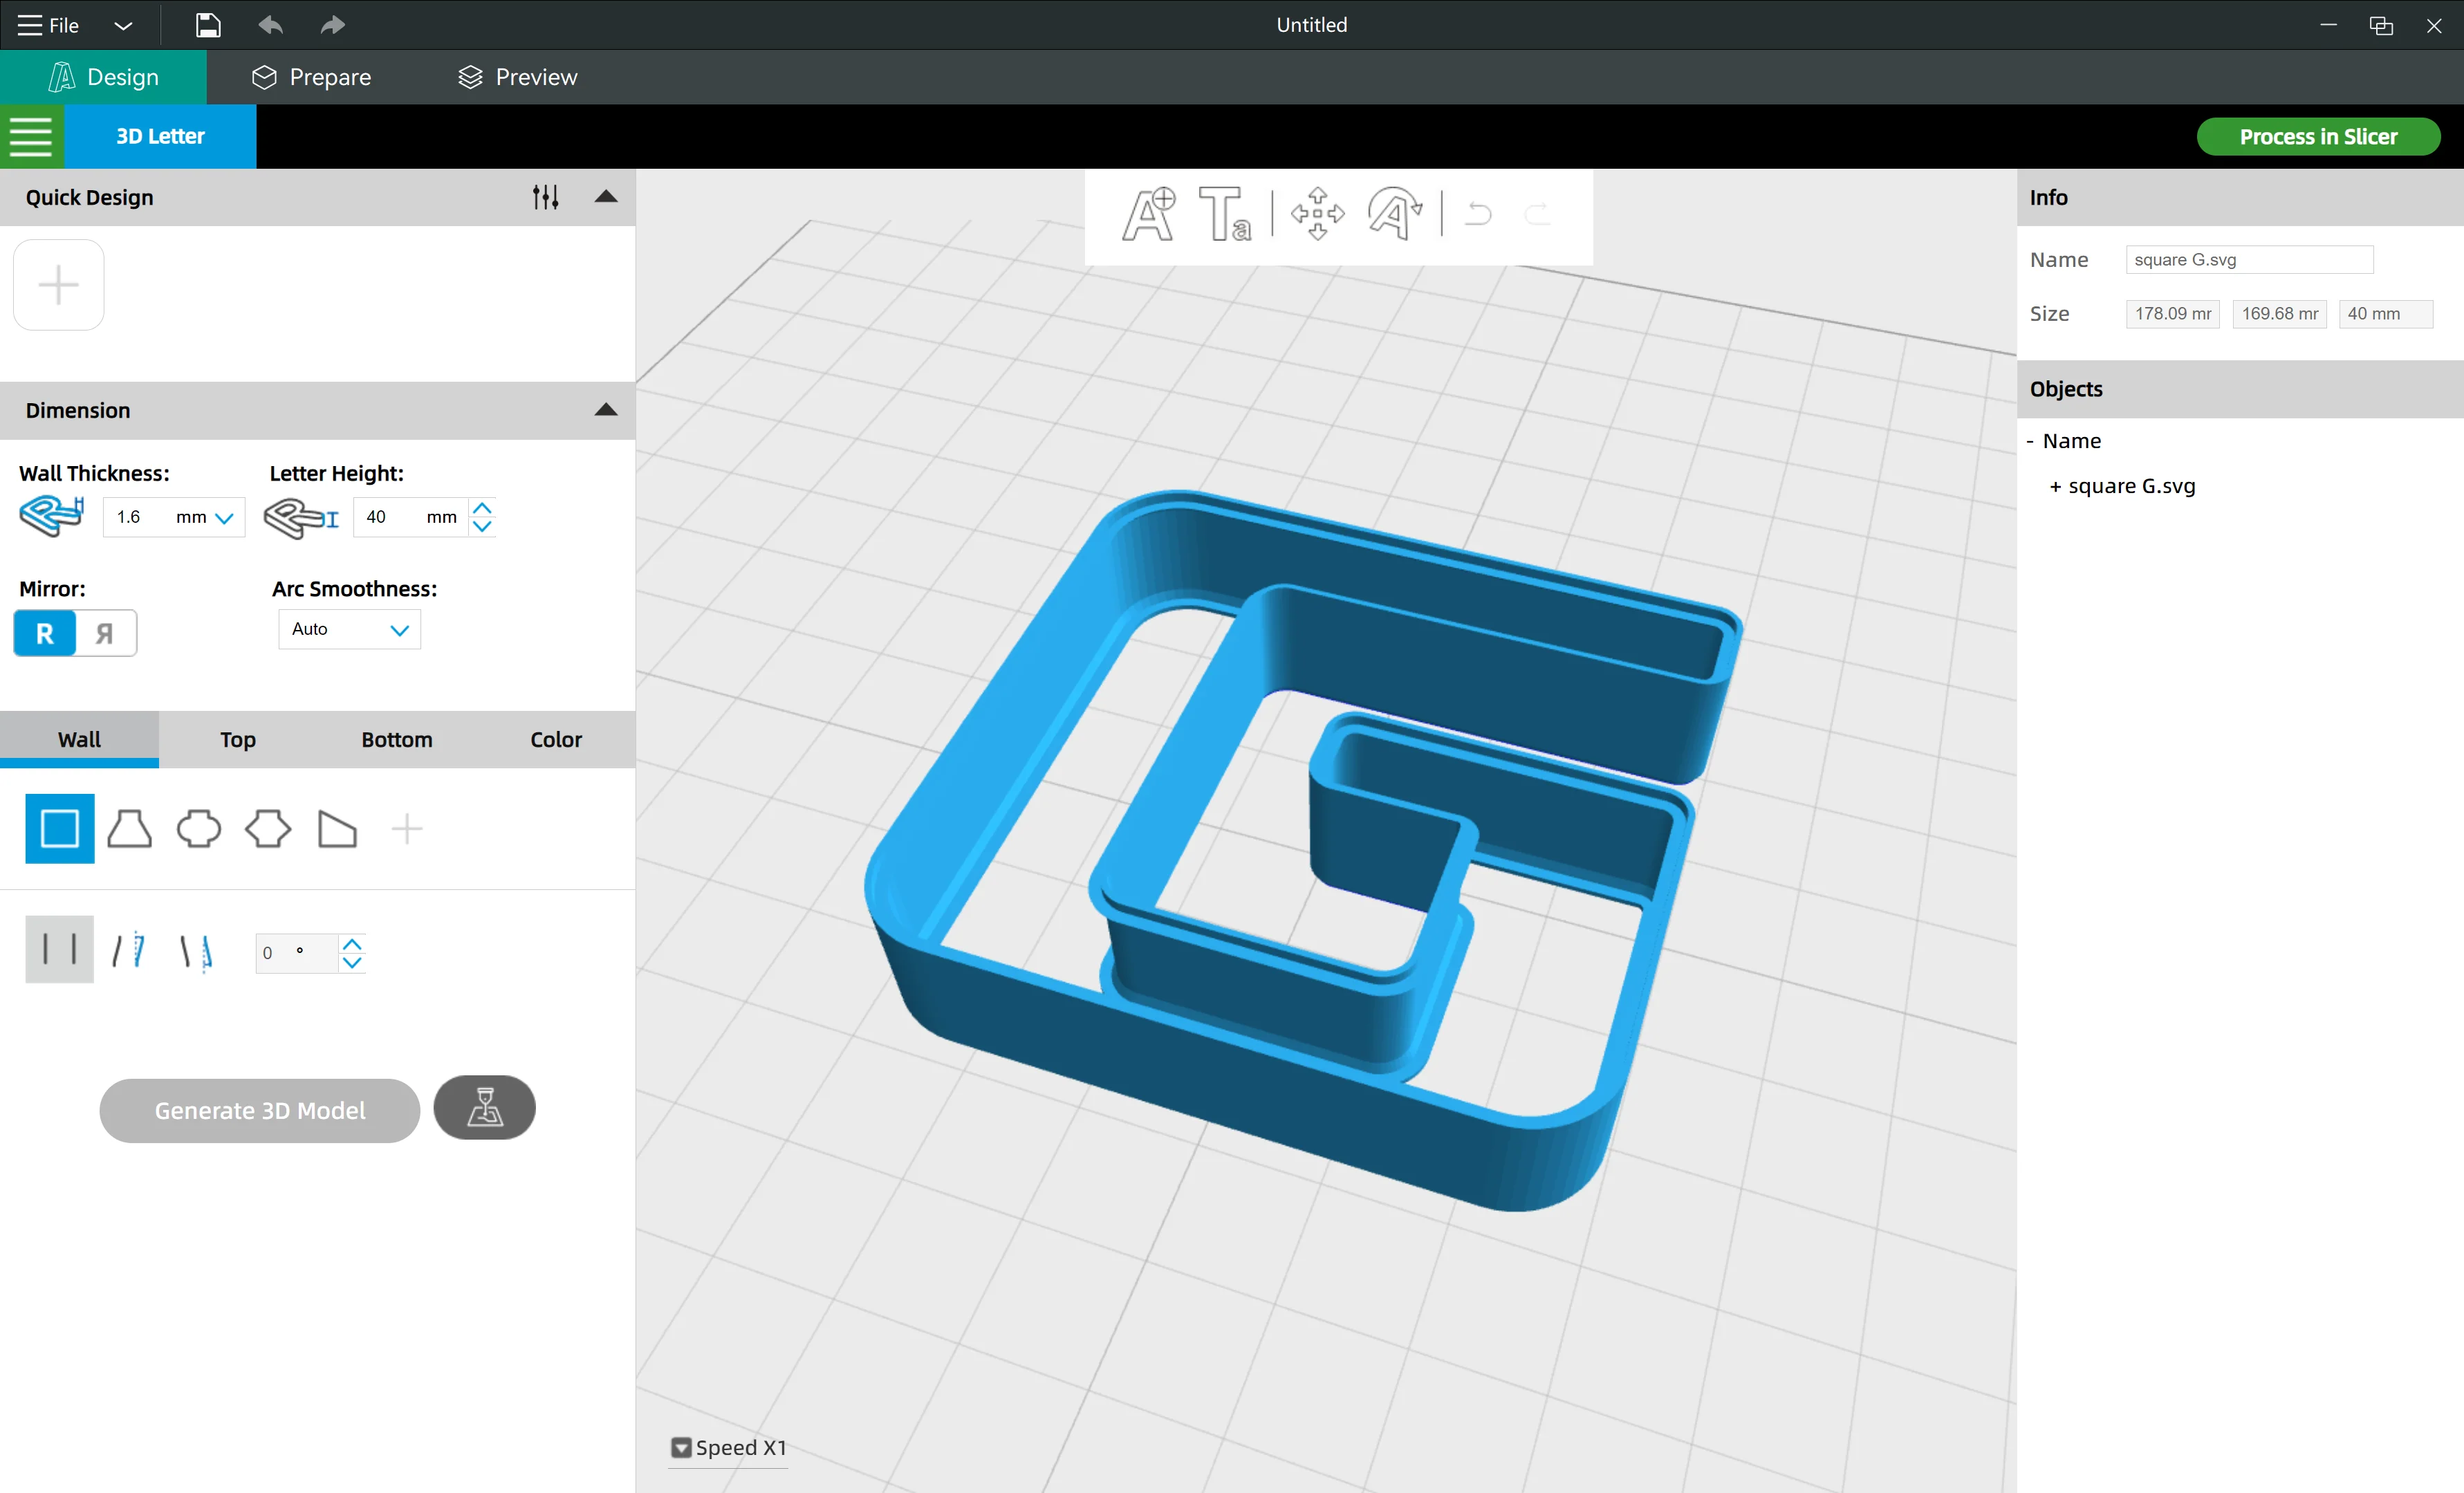
This is the typical workflow of using FormLetter "Design" software.
Step 01 - Clear Design Objective
Make sure you clearly know what kind of channel letter you are making, the shape, light transmission areas, colors, backing and face material, etc.Step 02 - Confirm "Dimension"
Set the "Wall thickness", "Letter Height", and choose to "Mirror" the letter or not.Step 03 - Choose "Wall" Options
Choose the options to define the cross section shape of the channel letter.Step 04 - Choose "Top" Options
Choose from the three options: open top surface, close top surface, or open surface with slot.Step 05 - Choose "Buttom" Options
Choose from the five main button options, you will be able to generate over 10 kinds of bottom shapes.Step 06 - Import the SVG file
Once you select all the design options, please import the SVG file to generate the 3D model.Step 07 - Adjust the design options
If anything you don't satisfy, you can change the design options, then click "Generate 3D Model" button to regenerate again.Step 08 - Export the DXF cutting path
Set a proper tolerance and export the right path.Step 09 - Process in Slicer
Once you finish the design, click the "Process in Slicer" button to slice and print the 3D models.